Vertical Succulent Garden Layout Ideas
A blank exterior wall or fence is wasted square footage, and succulents are the easiest plants there are to hang on one. Pack fifty small succulents into a four-by-six-foot frame and you’ve got a living mosaic that takes up zero ground space — perfect for a skinny patio, a balcony, or a narrow side yard. The catch is that a vertical planting lives or dies on three things: the right planter, fast-draining soil, and a watering setup that doesn’t soak the wall behind it. Get those right and a succulent wall is about the lowest-maintenance vertical garden you can build. Here are the layout ideas and the build steps I’d follow.
As an Amazon Associate, Backyard Superstar earns from qualifying purchases at no extra cost to you.
Why a Succulent Wall Works in a Small Space
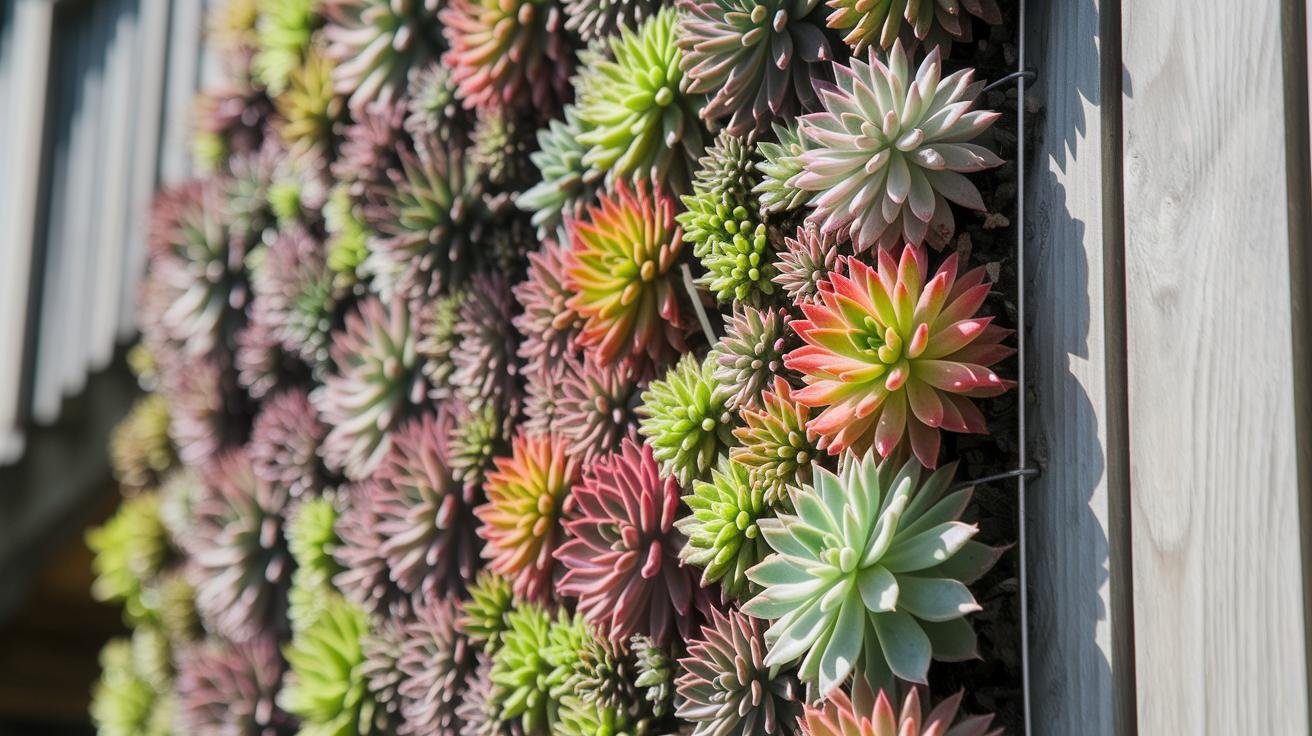
Succulents are built for this. They store water in their leaves, so they tolerate the fast-drying conditions of a vertical pocket far better than thirsty annuals would, and most are happy on a single watering every week or two. They stay compact, they come in shapes and colors that read well from a distance, and they don’t need deep soil to root. That combination is exactly what a wall planting needs: light weight, low water demand, and plants that look good packed tight.
You can run a succulent wall indoors in a bright spot or outdoors on a fence or stucco wall. Outdoors, it pulls double duty as privacy screening and decoration. If you’re weighing this against other vertical options, my rundown of the best materials for vertical garden structures covers how the frame choice plays out over a few seasons of weather.
Layout Ideas: Grids, Staggered Rows, and Patterns
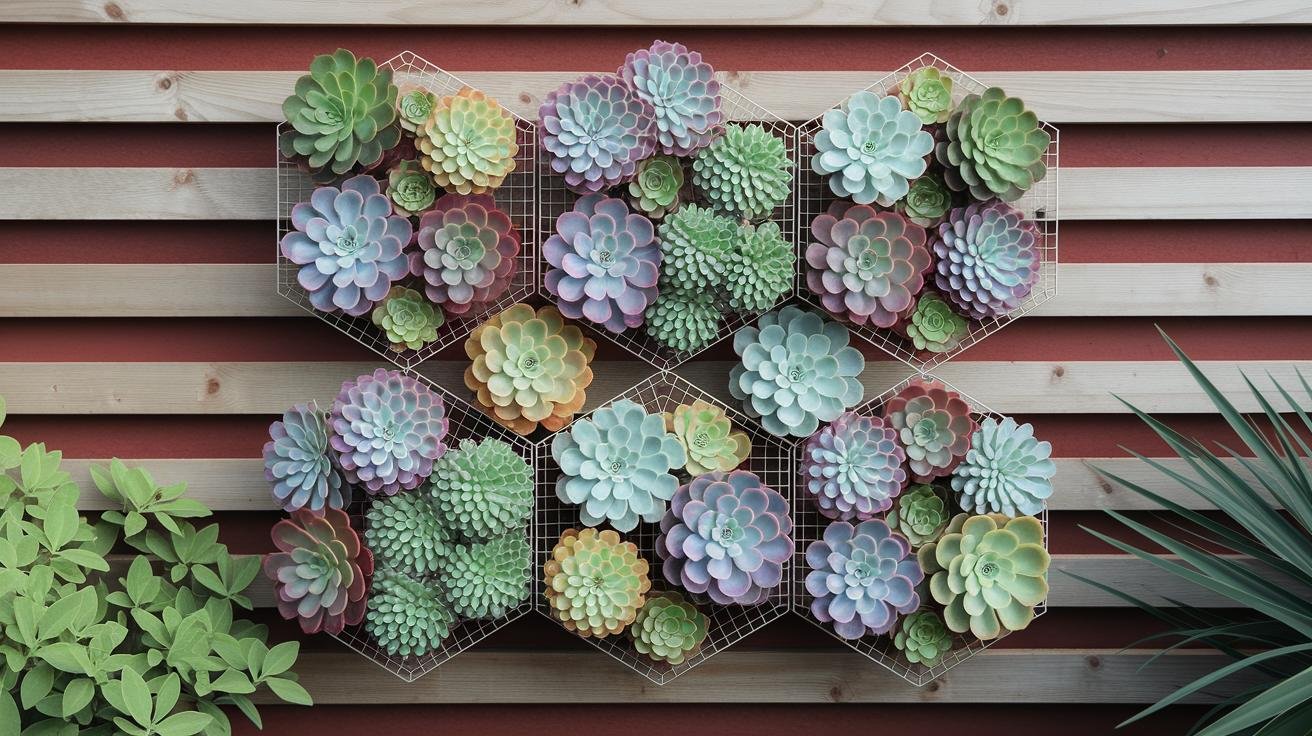
Before you buy anything, decide on a layout — it drives how many plants and pockets you need. The three that hold up best:
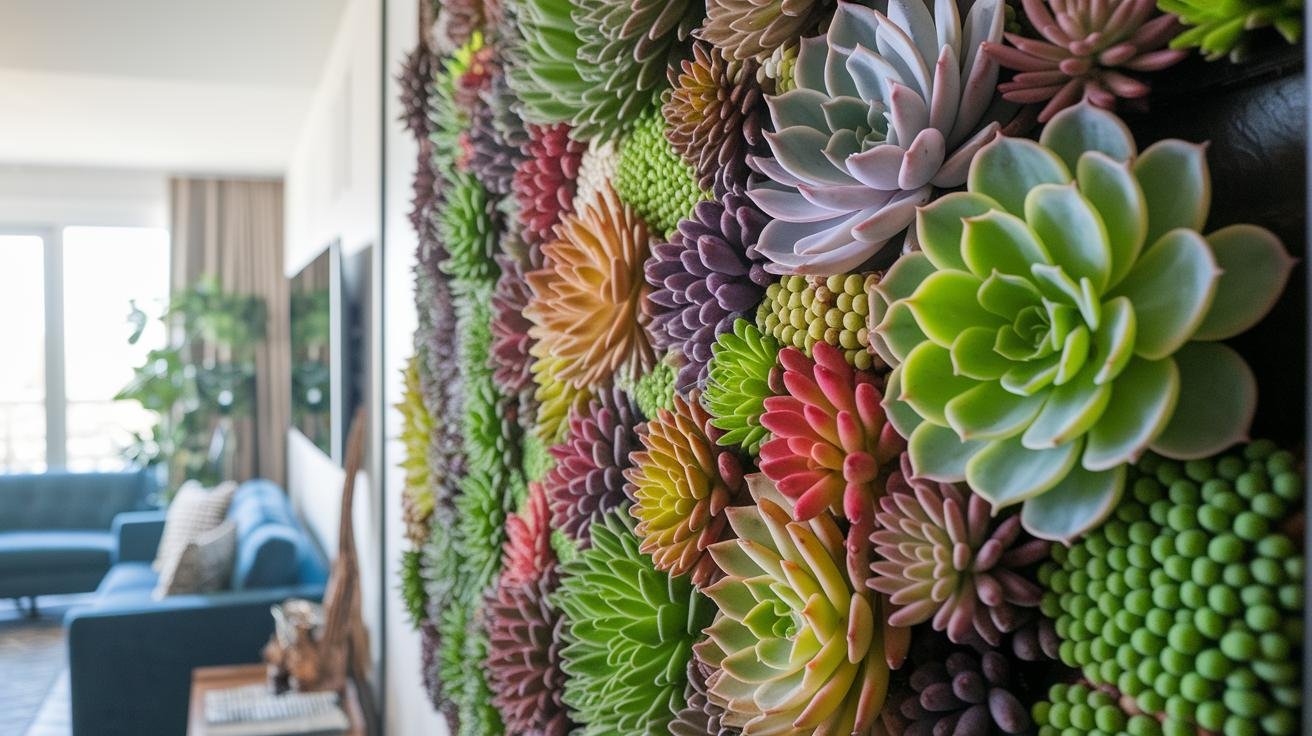
- Even grid. Pockets in neat rows and columns. It’s the simplest to build and the easiest to keep balanced as plants grow. A grid of rosette-shaped echeveria reads like tile.
- Staggered rows. Offset each row by half a pocket, brick-style. It breaks up the rigid look and gives trailing types like string of pearls room to spill over the row below.
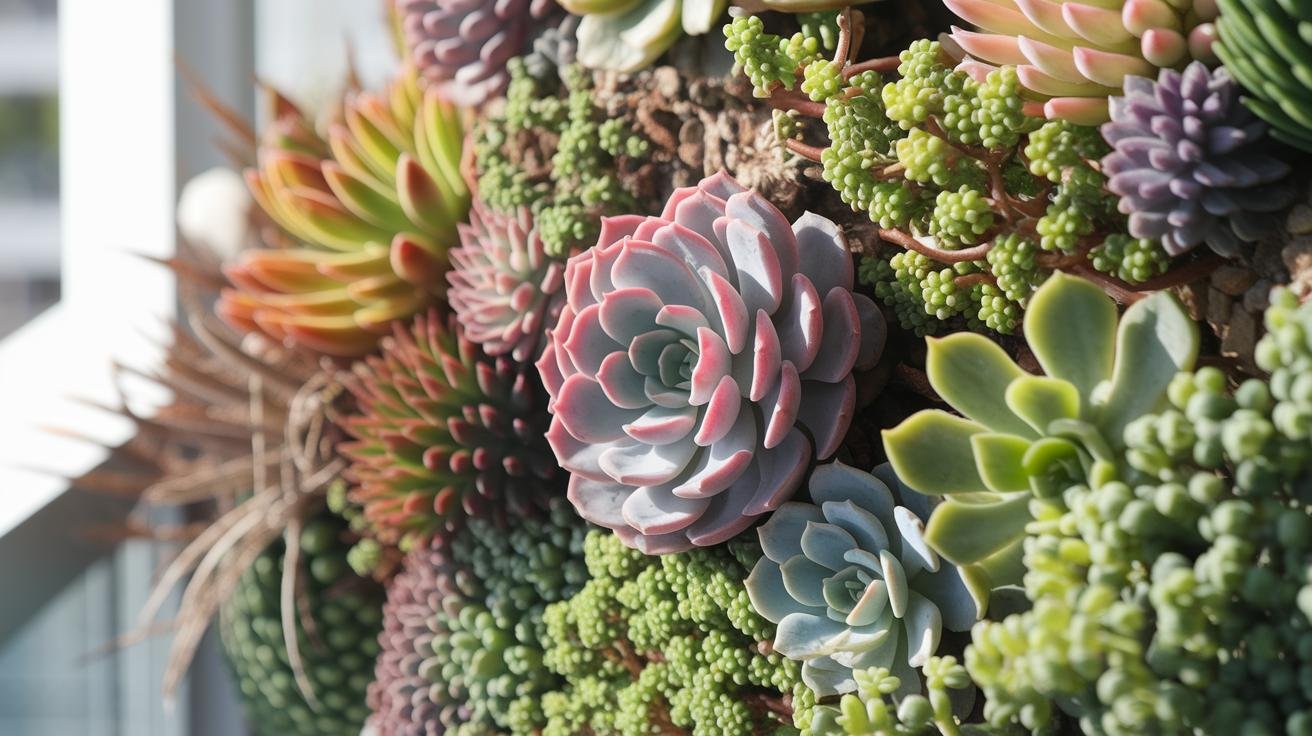
- Geometric blocks. Group plants into hexagons, triangles, or color blocks — soft-pink echeveria against green haworthia against deep-purple sedum. More planning, more payoff.
Color is the other lever. A monochrome wall — every plant in a shade of green or silvery gray — looks calm and modern and lets leaf texture carry the design: spiky haworthia against smooth jade against powdery blue echeveria. If you want contrast instead, pick two or three anchor colors and repeat them across the panel so the eye has a rhythm to follow rather than a random scatter. Either way, settle the color story before you plant, because rearranging soaked pockets later is a muddy, fiddly job.
Two rules keep any of these from going sideways. First, leave a few pockets empty so plants have room to fill in over the season; a wall crammed wall-to-wall on day one looks overgrown by month three. Second, weight the heavier, faster-growing plants toward the bottom so the whole panel doesn’t get top-heavy. If you want more small-space design thinking, the small-space container garden ideas guide applies the same balance principles to pots.
Picking the Planter: Pocket Panels vs. Frames
You’ve got two practical routes. A felt pocket planter is the fastest — a hanging panel of fabric pouches you mount and fill, no building required. A rigid frame (a pallet, a metal grid, or an old shutter backed with liner) is more work but more durable and customizable. For most people, especially a first build, I’d start with a pocket panel.
The HilarityMax 36-Pocket Vertical Planter is a solid first buy — thick breathable felt, 36 six-inch pockets, and it ships with a pair of gloves and a basic planting guide, which takes some guesswork out of it (mid-range, $$). If you’re covering a larger wall and want to tile several panels together to save money, the Ogrmar 36-Pocket Vertical Wall Planter is a budget-friendly version that’s designed to butt up against matching panels for a bigger grid (budget range, $). Both have grommets along the edges for mounting. Whichever you pick, hang it on screws or hooks rated to hold the planter’s full wet weight — soaked soil is a lot heavier than dry.
If you want something more permanent or fully custom, build a rigid frame instead of using a fabric panel. A reclaimed wood pallet is the classic move — staple landscape fabric or pond liner across the back, fill the slat gaps with succulent mix, and plant into the openings once it has settled. A metal grid panel or an old window shutter works the same way and gives the wall real character. The trade-off is weight and effort: a planted pallet is genuinely heavy and needs solid anchoring or a lean against a sturdy wall, so it is a better fit for a second build than a first.
Building the Wall: Backing, Soil, and Mounting
If you’re mounting on wood or a painted surface, protect it first. Staple a layer of pond liner or heavy plastic sheeting between the planter and the wall so moisture doesn’t wick into the structure — this is the step people skip and regret. On stucco or block, you can usually mount straight to the wall with masonry anchors.
Soil is where vertical succulent walls succeed or rot. Regular potting mix holds too much water and stays soggy in a pocket, which is a death sentence for succulents. Use a fast-draining cactus-and-succulent blend instead — Hoffman Organic Cactus and Succulent Soil Mix is a cheap, widely available option that drains quickly and comes ready to use (budget range, $). Fill each pocket about three-quarters full, set the plant, then top off and tamp gently. A thin layer of coarse sand or fine gravel on top slows evaporation and keeps soil from washing out when you water.
Choosing and Arranging the Succulents
Stick with tough, drought-tolerant types and you’ll do almost no babysitting. The reliable backbone of a wall is rosette succulents — echeveria and haworthia — paired with trailing varieties like string of pearls and sedum that drape over the pockets below. Crassula, jade, and a small aloe add height and contrast.
The simplest way to fill a panel is an assortment. A multipack like Altman Plants Assorted Live Succulents (20-pack) gives you a spread of rosettes and trailers already rooted in succulent mix and sized right for two-inch pockets, so you can lay out a whole grid from one order (mid-range, $$). Arrange before you plant: set the pots in their pockets, step back, and shuffle until the colors and shapes are balanced — taller and trailing toward the top and edges, tidy rosettes filling the field. For more container plant options if you want to mix in non-succulents elsewhere on the patio, see the best plants for patio containers.
Watering Without the Mess
Hand-watering a vertical wall is a chore and tends to wet the wall and the floor below. The top pockets also dry out faster than the bottom ones, so even watering by hand is genuinely tricky. For anything bigger than a single small panel, a drip line solves both problems. A kit like the Flantor Drip Irrigation Kit gives you the quarter-inch tubing and adjustable emitters to run one slow drip into each pocket, so every plant gets the same amount and the runoff is minimal (budget range, $). Run the main line across the top, drop a feeder into each column, and set emitters to a single steady drip rather than a spray. Pair it with a hose timer and the wall basically waters itself. Whether you drip or hand-water, the rule for succulents is the same: water thoroughly, then let the pockets dry out before the next round.
Step-by-Step Install
- Mount the backing and planter. Level the panel, then anchor it with hardware rated for the soaked weight. Use a 4-foot level across the top rail and shim any low corner.
- Run the drip line (optional but worth it). Lay the main tube across the top, drop feeders down each column, and set one emitter per pocket. Open the valve and adjust each to a single drip — not a spray, not a puddle.
- Fill with succulent mix. Three-quarters full per pocket, fast-draining blend only.
- Plant from the top down. Set rosettes in the field, trailers along edges and the bottom row, taller plants up top. Firm each in and top with coarse sand.
- Water and check for leaks. Run the first watering, then run a finger along the backing seams. If water beads through or the backing peels, seal the gap with outdoor-grade sealant.
- Re-check the next day. Tighten any hanger that has sagged more than about an eighth of an inch per foot once the soil is wet and heavy.
Keeping It Alive: Light and Pests
Most succulents want four to six hours of bright, indirect light a day. Outdoors, morning sun with afternoon shade is ideal — full blazing afternoon sun can scorch tender leaves on a heat-radiating wall. Rotate the panel a quarter-turn every month or so if one side leans toward the light. Indoors, set it near the brightest window you’ve got, or add a grow light.
Pests are rare on a well-drained wall, but watch for mealybugs (little white cottony spots in leaf joints) and thrips. Dab mealybugs with a cotton swab dipped in rubbing alcohol, or treat with neem oil, and pull any badly damaged leaves. A pinch of cinnamon on the soil surface helps discourage fungus on freshly trimmed plants. For a full organic playbook, my natural pest control guide covers the same pests on container plantings. Each spring, refresh tired soil, trim anything leggy or sunburned, and reset any emitters that have clogged. That’s about the whole maintenance list — which is why a succulent wall is the vertical garden I recommend to people who say they kill everything.
One seasonal caution: most of the popular wall succulents are not frost-hardy. If winter lows in your area dip below about 30°F and the wall is portable, move it indoors to a bright window or a sheltered porch before the first hard freeze. If it is permanently mounted outdoors in a cold zone, treat it as a warm-season display and replant in spring, or build it around cold-tolerant sempervivum (hens-and-chicks), which shrug off frost and come back on their own.
Recommended gear for a succulent wall
As an Amazon Associate, Backyard Superstar earns from qualifying purchases at no extra cost to you.
- Top planter — HilarityMax 36-Pocket Vertical Planter ($$). Thick breathable felt, 36 six-inch pockets, ships with gloves and a planting guide.
- Budget planter — Ogrmar 36-Pocket Vertical Wall Planter ($). Tiles against matching panels to cover a bigger wall cheaply.
- Soil — Hoffman Organic Cactus and Succulent Soil Mix ($). Fast-draining, ready to use — keeps pockets from staying soggy.
- Plants — Altman Plants Assorted Live Succulents (20-pack) ($$). Rooted rosettes and trailers sized right for two-inch pockets.
- Watering — Flantor Drip Irrigation Kit ($). 1/4-inch tubing and adjustable emitters for one even drip per pocket.
FAQ
How many succulents fit in a vertical garden?
A four-by-six-foot frame holds roughly fifty small succulents. A standard 36-pocket panel holds 36 to 72 plants depending on whether you put one or two in each pocket. Leave a few pockets open for growth.
What soil should I use in a vertical succulent wall?
Use a fast-draining cactus-and-succulent mix, not regular potting soil. Regular mix holds too much water in a pocket and causes root rot. Topping each pocket with coarse sand helps it drain and stay put.
Which succulents work best in vertical gardens?
Echeveria, haworthia, and crassula make a sturdy rosette backbone; string of pearls and sedum trail nicely over lower pockets. Group by size and color and stick to drought-tolerant types you water every week or two.
How do I water a vertical succulent garden evenly?
Top pockets dry faster than bottom ones, so a drip line with one emitter per pocket is the easiest way to keep watering even. Set each emitter to a single slow drip, water thoroughly, then let the pockets dry before watering again.
How much light does a succulent wall need?
Aim for four to six hours of bright, indirect light daily. Outdoors, morning sun with afternoon shade prevents scorch; indoors, use the brightest window or a grow light, and rotate the panel monthly for even growth.
Can I build a vertical succulent garden indoors?
Yes. Mount a waterproof backing behind the panel to protect the wall, use a drip tray or hand-water carefully to catch runoff, and place it in your brightest spot or under a grow light.