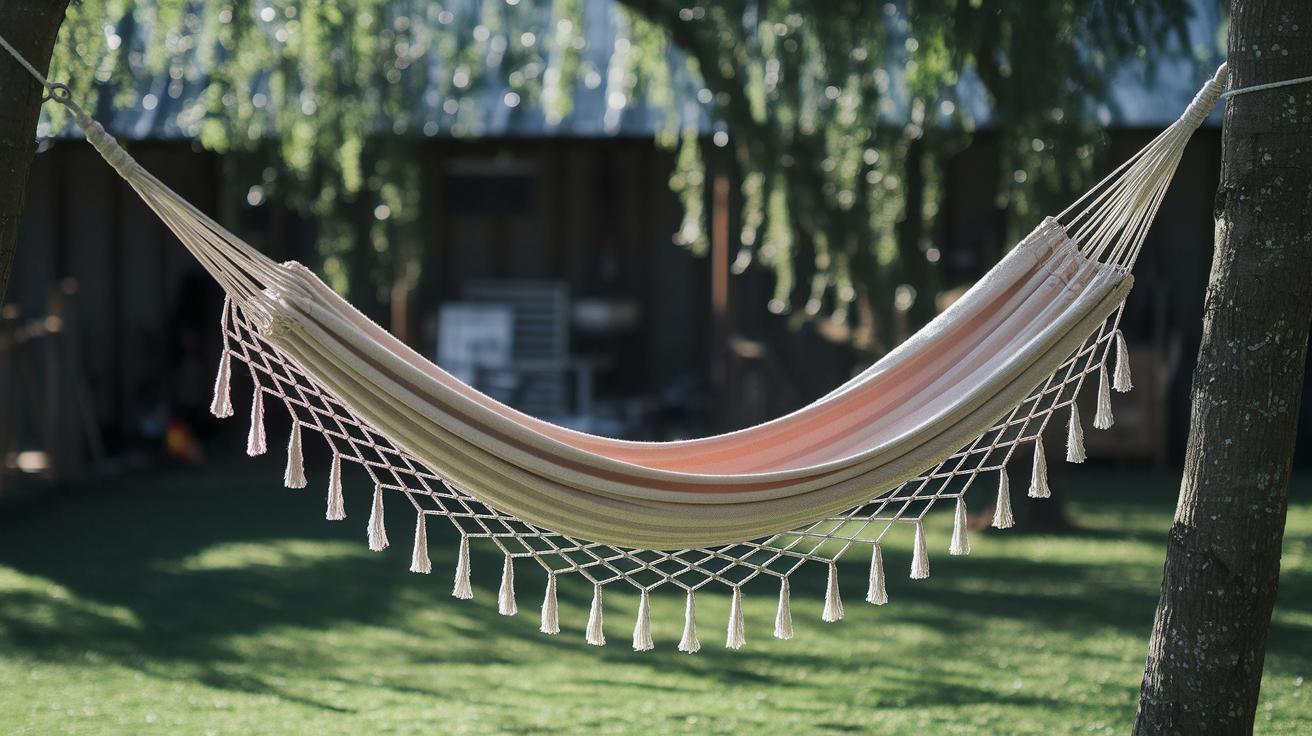
Garden Hammock Cleaning and Maintenance Guide: Awesome
Ever flop into your garden hammock and feel twigs poking your back? It’s like settling into a bird’s nest, only scratchy and stiff. I’ve been there, right?
A sparkling clean hammock feels like a cloud hug and lasts way longer. You’ll skip those crunches and stay comfy all afternoon. Plus, a sturdy hammock means less worry about tears.
In this quick guide, you’ll learn simple steps to freshen up your sling. We start by brushing off leaves and dust. Then you’ll hand-wash the fabric (the cloth part) in cool, soapy water. Next you scrub the ropes (the twisty cord) with a soft brush and a gentle, natural cleaner (safe soap mix).
By the way, my cat thinks our hammock is her personal sun spot, so I usually shoo her away first. Okay, back to getting your backyard nest ready for lazy shade naps.
Essential Steps to Clean and Maintain Your Garden Hammock
First, grab a soft brush or a handheld vacuum to whisk away leaves, dust, and loose dirt. Keeping fibers and ropes free of grit stops wear and tear and makes the deeper cleaning way more effective.
Next, separate the fabric part from the rope sections. You’ll hand wash the fabric in lukewarm water with a mild detergent to keep colors bright and fibers strong. And for the rope (the twisted cords that hold you up), a good soak and gentle scrub loosens hidden grime.
Here’s a quick rundown of the steps:
- Brush or vacuum off debris
- Pre-soak or hand wash fabric
- Soak and scrub rope sections
- Treat stains with a baking soda (white cleaning powder) paste
- Soak in vinegar (a natural cleaner) to tackle mildew (a type of fungus)
- Rinse, air dry in shade, then store properly
Rinse until the water runs crystal clear, that way no soap residue sticks around to attract fresh dirt. Let your hammock hang in a shaded, breezy spot until it’s completely dry to prevent mold. Once it feels bone-dry, tuck it into a breathable bag and stash it in a cool, dry place.
Stick to this routine, and your hammock will stay fresh, safe, and ready for lazy afternoons all season long.
Pre-Cleaning Inspection and Debris Removal for Your Hammock

First, lower your hammock so it’s easy to reach. Take a close look at the carabiners (metal clips), straps, and tree hooks. Run your finger along each metal ring to feel for rough spots that might give way under weight. And don’t forget to jiggle every knot and loop, if something slips or feels loose, it’s knot-tying time before you kick back.
Next, get rid of leaves and loose dirt. Grab a soft brush or use a vacuum cleaner (machine that sucks up dirt) with a brush attachment so you don’t snag any fibers or ropes. Gently whisk away twigs, leaf bits, and grit hiding in the cords. As you brush, peek under each cord for frayed ropes or torn fabric edges. This little bit of care now means fewer headaches when it’s time for a full wash, and your hammock will last all season.
Fabric Hammock Washing and Stain Treatment Techniques
Let’s start with a gentle hand wash. Fill a tub or basin with warm water (under 104°F, so it feels like a cozy bath) and stir in a mild eco-friendly detergent (soap that’s gentle on the planet). Soak the fabric for 5–10 minutes, then knead it softly, think of it like pressing a sponge to lift away dirt. Have you ever noticed how the water darkens as the grime slips free?
If machine laundering is okay for your hammock, tuck it inside a mesh laundry bag (a see-through pouch that keeps fabric safe) and choose the gentle cycle setting, which moves clothes slowly and softly. Use cold water and skip the spin, this helps prevent snags and stretching. And please, no bleach or fabric softeners; they can break down the fibers over time.
Next up: rinsing. Drain the soapy water and refill the tub until the water runs clear. You might need to repeat this a couple of times. Then hang your hammock in the shade, avoid direct sun to keep colors bright, shake out extra water, and let it air-dry. No twisting or wringing, okay? Just a gentle shake.
Stubborn stains? We’ve got a trick. Mix two parts baking soda (that fizzy white pantry powder) with one part water to form a paste. Gently work it into the spots, like spreading frosting on a cake, and let it sit for 15–20 minutes. Then scrub lightly with a soft brush or cloth and rinse until there’s no residue left. Clean hammock, happy you!
Rope Hammock Cleaning: Soak, Scrub, and Rinse

First, drape your rope hammock into a big tub or bucket filled with warm water and a little mild detergent. Stir until the bubbles float to the top, then press the ropes (thin threads) under the surface. Let it soak for about 30 minutes so grime loosens.
Next, grab a soft-bristle brush and work along each rope strand in small, gentle strokes. Start at one end and scrub near the knots and suspension points where dirt loves to hide. But go easy, vigorous scrubbing can fray the fibers and wear them out.
Once you’ve scrubbed every inch, rinse the hammock with a garden hose or pour clean water from a bucket until all the soap suds vanish. Give it a good shake to get rid of extra water while it’s still low enough to reach.
A clean hammock means a comfy afternoon later.
While it drips dry, check every knot by tugging gently and watching for slips or weak spots. If you spot any frays, swap in new cord (strong rope) following the manufacturer’s replacement guidelines. Once it’s bone dry, hang the hammock back up, and you’re all set for a lazy swing in the sun!
Tackling Stains and Mildew on Garden Hammocks
Spots and mildew can sneak onto your hammock faster than you’d think. Just last week, mine had greenish blotches after a rainy afternoon. Oops.
First, grab baking soda (that fizzy, white powder you keep in the pantry). Mix two spoonfuls of baking soda with one spoonful of water to make a paste.
Spread the paste onto each stain. Let it sit for about 15-20 minutes. Then gently scrub with a soft brush until the mark fades. Rinse well and watch your fabric perk up.
Next, try a vinegar soak. Combine one part white vinegar with three parts water in a bucket. Lay your hammock fabric in the mix so mildew patches soak for around 30 minutes.
You’ll notice a tangy smell, but that’s just the mildew letting go, right? Rinse everything thoroughly so you’re not stuck with a salad-dressing scent.
By the way, my cat loves to nap on the hammock once it’s dry. But before you curl up, give it a quick sprinkle of mildew-resistant spray. I reapply every few months and it keeps the fabric feeling fresh and clean longer.
Post-Drying Protective Treatments

Once your hammock is fully dry, it’s time to give it extra armor against rain and sun.
-
Spritz on a water-repellent spray
Hold the can about 8 inches from the fabric. Mist the front and back until you see a soft shimmer. Oops, don’t overdo it. Let it rest for 24 hours so the coating bonds with every fiber. -
Add a UV-blocking fabric protectant
Test on a hidden spot first. From 6 to 8 inches away, mist every strand evenly. Wait at least two hours in the shade before you fold or store. By the way, this really helps keep colors bright and ropes strong.
Now rain beads and rolls right off. And the sun won’t fade or weaken your hammock any time soon.
Seasonal Storage Solutions for Your Garden Hammock
Before you pack it up for the season, make sure it’s bone-dry. Damp ropes will surprise you with mold later. Oops, I once left mine damp by mistake. Big mold patch to clean up.
Give your hammock a good shake to knock off dust or leaves. Then fold or roll it loosely so air can still move between the layers. It’s like giving your hammock room to breathe.
Slide it into a breathable storage bag (a bag that lets air out but keeps bugs away). By the way, my cat tried to sneak in there once, so keep it zipped tight.
Tuck it on a sturdy shelf or in a closet in a cool, dry spot. The fibers will thank you. Avoid an attic or garage where it can bake in summer heat or freeze in winter cold.
When winter winds or heavy storms roll in, unhook your hammock and lift it off the ground. Pests love damp, forgotten fabric, so hanging it by its straps or placing it up high keeps critters out.
Storing indoors shields your hammock from rain, snow, and harsh UV rays. If you leave it outside, you risk mildew, color fading, and mouse teeth marks.
Do this, and your hammock will be fresh and ready for backyard lounging when warm days return.
Regular Maintenance and Troubleshooting for Garden Hammocks

Every month, sneak outside and show your hammock some love. Before you flop down, give the soft fabric and cords (the ropes that hold your hammock) a once-over. Then circle your calendar for a deeper check every two months, right before summer’s heat kicks in and again when fall breezes arrive.
That way you’ll spot wear early and avoid bigger repairs. And hey, if you’re unsure how much weight yours can take, visit garden hammock weight capacity explained before anyone hops in. By the way, my cat thinks it’s her personal sunbathing spot, just saying.
When you inspect, run your fingers along each cord strand. Feel for fuzz or thin spots – those signals mean it’s time to act. Peek at the carabiners (the metal hooks) and straps (the bands that wrap around trees or stands). Give the knots where the straps meet the hammock a gentle tug. Spot a tiny rip? A patch kit (a mini sewing set or iron-on patch) can save the day before it grows.
Quick fixes keep you swinging longer without breaking a sweat:
- Untie loose knots and tie them again or use a double knot
- Snip stray fibers with scissors so they don’t catch
- Cover small holes with a patch kit or outdoor-grade tape
- Spray silicone lubricant on carabiners and straps to keep them slick
- Swap out worn ropes or straps by following the maker’s guide
- Wipe metal parts with a damp cloth to clear off grit before you lube
A few minutes of care now means fewer surprises later. No more mid-swing snaps or sudden sagging. Keep a small toolkit nearby with scissors and patches. Soon, checking and fixing your hammock will feel as easy as slipping into Sunday pajamas.
Quick Reference: Tools & Cleaners
Ready to make your tools sparkle? Here’s what I reach for:
- Soft-bristle brush (brush with gentle bristles): Scrapes off clumps of damp soil and tiny rocks.
- Non-scratch sponge (gentle scrubbing pad): Wipes away stubborn spots without leaving scratches.
- Microfiber cloth (ultra-soft drying cloth): Buffs everything dry and streak-free.
- Garden hose or sturdy bucket (for rinsing): Rinses away suds and leftover grit in one go.
- Mild, biodegradable detergent (plant-based soap): Cuts grease and grime but’s kind to earthworms.
- Baking soda paste (2 parts baking soda mixed with 1 part water): Treats tough stains, let it bubble for a minute then wipe.
- White vinegar solution (1 part vinegar to 3 parts water): Zaps mildew right off.
By the way, I once forgot my brush in the sun. Oops. A quick soak brought it back to life.
Planting season’s more fun with clean gear, right?
Professional Cleaning Options and Warranty Considerations

But first, take a peek at the washing guidelines on your hammock’s tag (those care notes stitched into the fabric). Some makers say it’s okay for a gentle cycle, while others want you to hand wash only. If you ignore those instructions, you might void your warranty (the promise to cover future fabric tears or loose hardware).
I like to keep a little cleaning log. I jot down the date, detergent brand, and water temp for each wash. Oops, I once spilled a drop of soap and forgot the water temp note. Clear records can be a life saver if you have to file a claim.
When a stubborn stain or pet odor just won’t quit, think about hiring a pro who knows outdoor textiles (fabrics like hammocks). These folks use low-noise machines and plant-based cleaners that lift grime without roughing up fibers. Have you ever smelled fresh cedar cleaner in a sunny workshop? It’s pretty nice.
Be sure to ask for a simple invoice or service report showing each step of the cleaning process. That way, if your hammock’s warranty calls for regular professional care, you’ll have proof right when you need it.
A detailed receipt keeps your warranty intact.
Final Words
In the action, you’ve removed dirt, hand washed fabrics, soaked and scrubbed rope sections and tackled stains with baking soda paste and vinegar soaks. You’ve seen how proper rinsing, shade drying, UV protection and off-season storage help your hammock last.
Simple maintenance like knot checks, eco-friendly tools and occasional pro services also keep things smooth. This garden hammock cleaning and maintenance guide sets you up for countless lazy afternoons stretched between trees. Enjoy every moment swinging under open skies.
FAQ
How do I remove loose dirt or debris from my garden hammock before cleaning?
Removing loose dirt or debris starts with inspecting hanging hardware (like carabiners and straps) for wear. Then brush or vacuum leaves, twigs, and dust off fibers before cleaning.
What’s the best way to hand wash a fabric hammock?
Hand washing a fabric hammock with lukewarm water and mild, eco-friendly detergent prevents damage. Submerge evenly, gently agitate, then rinse thoroughly to remove soap.
How should I deep clean a rope hammock?
Deep cleaning a rope hammock involves soaking it in a mild detergent solution for 30 minutes. Then use a soft-bristle brush to scrub grime from each strand, rinse until the water runs clear.
How do I remove stains from my garden hammock?
Removing stains from a garden hammock works best with a baking soda paste of two parts baking soda to one part water. Let sit 15–20 minutes, then scrub lightly and rinse.
What’s the right way to treat mildew on my hammock?
Treating mildew on a hammock uses a one-to-three ratio of white vinegar to water soak for 30 minutes. Rinse thoroughly afterward and let dry fully in shade.
How should I rinse, dry, and protect my hammock from sun damage?
Rinsing a hammock thoroughly removes soap residue that attracts dirt. Hang it in a shaded, well-ventilated spot until completely dry, then apply a UV-blocking fabric protectant per product instructions.
What’s the best way to store my hammock during the off-season?
Storing a hammock off-season requires it to be fully dry, then placed in a breathable bag to allow airflow. Keep it in a cool, dry indoor area away from pests, rain, and snow.
How often should I inspect and maintain my garden hammock?
Inspecting and maintaining a garden hammock before each use includes checking for frayed ropes or fabric tears, tightening knots, trimming fringes, and lubricating metal hardware with silicone spray to keep it safe.
Which tools and eco-friendly cleaners do I need for hammock care?
Essential tools for hammock care include a soft-bristle brush, sponge, microfiber cloth, and garden hose. Eco-friendly cleaners like mild detergent, baking soda paste, and white vinegar solution handle most dirt and stains.
When should I seek professional cleaning or warranty advice for my hammock?
Seeking professional cleaning for a hammock is wise when stains or odors persist. Also review manufacturer wash guidelines first to avoid voiding any warranty and document care steps as proof.


