Lawn Jenga Safety Tips for Your Backyard Game
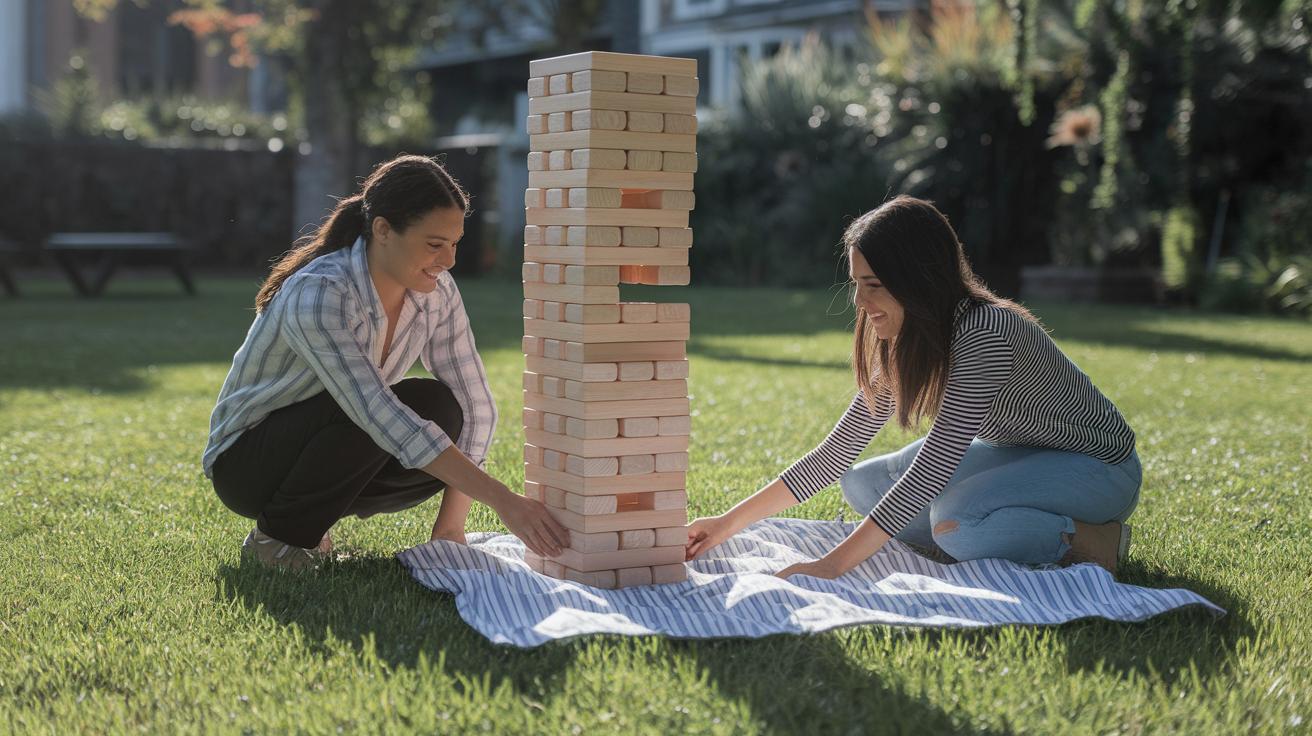
A lawn Jenga tower can reach four feet tall and send heavy wooden blocks flying in any direction when it falls. That’s exactly why site prep and a few safety habits matter before the first block gets pulled. The good news is that none of this takes long — a five-minute setup check is all it takes to turn a potentially dangerous collapse into a clean, controlled tumble everyone can laugh about.
This guide covers every layer of safe lawn Jenga play: choosing and leveling your site, inspecting blocks, laying protective padding, setting height limits, marking spectator zones, supervising mixed-age groups, and keeping a first-aid kit within reach. Work through it once and your backyard setup will run itself.
Proper Ground Leveling and Site Selection for Lawn Jenga
Pick a spot that feels as solid and flat as a picnic table. Firm turf gives your tower a steady base so blocks stay put even when you pull from the middle. Soft, spongy ground lets the tower sink and tilt before the game even starts.
Start by scanning the area for high or low spots. Walk it, press down any small bumps, and fill shallow holes with extra soil. Then clear away sticks, rocks, and debris — anything that could sneak under a block and send the stack off-angle. Next, check turf moisture. If you leave footprints or spot puddles from recent rain, wait for the ground to dry. A dry surface means crisp block pulls without sliding.
Wind is an underrated factor. Hold a tissue in the air — if it blows steadily, gusts are already above the 15 mph threshold that can wobble a tall tower. Move to a more sheltered corner or wait for calmer conditions. Finally, mark a 3-foot clear zone around the tower’s footprint using sidewalk chalk or a length of string. That boundary gives every player room to step back safely when the tower falls.
- Test level with a straight board or bubble level.
- Wait for damp grass to dry before setting up.
- Clear sticks, rocks, and any debris from the play area.
- Mark a 3-foot clear zone around the tower base.
- Move to a sheltered spot if wind exceeds 15 mph.
- Re-inspect the ground and wind before each new round.
Block Quality Inspection and Material Selection
Before building the tower, run every block through a quick inspection. Wooden blocks should feel smooth with no splinters or rough edges — sand down any sharp spots and wipe them clean. Check for cracks, chips, or warping that could cause a block to catch mid-pull. Blocks should be uniform in length, width, and thickness so the tower stacks evenly, and each one should feel consistent in weight.
Plastic blocks hold up better in wet conditions and resist the slow deterioration that affects untreated wood. Either material works well as long as the finish is smooth enough for clean extraction. Store blocks in a dry location between uses to prevent moisture from swelling wood grain or making surfaces tacky.
A quick maintenance routine extends the life of any set: wipe each block with a damp cloth, air dry completely before stacking, and apply a coat of outdoor sealant to wooden blocks at the start of each season if you notice any small surface cracks forming.
Protective Padding and Gear Recommendations
Even on well-leveled ground, blocks land hard when a tall tower goes down. Lay interlocking foam floor tiles covering at least a 3-foot radius around the base — these absorb impact and protect both the blocks and the turf underneath. Add non-skid rubber mats over any patches that stay slightly damp, and tuck corner padding strips along the edges of the play area to cushion blocks that travel farther on the bounce.
For towers that approach the 3- to 4-foot range, safety glasses are worth wearing. A block spinning out from the middle of a tall stack can travel at eye level. Post a small sign or hang a flag near the setup area listing the required padding and optional eyewear — a visual reminder helps everyone suit up before the first pull rather than after a close call.
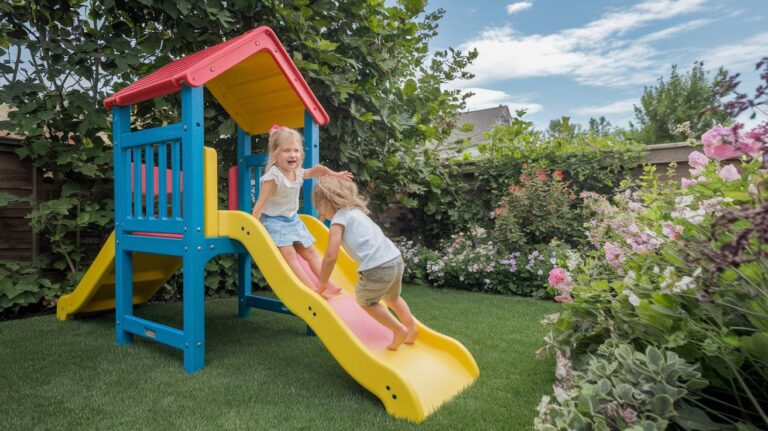
If you’re setting up for younger players, check out how to design a safe backyard activity space for kids — many of the layout and padding principles carry over directly.
- Interlocking foam floor tiles covering a 3-foot radius.
- Non-skid rubber mats over damp or uneven patches.
- Corner padding strips along play area edges.
- Safety glasses for towers approaching 3–4 feet tall.
Tower Assembly, Height Limits, and Stable Stacking
Height is where risk escalates fastest. A tower under two feet is low-stakes family fun. At three feet, block extraction requires real care and focus. Beyond four feet, falling blocks can travel several feet across the lawn and pose a genuine hazard to anyone standing nearby.
Build the base by laying three blocks side by side on firm, level ground and pressing them down until they sit flat with no rocking. Add each new layer rotated 90 degrees from the one below — this alternating pattern distributes weight across the structure and locks each level in place. Slide your palm across the top of each completed layer to check for any tilt or gap before adding the next.
| Tower Height | Risk Level | Notes |
|---|---|---|
| Up to 1 ft | Low | Good for young children |
| 1–2 ft | Medium | Standard casual play |
| 2–3 ft | High | Recommend clear zone + padding |
| 3–4 ft | Very High | Safety glasses recommended |
Once the stack reaches three feet, pause and check every seam before adding more. Any visible lean or gap at this height will only amplify as layers increase. Agree on a max height before the game starts so no one keeps adding “just one more layer” past the safe limit.
Defining Safe Play Zones and Spectator Distance
A well-marked play zone keeps the game organized and ensures bystanders stay at a safe distance. Use sidewalk chalk to draw a circle roughly three feet out from the tower’s base — about one adult stride in every direction. Spray paint works for a more lasting boundary on grass. Then set cones or small stakes every five feet around the perimeter and run bright caution tape between them.
This boundary does two things: it tells active players where to stand while waiting their turn, and it gives spectators a clear line to stay behind. Block trajectories are unpredictable when a tower falls, especially for taller stacks. A visible perimeter takes the guesswork out of where it’s safe to stand and keeps everyone watching comfortably rather than nervously.
For other backyard toss games that benefit from similar court markings, the setup principles in this washers toss rules and court layout guide translate well to any game with a defined play area.
Supervision and Safe Block Extraction Methods
Mixed-age groups need a supervising adult — one adult for every three or four players works well. The supervisor’s job is to watch for players leaning toward the tower during extraction, remind everyone to stand behind the chalk line when it’s not their turn, and gently redirect any player whose technique looks risky before a block gets pulled.
Before each round, do a quick sweep of the play area. Move garden hoses, stray toys, or any trip hazards out of the marked zone. Two minutes of clearing before each round reduces scrambling when the tower falls and someone has to step back quickly.
For safe extraction, approach the tower from the side rather than the front. Nudge the target block gently with one finger while stabilizing the blocks on either side with your other hand. Once the block clears, step back out of the collapse zone before passing the block to the next player. Avoid kneeling or bending close to the tower — if it starts to fall, you want to be upright and mobile enough to step clear easily.
- Approach from the side, not from directly in front of the tower.
- Nudge the block with your index finger — no grabbing or pulling hard.
- Stabilize adjacent blocks with your other hand while extracting.
- Step back outside the clear zone before passing the block to the next player.
Pairing younger players with an older sibling or parent for their turn works well. It keeps the extraction technique consistent and gives younger players a model to follow. You can also require everyone to stand — no kneeling near the tower — and mark a small “no-lean” zone with stakes or flags a foot from the base.
For a game with similar supervision considerations and mixed-age playability, the horseshoes rules and safety guide covers the same themes of clear zones, turn order, and adult oversight.
Emergency and First-Aid Preparedness for Lawn Jenga Events
Keep a first-aid kit within arm’s reach of the play area — not in the house. Stock it with adhesive bandages in multiple sizes, antiseptic wipes, tweezers for splinters, a roll of gauze, adhesive tape, disposable gloves, and two or three instant cold packs. Splinters from wooden blocks and minor scrapes from falling hardware are the most common lawn Jenga injuries, and both are handled quickly with what’s in a standard kit.
Assign one person as a collapse-zone spotter before the game starts. Their job is to watch for wobbling and call out a warning when a fall looks imminent, giving spectators a moment to step back. Brief everyone on a simple emergency plan: who grabs the first-aid kit, who helps the injured player, and where the nearest urgent care is located.
- Assign a spotter to monitor the tower for early signs of wobble.
- Write down simple steps for falls and block-impact incidents before the game starts.
- Set water break timers so hands stay steady and players stay focused.
- Keep the address and directions to the nearest urgent care visible near the play area.
- Maintain an updated contact list for all players, especially children.
Log any incidents after the game — what happened, who helped, how it was treated. The habit takes two minutes and makes your next event meaningfully safer by identifying patterns before they repeat.
Visual Guides and Signage for Lawn Jenga Safety
Clear signage reduces the number of times you need to repeat the rules verbally. Draw a simple diagram of the tower footprint showing the 3-foot clear zone and post it on a small easel near the setup area. Add a photo or sketch of the correct block-extraction technique so first-time players have a visual reference without needing a full explanation.
Color-code your floor markings: green for the active player zone, yellow for the caution ring between the clear zone and spectator area, and red for the no-entry zone closest to the tower. Large arrows indicating where blocks should land and numbered photo notes make it easy for new players to follow along even after several rounds in the heat.
- Post a tower-setup diagram at the base for players to reference between turns.
- Pin the extraction technique guide in the player staging area.
- Hang small warning signs around the spectator boundary marking no-go spots.
With ground prep, block inspection, protective padding, height limits, a marked play zone, active supervision, and a first-aid kit all in place, lawn Jenga runs safely from the first pull to the final crash. Revisit the ground and breeze check before each new round, and the game stays in control no matter how tall the tower gets.
Frequently Asked Questions About Lawn Jenga Safety
How do I prepare the play surface for lawn Jenga?
Choose level, firm ground on dry grass. Flatten any bumps, remove sticks and rocks, mark a 3-foot clear zone around the tower footprint, and confirm wind is under 15 mph before building.
What should I check on blocks before playing lawn Jenga?
Look for splinters, rough edges, cracks, chips, or warping. Each block should be uniform in size and consistent in weight. Sand rough spots, seal surface cracks with outdoor sealant, and store blocks dry between uses.
What protective gear is recommended for lawn Jenga?
Lay interlocking foam tiles covering a 3-foot radius around the base, add non-skid rubber mats over damp patches, and use corner padding strips along the play area edges. Safety glasses are recommended for towers approaching 3–4 feet tall.
How tall can I safely build a lawn Jenga tower?
Keep the tower at 3–4 feet maximum. Build with three blocks per layer, rotate each layer 90 degrees, and check for tilt at every level. Agree on a height limit before the game starts so no one adds risky extra layers mid-game.
How should I mark a safe play zone for lawn Jenga?
Draw a 3-foot perimeter around the tower with sidewalk chalk or spray paint, set cones or stakes every five feet, and run caution tape between them at spectator entry points.
What is the safest technique for removing blocks from the tower?
Approach from the side, nudge the block gently with one finger while stabilizing the blocks on either side with your other hand, then step back outside the clear zone before passing the block.
What first-aid supplies should I keep on hand for lawn Jenga?
Keep bandages in multiple sizes, antiseptic wipes, tweezers for splinters, gauze, adhesive tape, disposable gloves, and cold packs within arm’s reach. Assign a spotter and brief everyone on your emergency plan before the game starts.
How can visual guides improve lawn Jenga safety?
Post a tower-setup diagram and extraction-technique guide near the play area. Color-code floor markings (green for player zone, yellow for caution ring, red for no-entry), and place warning signs around spectator boundaries.