How to Build a Raised Garden Bed Easily
Hey there, ready to stop wrestling with heavy, clumpy soil?
Soil (the loose top layer of earth) feeds your plants.
It sticks to your shovel and slows you down, right?
But here’s the trick. Build a raised garden bed and plant anywhere. Rocky yards and tiny balconies become a green oasis.
In just a few hours, you can nail together a cedar frame that smells sweet. It feels smooth under your hands. Then fill it with fresh, crumbly soil and watch your seedlings perk up.
No fancy tools needed; just some boards, metal brackets, and a drill.
I’ll guide you through every step and soon you’ll be digging into soft garden bed soil instead of poking around bland ground in no time!
DIY Guide to Build Your Raised Garden Bed
First, let’s gather everything you’ll need. You’ll want four cedar boards (2″×6″×8′) cut into eight 4-foot lengths. Grab four metal corner brackets (10″ framing angles), 16–24 hex-head screws (¼″×2½″), plus matching washers and nuts. If you’ve got a Kreg Jig (that’s a little tool for drilling neat pocket holes), go ahead and pull it out too.
Now, prep your boards. Mark how thick they are so you know where to drill. Line up a bracket on the inside edge of a board. Drill small pilot holes first, this helps screws go in smoothly without splitting the wood. Do that for each bracket and board pair.
Time to assemble. Start by fastening two boards into a panel. Repeat for another panel. Then join those panels into a U shape. Finally, attach the last side to close the box, making sure each corner sits nice and square. Yes, you can use a framing square and some clamps to keep things in place.
Pick a sunny, level spot in your yard. Lay down landscape fabric (to block weeds) or hardware cloth (a fine wire mesh that keeps out critters). Back to the bed, fill it up with your favorite soil mix. I love the smell of fresh earth, so good.
You’ll need a power drill or impact driver, a saw (miter, circular, or even a handsaw works), a tape measure, framing square, and a few clamps. Most people finish cutting and building in about four to six hours, especially if a friend’s helping.
Why cedar? It’s naturally rot-resistant (no added chemicals needed) and lasts around ten years. Expect to spend near $100 on lumber and hardware. A Kreg Jig isn’t required, but it sure speeds things up if you’ve already got one kicking around.
Selecting Raised Garden Bed Materials and Wood Types
Picking the right boards keeps your garden bed sturdy season after season. The wood you pick decides how well your frame stands up to hot sun, driving rain, and damp soil. Some boards come from the forest with no added chemicals, while others carry preservatives (chemicals that fight rot) that can seep into your dirt. It’s like choosing a tough jacket to wrap around your plants.
Have you ever run your fingers over freshly cut cedar? It feels warm and gives off that piney scent. Oops, I’m geeking out.
| Wood Type | Lifespan (years) | Chemical Safety Notes |
|---|---|---|
| Cedar | 10-20 | Natural rot resistance, no added chemicals |
| Redwood | 10-20 | Natural rot resistance, no added chemicals |
| Pine or Douglas fir | 3-7 | Untreated softwood (wood from trees with needles), watch for knots and splits |
| Pressure-treated | 15-20 | Uses ACQ preservatives (chemicals that fight rot) that may leach copper |
Cedar or redwood planks at least 2 inches thick give you years of use with no weird taste in your veggies. Pine can work if you’re on a tight budget, but it’s softer wood so it won’t last as long.
If you go for pressure-treated lumber, look for ACQ rather than the old CCA. I don’t use reclaimed railroad ties or random scrap wood. You never know what’s hiding there.
Defining Ideal Dimensions for Raised Garden Bed Plans

When you’re plotting your raised bed, pick a width you can reach without stepping inside. Four feet is perfect, your arms stretch right to the center and you don’t pack down that soft, crumbly soil (soil that’s soft enough for roots).
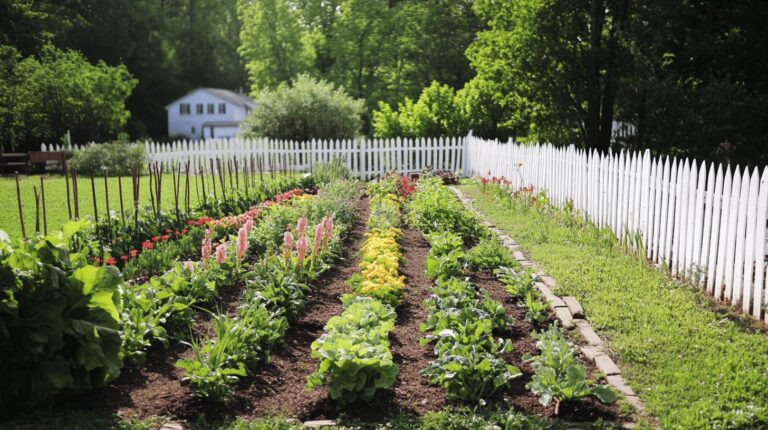
Keep the length at eight to ten feet. That gives you room for a row of tomatoes, carrots, or a mixed patch of flowers and herbs. Doesn’t that sound inviting?
And depth matters. Six inches (half a foot) is fine for lettuce and shallow-rooted herbs. But root veggies and peppers need more space, aim for 16 to 18 inches so their roots can spread.
Before you buy boards, sketch your bed size on paper. Better yet, mark it out in your yard with stakes or chalk. Wow, it really brings your plan to life and cuts the guesswork when building.
- 4-foot width for easy reach and no soil compaction
- 8–10-foot length for a full row of veggies or blooms
- Depth options: 6 inches for greens, 16–18 inches for deeper roots
- For a 4×8 bed, plan on nine 8-foot 2×6 boards or six 12-foot boards plus one 8-foot 4×4 post
- Space beds at least 36 inches apart for tool access and air flow
These simple sizes keep your plants within reach and help you lock in a clear lumber list before you shop.
Frame Assembly Techniques for Raised Garden Bed Construction
Reinforcing Beds over 6 Feet
If your raised bed is longer than six feet, you might notice the sides bowing under all that rich, dark soil. Here’s a quick neighborhood hack. Slide a support leg under the center of each long side or clamp on a galvanized steel mending brace (a metal strip that ties boards together) across the middle.
First, drill small pilot holes (tiny guide holes) through both the board and the brace. Then drive in 2 1/2-inch decking screws (strong outdoor wood screws) with a washer and nut so the wood doesn’t split. Trust me, this trick saved my bed from turning into a sad, saggy mess! Place the supports at even spots so the soil pushes down evenly and your frame stays straight all season.
How to Build a Raised Garden Bed Easily
Have you ever picked the perfect spot only to find the soil all bumpy? Let’s get that ground level so your bed sits like a dream.
First, strip away the sod (grass layer) and roots. I once left a patch, and guess what popped up? Weeds!
Next, dig out rocks and debris until you’re down to bare soil. Feel that earth in your hands. It should be soft but smooth.
Then fill in any low spots with extra soil or sand. Press it down so it does not shift when you stand on it.
Gently tamp the high spots, pressing until the ground feels firm under your feet. No wobbles here!
Finally, grab a board and a spirit level (tool that shows if something is even). Lay the board across your cleared ground, set the level on top, and watch the bubble settle neatly between the lines. Now you’re ready to build.
Selecting Soil Mix and Layering for Raised Garden Bed Fill
Picking the right fill keeps plants happy and roots strong. Have you ever felt warm earth crumbling between your fingers? It’s like giving your garden a soft, cozy home that still drains water well.
First, line the bottom of your bed with hardware cloth (strong wire mesh) or landscape fabric (weed barrier cloth). This stops gophers from popping in. Then add a 2-inch gravel layer for drainage so water won’t pool at the roots. If your bed is over a foot deep, tuck in empty plastic bottles or yogurt cups to save on heavy soil and still give roots room.
Next comes the real soil blend. Scoop in 50% topsoil (good soil for structure), 30% compost (decayed organic matter that enriches soil) for nutrients, and 20% aeration additives like coco coir (coconut fiber) or perlite (tiny white volcanic rocks). Mix gently, folding like you would eggs into cake batter so you don’t squash those coir chunks or perlite beads. It’s okay if it looks a little messy, that means it’s just right.
As you fill, tap the bed sides lightly with a board to help the soil settle. Oops, I once tapped too hard and dang dust flew everywhere. Peek inside and top off any low spots. If you want extra help with drainage, add a layer of landscape fabric over the gravel before pouring in soil.
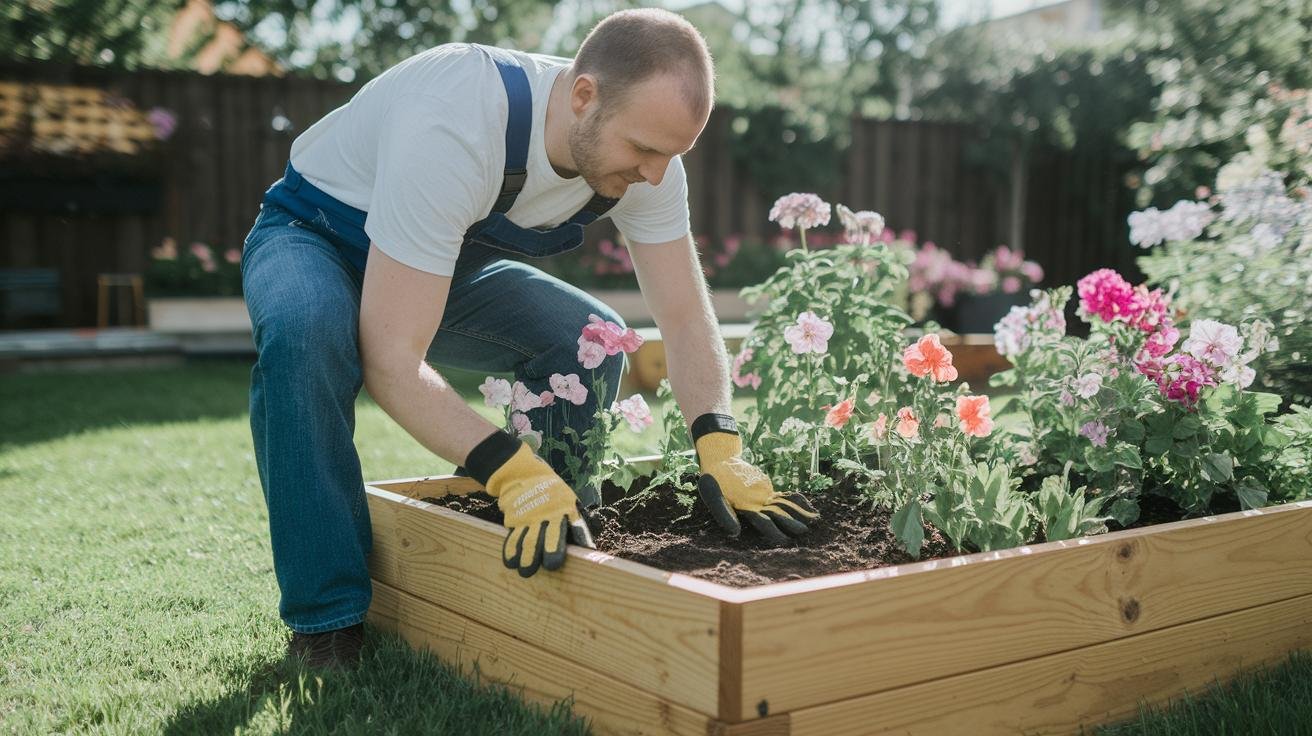
Before planting, moisten the mix until it feels like a wrung-out sponge, damp but not dripping. Then let it rest for a day so air pockets can rise to the top. Give the top layer a quick fluff with your finger or a small rake. And that’s it, you’re ready to tuck in seedlings or spread seeds and watch them grow.
Enhancements and Maintenance for Durable Raised Garden Beds
Before you fill your bed, snake drip irrigation (a system that drips water slowly to your plants) along the bottom. This little trick saves you from poking holes later and sends water right to the roots. Then cover the lines with your potting mix (loose soil mix) and add a 2- to 3-inch layer of straw or wood chips on top. That mulch (any material laid on top of soil) keeps weeds from popping up and holds in moisture so you water less often.
Next, tuck hardware cloth (a fine wire mesh) or landscape fabric (weed-blocking cloth) along the bottom and up the sides before you add soil. That barrier stops gophers and voles from tunneling up into your veggies. If your bed sits on really sandy ground, slip in a thin layer of gravel under the fabric. It helps water drain off so roots won’t sit in a puddle after a rain.
Every spring and fall, I give my bed a little TLC. Have you ever skipped a check and then heard a creak in the side panel? I walk around and tighten every screw, bolt, and bracket.
Then I brush on Osmo decking oil (a natural wood treatment) to shield the wood from sun and rain. When frost threatens, I pop on a removable lid or simple cover to keep those tender roots cozy until spring.
Final Words
In the action we collected boards, angles, screws, then cut cedar boards into 4-foot lengths. We lined up framing angles, drilled pilot holes, and joined panels into a sturdy square. Next steps had us clear and level the site, lay fabric, and position the frame before filling it.
Tools like a power drill, saw, tape measure, and square made the job fly by in a few hours. Cedar’s rot resistance means your bed stays strong season after season.
Ready to try it yourself? Here’s to your backyard bliss and knowing exactly how to build a raised garden bed!
FAQ
What is a raised garden bed kit?
A raised garden bed kit includes pre-cut boards, hardware, and step-by-step instructions so you can assemble a sturdy planting frame without sourcing individual materials.
How do you build your own raised garden bed on a budget?
Building your own raised garden bed on a budget uses reclaimed wood, repurposed cinder blocks, and bulk soil amendments. It typically costs half to two-thirds of a kit, saving you at least $50 per 4’x4′ bed.
How do you build a raised garden bed step by step?
To build a raised garden bed step by step, mark and cut your 2×6 boards to length, attach them with framing angles or screws, join sides into a box, place on leveled ground, and fill with soil mix.
How do you build a wooden raised garden bed?
Building a raised garden bed with wood uses rot-resistant cedar or redwood boards cut to size. Fasten 2×6 boards with 2.5″ decking screws and corner brackets into a sturdy box before adding soil.
How do you build a concrete block raised garden bed?
Building with concrete blocks involves leveling the site, laying blocks in your bed outline, stacking two or three layers for height, and filling gaps with gravel before adding soil.
How do you build a raised garden bed with legs?
Building a raised garden bed with legs starts by cutting 4×4 posts for corner legs, attaching side boards at waist height with lag screws, bracing each corner, then leveling before filling soil.
What kind of wood should you use for raised beds?
Cedar and redwood are best for raised beds, lasting 10–20 years without treatment. Pine or fir are cheaper but last only 3–7 years.
What do you put in the bottom of a raised garden bed?
At the bottom of a raised garden bed, start with 2 inches of gravel for drainage, then add a layer of hardware cloth or cardboard to block pests before filling with soil mix.
What vegetables should not be grown in a raised bed?
Vegetables not ideal for raised beds include tall corn and sprawling pumpkins. Deep-rooted crops like large potatoes may also overfill shallow beds and compete for nutrients.
Where can I find PDF plans for both standard and waist-high raised garden beds?
Many university extension and DIY gardening websites offer free PDF plans with board layouts, cut lists, and leg height details for 4’x4′ standard and 24–36″ waist-high beds.