

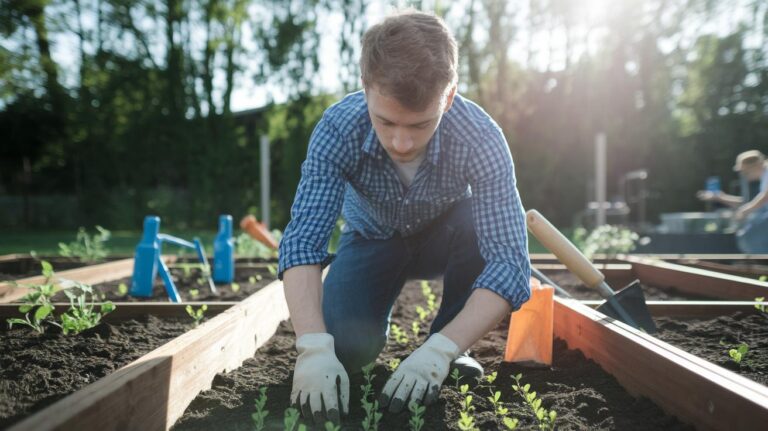
Hydroponic Herb Garden Thriving Indoor Flavors
Ever wanted to pinch basil leaves and breathe in that sweet, herby aroma right in your kitchen? Turns out you don’t need a backyard or muddy soil to make it happen.
Hydroponics (growing plants without soil in water) brings crisp basil and mint right to your sink – and no dirt to track around. I was a bit nervous at first – I even spilled some mix. But I quickly forgot the mess when I tasted my first crisp basil leaf.
Imagine steeping a mint leaf in hot tea and tasting that cool, bright zing as it opens on your tongue. It’s like a morning breeze in a cup. Plus, filtered water and a teaspoon of nutrient mix (plant food in powder form) keep everything growing strong.
In this quick-start guide, I’ll walk you through choosing a snug spot by an outlet. Then you’ll learn how to install lights and test water pH (how acidic or alkaline water is) so your kitchen herb garden thrives.
Your kitchen counter is your new backyard. Let’s get growing!
Quick Start Guide for Indoor Hydroponic Herb Garden
Time to bring the garden indoors. Hydroponic (growing plants without soil) lets you skip messy dirt. Have you ever smelled basil so fresh it makes your kitchen dance? You’ll need a 1 to 3 square foot spot near an outlet.
- Pick a 1 to 3 sq ft area near an outlet.
- Choose a DIY system or a plug-and-play kit (browse a compact indoor vertical herb garden if you need to save space).
- Mix 1 to 2 teaspoons of nutrient mix (liquid plant food) per gallon of filtered water.
- Hang full-spectrum LED lights (energy-saving grow lights) 12 to 18 inches above plant tips for 14 to 16 hours a day.
- Start with herbs like basil, mint, or parsley for quick wins.
- Test water pH (acidity or alkalinity) twice a week, aiming for 5.5 to 6.5.
- Clean the water tank (reservoir) every 2 to 4 weeks.
- Use timers to run the pump and lights so you don’t have to flip switches every day.
Starter kits range from about $50 for a basic deep water culture (DWC) bucket to around $300 for units with sensors, timers, and auto-dosing. Budget models cover the basics but you’ll check water and nutrients more often. Fancy setups will ping your phone and do some of the work for you! I picked a mid-range kit and I love not guessing when to feed my plants.
Next up: system comparisons, gear picks, lighting tips, herb profiles, and troubleshooting. Ready to dig in?
Comparing Hydroponic Herb Garden Systems

Ever dreamed of snipping fresh basil right over your sink? Picking the right hydroponic setup comes down to your space, water use, time, and how comfy you are with new gear. Think about reservoir (water-and-nutrient tank) size, setup ease, and how often you’ll check on plants.
By the way, my cat naps on my grow tray sometimes. Back to your kitchen garden, here are five popular systems with their perks and one thing to watch out for.
-
Deep Water Culture
Roots float in a big tank of oxygen-rich water with plant food (nutrient solution). You get sturdy herbs fast and setup is low-tech. But it takes up counter space and needs a deep reservoir. -
Nutrient Film Technique
A thin stream of water with plant food flows over shallow roots, so you save water and fit into tight spots. It’s quiet and efficient. But if the pump stops, your herbs can wilt fast, you’ll need to check flow often. -
Ebb & Flow
Trays flood and drain on a timer, giving roots a drink then a breath of air. That cycle makes dense, healthy growth. But if pump timing glitches, young plants can get stressed. -
Wick System
A cotton rope (wick) soaks up water and nutrients into the grow mix (soil-less medium). No pumps, just quiet capillary action. But it’s only good for small herbs and yields are lower. -
Vertical Planter
Stack trays or tubes so herbs climb up a column, great for tiny spaces and easy snipping at eye level. But startup costs are higher and parts can be trickier to clean.
Ready to map out your gear and nutrient plan? Let’s get those herbs thriving.
Essential Equipment and Nutrient Planning for Hydroponic Herb Garden
Your reservoir (opaque water tank) is the heart of your setup. Think of it like a big water bowl that keeps everything flowing. Aim for about 1–3 gallons for a small herb patch. Then pick a water pump sized to that volume so it can swirl nutrients without huffing and puffing. Toss in an air stone (tiny porous diffuser) attached to an air pump so roots get a gentle stream of oxygen-rich bubbles. And don’t skip the pH meter (it measures acidity) or a digital tester, you’ll want to peek at those numbers now and then.
Seedlings and cuttings need a cozy spot. I like rockwool (fibrous growing medium) or LECA (lightweight clay pebbles) tucked into net cups. They hold plants upright and let water wash through, no muddy mess. Hang full-spectrum LED grow lights about 12–18 inches above your herbs. The glow should feel bright but soft, like morning sun warming your face, so leaves unfurl into a juicy green.
Water quality can make or break your hydroponic success. Test your tap water first and use a filter or dechlorinator to kick out chlorine or chloramine. To keep pH happy at 5.5 to 6.5, adjust with a little phosphoric acid or potassium hydroxide (follow the label). For nutrients, mix a solution made for leafy greens with an N-P-K ratio of about 3-1-2. Stir in 1–2 teaspoons of concentrate per gallon. Oops, I once spilled a bit, no biggie, just stirred it back in. By the way, organic blends can shift faster than synthetics, so check your levels more often.
Lighting and Environmental Control in a Hydroponic Herb Garden

Your herbs need about 14 to 16 hours of light each day. Hang full-spectrum LEDs (light-emitting diodes) 12 to 18 inches above the leaves so they get a soft, sunlike glow, no hot spots. Have you ever watched little basil leaves reach for the light? The blue side of that glow is like a morning stretch for leafy greens, and basil and parsley will thank you for it.
When you tuck in edible flowers or tiny pepper plants, add a splash of red light. It helps blooms pop and little peppers set fruit. In winter, when real daylight fades, a timer is your best friend. Set it once and then go sip your coffee while your setup runs on autopilot.
Humidity and airflow matter almost as much as light. Aim for about 50 to 70 percent humidity (moisture in the air) with a small humidifier or dehumidifier, depending on whether your room feels like a sauna or a dry closet. Clip-on fans swirl air around the leaves so you avoid gray mold (a nasty leaf fungus) and mildew.
For a real growth kick, try CO2 (carbon dioxide) supplementation. A gentle puff can boost growth by up to 20 percent. Just keep a monitor handy so you don’t go overboard. With the right humidity tools and a bit of airflow, your indoor herb patch will feel more like a bright greenhouse than a corner of your kitchen.
Selecting and Caring for Herbs in Your Hydroponic Herb Garden
Picking the right herbs starts with your kitchen and your setup. Think about pH (how acidic or alkaline the water is) and temperature. Aim for about 5.5 to 6.5 pH and 65°F to 75°F water. And guess how fast you want a snack, some herbs sprout in three weeks, others take longer. Also note space: tower planters work great for mint, while mesh cups in a DWC (deep water culture) system suit shallow roots. Matching plant habits with your light, water, and containers is the key.
Have you ever smelled fresh basil on a morning breeze?
Genovese basil gives you big, soft leaves every four weeks. Thai basil grows a bit slower but adds spicy, licorice notes to stir-fries.
Mint can be eager. Pinch off flowers and trim stems each week so it won’t take over your tank. Its bright green leaves smell amazing in tea and mojitos.
Cilantro likes cooler water, 60°F to 68°F. Feed it lightly every seven days. It’ll keep you happy until it bolts (when it flowers and seeds).
Thyme is easy. Cut back nitrogen (plant food) by half and nudge pH toward 6.8 for a stronger taste. You’ll notice its tiny leaves release warm, earthy scents when you brush them.
Parsley does well in a DWC system with mesh cups. Those cups hold stems steady while roots stretch into evenly moist water. I once had my cat nap on the tray, oops, but the parsley stayed upright!
Chives let you snip outer leaves every two to three weeks. They pop a mild onion flavor into salads or scrambled eggs without replanting.
To keep your counter full of fresh greens, sow new seeds every two weeks in a small seed tray under gentle light. As you harvest outer leaves from older plants, younger sprouts fill the gap. This staggered planting trick means you’ll never run out of parsley for pasta, mint for drinks, or cilantro for tacos. Continuous harvest? Absolutely.
Maintenance, Troubleshooting, and Harvesting in a Hydroponic Herb Garden

Keep your hydroponic (growing plants in water) reservoir (water tank) happy by swapping and scrubbing it every 2 to 4 weeks. You’ll feel the warm water and gentle scrub as you rinse away nutrient gunk and slimy stuff. Um, I sometimes hum a tune while I scrub. Back to your tank: try dark containers or opaque lids to block sneaky sunlight and keep algae out.
Twice a week, pop off the lid and test pH (acidity level) and nutrient strength. A quick dip with a digital tester or pH strip shows if you’re in that sweet 5.5 to 6.5 range. Set phone reminders so you don’t have to guess.
If your herbs look sad – stunted stems or yellow patches – it’s troubleshooting time. Have you ever zoomed in and found tiny hitchhikers like aphids (small sap-sucking bugs) or mealybugs (white fuzzy pests)? A spray of neem oil or a few released ladybugs can clear them out.
And if leaves curl or get brown edges, grab a simple disease chart to match what you see with a fix. Sometimes low oxygen in water or a funky nutrient mix causes root rot (when roots start to decay) or tip burn. Adjust air stones (those little bubbler things) or tweak nutrients until roots look plump and white again.
Knowing when to snip herbs locks in flavor and gives plants a boost. Harvest sprigs once each plant has three to four true leaves – that’s the trick for a meal’s worth and quick regrowth. Yum!
For a snack in a day or two, tuck trimmed herbs into sealed bags and stow them in the fridge crisper drawer. Planning ahead? Spread leaves on a rack in a low-heat dehydrator (food-drying machine) or an oven set to 95°F until they’re brittle. Then pop them into airtight jars away from light. Those steps lock in aroma and taste so your indoor garden feeds you all season.
Final Words
in the action we sized up our space, chose a kit or DIY path, weighed system features, mixed nutrients, hung LEDs, picked basil, mint, parsley, and set pH checks.
Then we scoped cost ranges, from $50 simple DWC kits up to $300 for advanced setups.
Now you’ve got a clear plan to build and maintain your own hydroponic herb garden. Enjoy each leafy harvest and watch those fresh greens thrive.
FAQ
Which herbs grow best hydroponically?
Herbs like basil, mint, and parsley grow best hydroponically because they adapt quickly to nutrient-rich water, offer steady leaf harvests, and thrive under LED lighting with simple root support.
Do hydroponic herb gardens work?
Hydroponic herb gardens work by pumping nutrient solution directly to roots, boosting growth rates and flavor while cutting space needs, so you can harvest fresh greens year-round indoors or outdoors.
What is the biggest disadvantage of hydroponics?
The biggest disadvantage of hydroponics is the higher setup expense and equipment complexity—pumps, lights, and nutrient monitoring add cost and demand more regular attention than soil gardens.
How long do herbs take to grow in hydroponics?
Herbs take about four to six weeks to reach harvest size in hydroponics, with fast growers like basil and cilantro ready in as little as three weeks under ideal light and nutrient conditions.
What should you look for in a hydroponic herb garden kit?
A good hydroponic herb garden kit should include a sturdy reservoir, adjustable LED light, reliable pump, easy-to-follow setup guide, and enough growing space to fit your favorite herbs.
How can I start a DIY indoor hydroponic herb garden?
To start a DIY indoor hydroponic herb garden, pick a 1–3 sq ft spot, use a container and small pump, mix 1 teaspoon nutrient concentrate per gallon, and run LEDs 14–16 hours daily.


One Comment