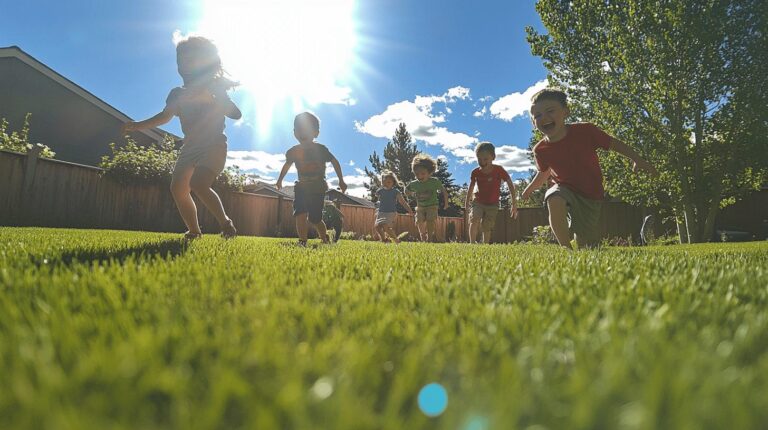
Backyard Ninja Course Ultimate DIY Build Guide
Have you ever stared at your backyard and thought, What if this could be my own ninja playground? Soft grass under your feet and the sun warm on your back. Ah, the possibilities.
Imagine shimmying up wooden beams (posts) and swinging across monkey bars (horizontal ladder) right behind your fence. Um, you might catch a neighbor’s eye. But hey, every warrior’s got to start somewhere.
In this guide, we’re going to turn that empty yard into an action-packed ninja course. We’ll walk you through measuring your lanes with a tape measure (tool for length) and marking wooden pins (stakes) at key spots. Then you’ll dig holes and set your 6×6 posts (wooden beams) in concrete (hardened mix of cement, sand, and water). You’ll get simple steps, handy tips, and maybe even a quick oops moment or two.
By the time you’re done, you’ll have a sturdy, safe setup that fits your space and lights up your inner warrior. Picture yourself landing a perfect jump on the soft grass and feeling proud every time.
Ready to roll up your sleeves and build?
Design and Planning Your Backyard Ninja Course
Step 1: Survey and clear your space.
Walk the yard and pick the flattest spot you can find. Your ninja lanes should each be about 15 to 20 feet long, with a 2 to 3 foot gap between them. Then trim low branches and shuffle rocks or roots out of the way.
By the way, peek up for wires or loose limbs so you don’t get a surprise.
Step 2: Adapt a plan.
I started with a 40 page PDF from Ninja Warrior Blueprints (a detailed guide for obstacle setups). It had a handy parts list but skipped the closeup attachment tips – oops, I had to guess where some bolts went.
So I flipped and rotated the layout along my fence line, then made both lanes the same length. Feel free to tweak as much as needed to keep things balanced. Measure ground slopes so you can adjust post heights for any little hills or dips.
Step 3: Mark lanes and posts.
Drive stakes at each corner and every 8 feet along your lanes. Tie garden string between them to map out your course. Snap chalk lines on the grass so you can stroll the path before you break ground. Use a tape measure and a carpenter’s square (an L shaped tool for right angles) to keep stakes perfectly in line.
Step 4: Dig holes and set posts.
If your soil feels like tough clay or you hit stone, aim for 4 feet deep. You might want to call in a pro if it gets rough.
Drop in a 16 foot six by six inch post (a big support beam), then pour in Quikrete Fence N’ Post concrete. Level each post with a simple level tool and let the mix cure for at least 48 hours. Brace each post with scrap 2 by 4 boards to keep them steady. That solid grip will stop wobbles when you swing on monkey bars or hop between steps.
Selecting Materials & Construction Techniques for Your Backyard Ninja Course
Start with solid posts and beams. Many builders use 6×6-inch posts (wood soaked to resist rot) set in concrete for a firm hold. Then bolt 2×8-inch boards (two-inch by eight-inch planks) across those posts with heavy-duty carriage bolts (large bolts with square heads). And if you want extra lanes or plan to swap grips later, add 2×6 cross beams with joist hangers (metal brackets that hook onto beams).
Thinking wood versus metal obstacles? Wood has that warm, rough grain under your palm, but it needs a fresh coat of sealant each year to guard against rot. Steel frames often arrive with UV-protected plastic coatings that shrug off rust for years with almost no touch-ups. Either way, you’ll end up with a sturdy course you can tweak as you go.
Next up: anchor and footing options. Pour ready-mix concrete (like Quikrete Fence N’ Post) around each post and brace it with scrap 2×4s while it sets for rock-solid support. For a site you can’t dig or a quick teardown, try screw-in earth anchors (long screws you twist into the ground). They skip the concrete step and pull out by hand or machine when you’re done.
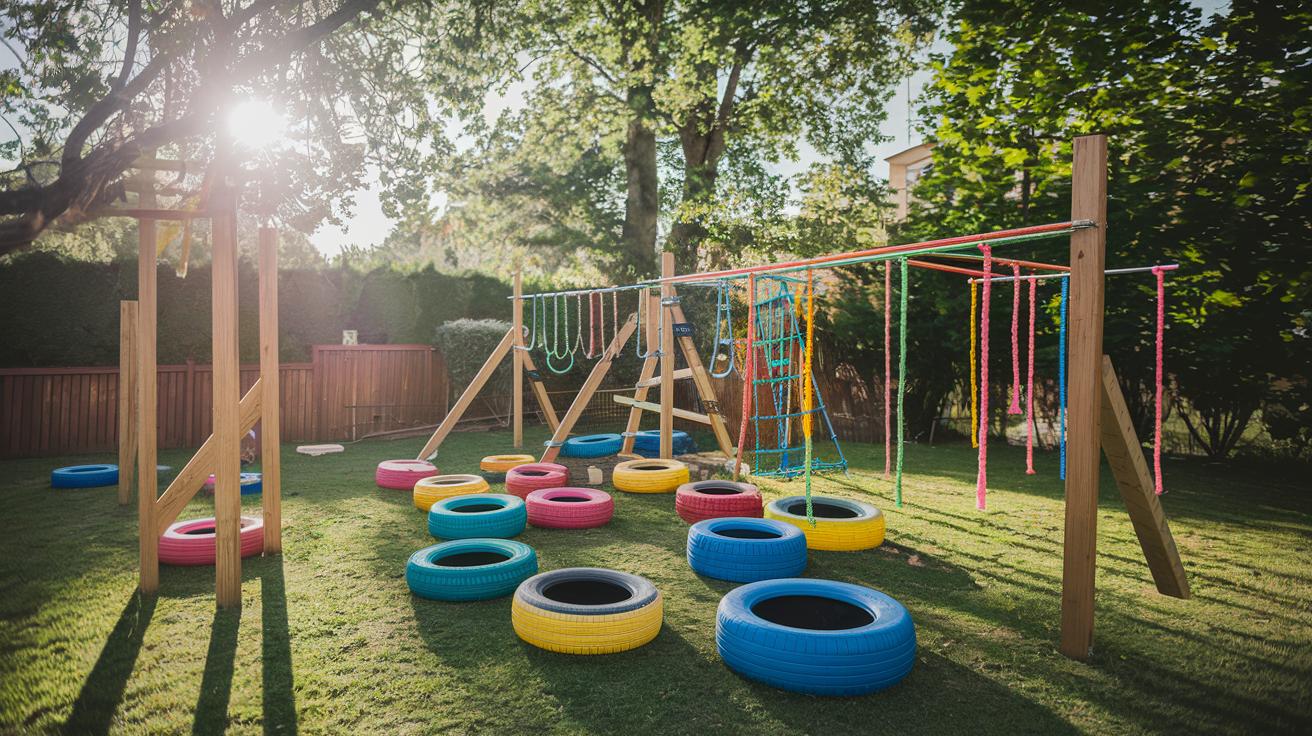
Don’t toss scrap bits, turn them into ninja fun. Slide old PVC pipes (light plastic tubes) onto rebar legs (steel rods pushed into the ground) for climbing walls. Hang old tires from beams for a swing or loop motorcycle straps for hand holds. I even hung a tractor tire once, so unexpected and fun! These found items add character and cut your costs.
Weatherproofing matters. Coat wood with an outdoor sealant plus water repellent so rain beads off instead of soaking in. Spray metal parts with a clear rust inhibitor before you add color. A quick spray every six months keeps your course looking sharp and feeling strong.
Building a ninja course is part design, part backyard treasure hunt. Mix treated lumber, steel pieces, and repurposed gear for a playground that’s tough, playful, and uniquely yours.
DIY Kits vs. Custom Builds & Professional Installation Options
Modular obstacle kits can be the quickest path to your own ninja warrior course. Packages like SpartanSesh snap together with screw-style earth anchors (sturdy stakes that grip the ground) so you skip mixing concrete. The frames are UV-protected (built to resist sun fading), so they shrug off rust and stay bright in the backyard. Adjustable pull-up bars at 6 and 8 feet help you level up as you grow stronger. I set mine up in a single Saturday, sun on my back and dirt under my nails. Instant playground!
Custom obstacle fabrication gives you total freedom. But heads up, you know, many DIY plans come as basic PDFs and can skip close-up attachment tips. You might find yourself on a hardware store treasure hunt. I once forgot a bolt and had to dash back in the rain. Budget about $5,000 for materials and tools, plus sweat equity (your own labor), and expect a few “how does this fit?” moments.
And if your yard throws you a curveball, like rocky soil or hidden tree roots, hiring professional installers can be a lifesaver. A pro crew will drill through clay or rock, set posts in concrete so everything sits rock-steady, and clean up the mess. Trust me, I’ve watched them chew through roots like they’re butter. You’ll pay extra labor fees, but you’ll save your own time and avoid a yard full of half-drilled holes.
Ready to pick your challenge?
| Option | Pros | Cons |
|---|---|---|
| Modular Kits | Fast setup, less heavy lifting | Higher kit cost |
| Custom Builds | Fully personalized | More guesswork, around $5,000 materials cost |
| Professional Install | Less DIY effort, rock-steady foundation | Added labor fees |
Essential Obstacles & How to Build Them for Your Backyard Ninja Course
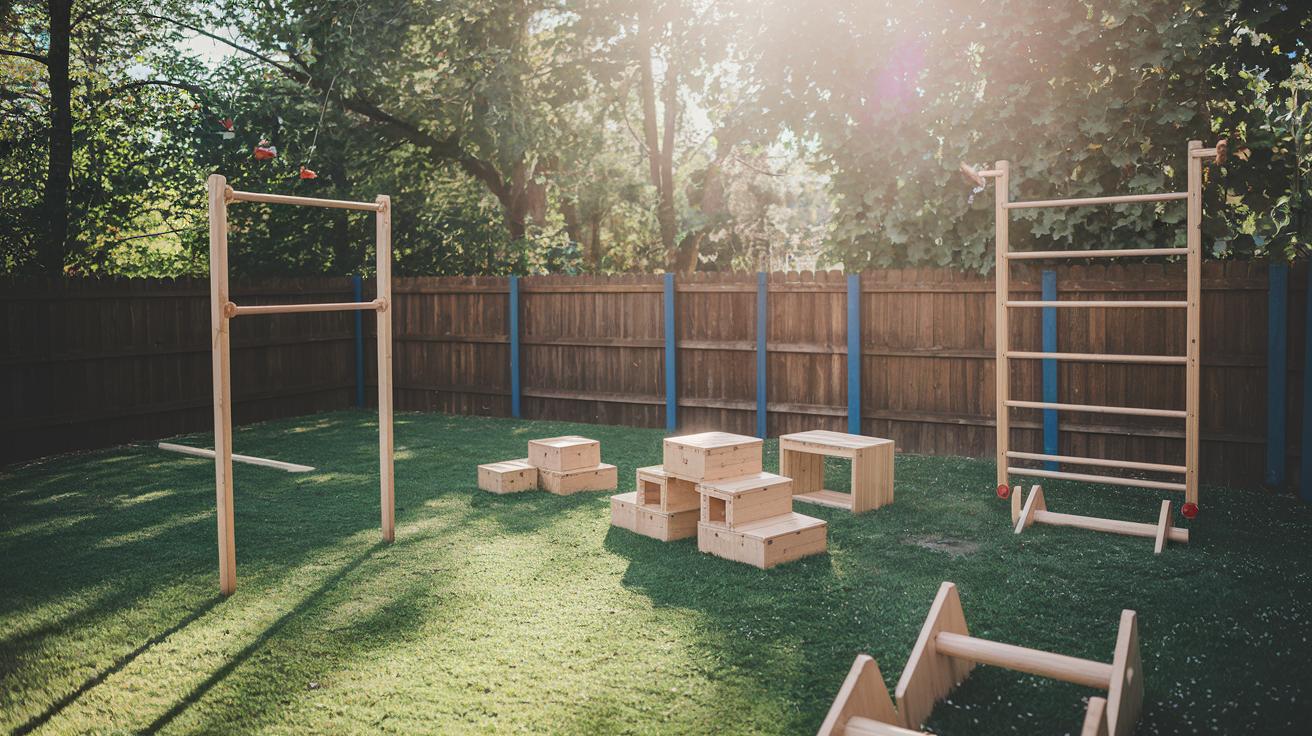
Monkey Bars
Turn old trampoline pipes into monkey bars you can hang on. Bolt each bar to a pair of two-inch-by-six-inch boards (2×6 boards) using joist hangers (metal brackets that hook over a beam). Screw in D-ring hooks rated for 400 pounds so you can swap out grips later. Space the bars about 12 inches apart – wide enough for your fingers but close enough for a smooth swing.
Quintuple Steps and Balance Beam
Cut five sturdy scrap boards into 12-inch lengths – these are your steps. Angle each board up at about 15 to 20 degrees and bolt them to a two-inch-by-eight-inch support beam (2×8 beam). Leave six inches between each step for easy climbing. Anchor the bottom of the beam into the ground with a rebar stake (a long steel rod) or a concrete footing (a small poured pad) to keep things steady.
For the balance beam, grab a round log that’s six to eight inches across. Set it on two solid blocks spaced about four feet apart and secure it with screws. Walk slowly, feeling the wood curve beneath your toes and challenging your balance.
Cargo Net and Ladder
Screw a two-inch-by-eight-inch board across your main posts to create an anchor point. Lash the top of a cargo net (rope webbing) to that board with heavy-duty zip ties or steel clamps. Pull the net tight and tie its bottom corners to a lower beam or drive in a ground stake. For the ladder, install one-inch wooden dowels (round sticks) or treated two-by-two slats (2×2 boards) every 12 inches. Give each rung a good pull – make sure it won’t budge when you climb. (I learned the hard way that testing each rung really pays off.)
Advanced Holds and Traverses
Add pig-nose grips (small rock-climbing holds) to a sturdy wood panel by drilling pilot holes and screwing each grip in with lag screws (long heavy screws). Then mount ninja knobs (four-in-one plastic knobs) on another board in a chevron pattern to keep your hands guessing.
For a zig-zag traverse, slide a length of three-inch PVC pipe through two angled supports. Cap each end with plastic plugs to keep out bugs and give you a smooth grip as you move sideways from one support to the next.
• Quintuple steps: five 12-inch boards at a 15-to-20-degree angle
• Balance log: 6-to-8-inch diameter, blocks every 4 feet
• Hurdle pipe: 3-inch PVC pipe with a half-inch wall thickness
• Rope climb: 1½-inch rope (manila or synthetic) hung from a heavy-duty eye bolt (a bolt with a loop)
• Slackline: tension it low so it sags a little, about 1.5 feet off the ground
• Salmon ladder: rungs spaced 8 inches apart
• Fire pole: embed at least 2 feet into concrete footings
• Pipe traverse: cap each end of the pipe to keep insects out
Course Safety Guidelines & Protective Surfacing
Think of posts set in concrete like sturdy anchors, no wobble when you swing on monkey bars or hop between steps. That solid hold cuts the chance of a sudden tilt.
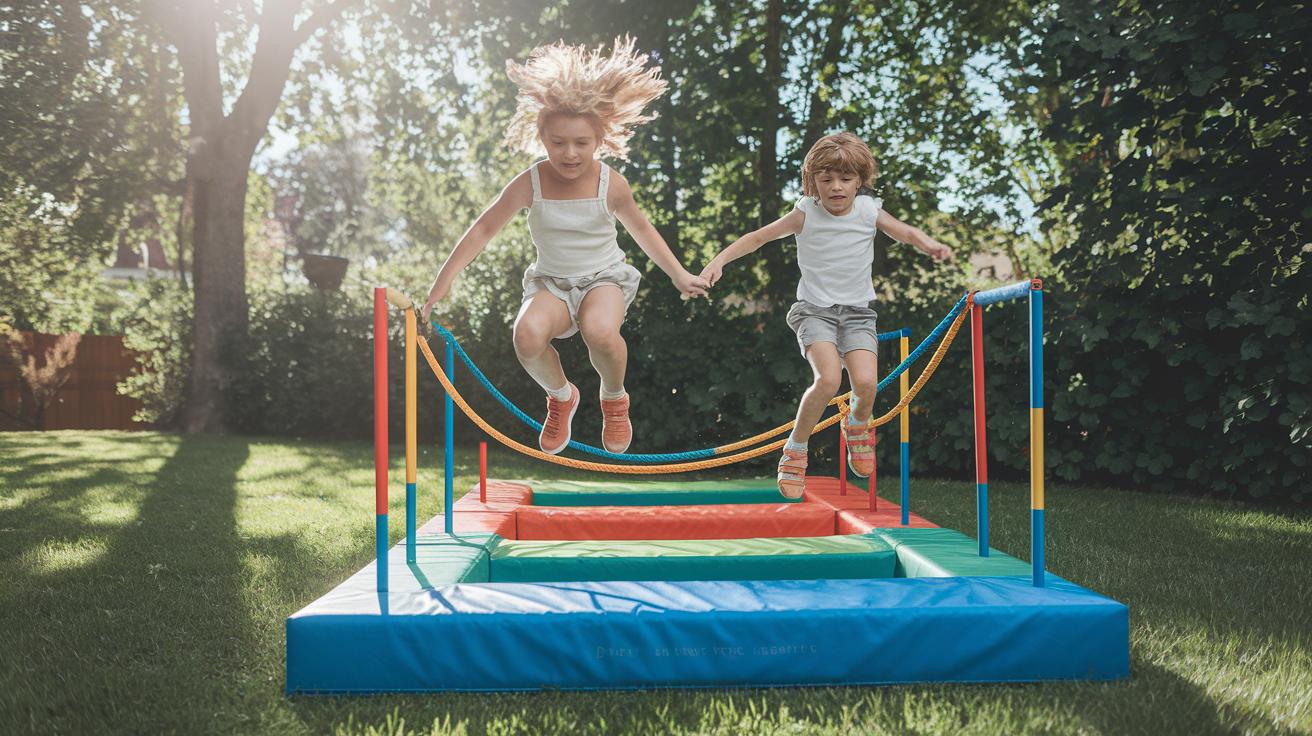
For everyday safety, grass plus a few gymnastics pads (they cost a few hundred bucks) can help. But nothing beats a true shock absorbing layer under your backyard ninja course. It’s like landing on a soft cloud.
Here are our favorite ground covers:
- Rubber mulch: soft granules that cushion your falls and drain water well
- Artificial turf: plush underfoot with built-in drainage
- Foam tiles: interlocking pads you snap together for quick coverage
- Gym mats: thick foam wrapped in vinyl, easy to move where you need extra padding
Lay weed barrier fabric (a cloth that stops weeds) over leveled soil (even, flat ground), then pour or roll out your surface of choice. Use edge boards or landscape timbers to keep mulch and turf in place. Foam tiles tuck right up to posts and trim neatly with a utility knife.
Make sure each obstacle has legs reinforced with rebar (steel rods) and holds secured with lag screws. That stops pipes from twisting and grips from loosening when you race across.
Set up a small first aid station in plain view of the course. Stock bandages, antiseptic wipes, ice packs, and a simple burn kit. Tuck emergency contacts into a clear plastic sleeve nearby. And mark an easy path from the course to your yard gate in case you need help fast.
Nearby, carve out a shaded rest spot, a bench or small canopy works great. A cool place to sip water between runs keeps everyone smiling and ready for the next lap.
Maintenance Schedule & Weatherproofing Your Backyard Ninja Course
Walking your ninja course each month feels like a mini adventure. You’ll spot loose parts before they cause trouble. I love the crisp snap of clean straps in the morning air.
Monthly Check-In
- Tighten the carriage bolts (big square-headed ones).
- Swap any stripped screws on your ninja knobs with thicker (stronger) fasteners.
- Tug every rope and strap so nothing slips during your dash.
Quarterly Care
- Sweep off crunchy leaves and muddy footprints.
- Check soil (top layer of dirt) around each post. If water pools, regrade so it slopes away or add a strip of gravel (small rocks).
- Inspect metal hangers and joist clips for bending or stress.
Annual Tune-Up
Each year, give your course a little spa day.
- Wood beams: brush on a fresh coat of outdoor stain or sealant (clear water repellent) to keep rot at bay. Oops, spilled a drop here. No biggie.
- Steel frames: spray on rust inhibitor and every two years reapply that shiny thermoplastic coating so they stay bright.
- Winter prep: remove delicate holds, drape a tarp over beams, and tuck fragile grips inside for safety.
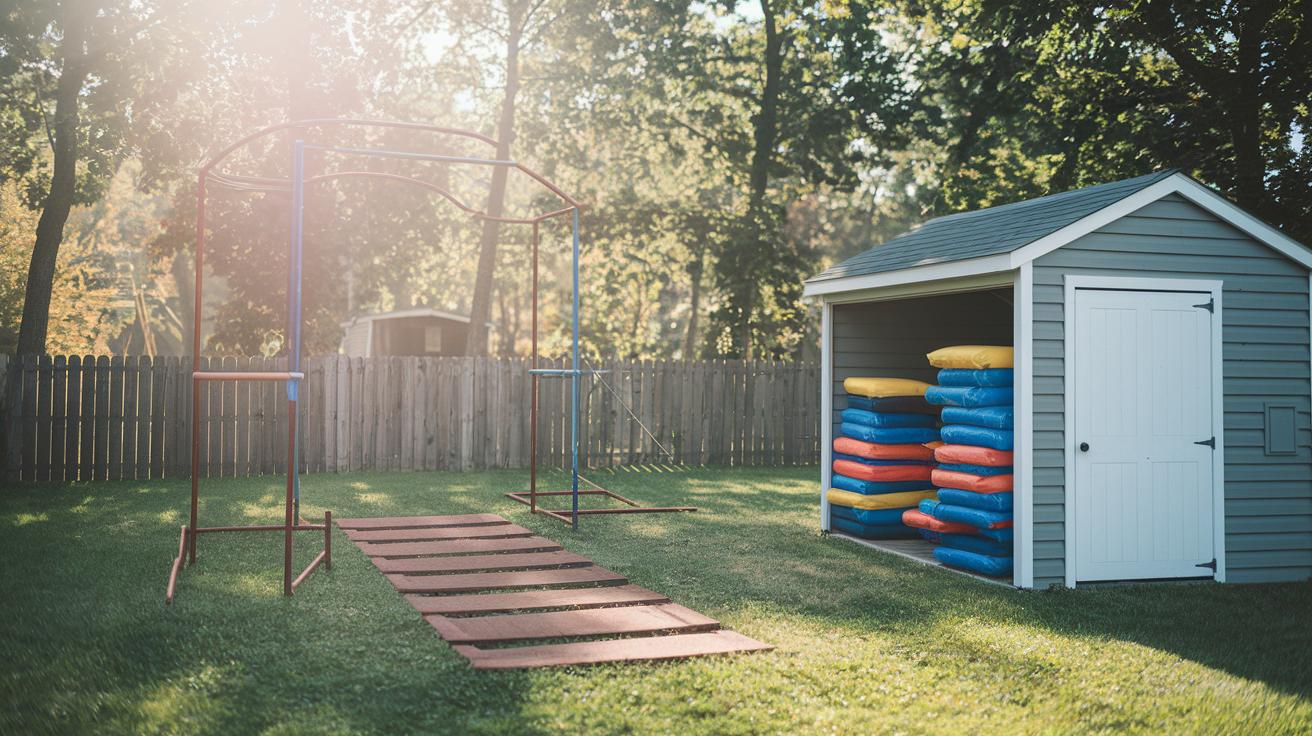
Seasonal Storage Tips
Store your gear where it feels cozy.
- Stash crash pads and spare grips in a pop-up tent next to your shed.
- Before the first freeze, wrap beams in weatherproof covers.
- Label boxes of holds so when spring comes you’re ready to mix things up.
Drainage and Runoff Fixes
Think of your yard like a sponge. Water should flow off and not pool around your posts. Grade the ground so rainwater runs away. For extra help, dig a shallow trench along your lanes, fill it with gravel, and watch puddles disappear.
Ninja Training Tips & Tracking Progress on Your Backyard Course
Keeping score turns workout time into friendly fun. Why not kick off a family pull-up challenge? Grab a big sheet of paper or whiteboard and let everyone log their reps each week. My kids (ages 7, 9, and 11) are racing to beat their fastest fire-pole climb, 7 seconds so far!
- Weeks 1 to 2: Do 3 sets of as many pull-ups (exercise where you hang by a bar and pull yourself up with your arms) as you can, resting 30 seconds between sets.
- Weeks 3 to 4: Add negative reps (lowering slowly) or use a resistance band to make extra reps.
- Jot each session down in a notebook or on your board, oops, I once wrote down 4 reps when I meant 5.
Grip strength drills make obstacles feel easy. Try hanging from monkey bars (horizontal bars for swinging) or pig-nose holds (pinching small boards to work your fingers). Time yourself moving sideways on gym rings for a ring traverse (moving across rings). And give the slackline (a tight line you balance on) a shot for extra balance work.
- Hangs: 3 tries of 20 seconds each, feel that forearm burn?
- Ring traverse: Measure how long it takes to cross, then rest one minute.
- Slackline: Aim for 10 steady steps without wobbling.
And don’t forget agility and mobility. Lay out an agility ladder (flat rungs on the ground for quick feet) next to your course. Do plyometric step-overs (explosive jumps over a low beam) to wake up your legs. Finish with gentle stretches, reach high for the sky, then fold forward to touch your toes, to soothe tired muscles before the next run.
Final Words
Surveying your yard, setting post depths, spacing out two 15–20 foot lanes, and flipping your blueprint to fit shows you’re in full swing.
Picking sturdy 6×6 pressure-treated posts or UV-coated steel, anchoring in concrete or earth screws, and weighing DIY kits vs pro help makes the build feel doable.
You’ve built monkey bars, quintuple steps, rope climbs, then added mulch or foam mats for softer landings.
Keep that monthly check on bolts, seal wood each year, and run family drills to track progress.
Your backyard ninja course is ready to become everyone’s favorite training spot.
FAQ
Can I build a ninja course without trees?
Building a backyard ninja course without trees is possible by installing sturdy posts set in concrete footings and using freestanding obstacles like PVC hurdles and portable rigs for training.
Where can I find a backyard ninja course near me?
You can find backyard ninja courses near you by checking local gyms, obstacle parks, or community centers online and using platforms like Google Maps or Yelp to locate nearby setups.
Are there backyard ninja courses for adults?
Backyard ninja courses for adults feature reinforced frames, adjustable obstacle heights, and challenging elements like salmon ladders, heavy-duty grips, and advanced traverses for a solid workout.
What about backyard ninja courses for kids?
Backyard ninja courses for kids include lower obstacle heights, cushioned landings, and playful designs such as small hurdles and gentle rope swings to build skills safely.
How much does a ninja warrior course cost?
A DIY backyard ninja course usually costs about $6,000 to $7,000 in materials, while modular kits or professional installation can cost more depending on obstacle count and build complexity.
How can I DIY or buy backyard ninja course equipment?
For DIY setups, use online blueprints, pressure-treated lumber, and basic hardware. Or purchase modular obstacle kits and ready-made equipment from specialty retailers to simplify assembly.
Do American Ninja Warrior contestants get to practice the course?
Contestants on American Ninja Warrior receive a brief practice session on a nearby replica course, typically just a few warm-up minutes rather than full timed runs before filming.
Can a 2-year-old do an obstacle course?
A 2-year-old can try a toddler-friendly obstacle course with soft mats, low platforms, and simple climbs, but constant adult supervision is essential for safety.