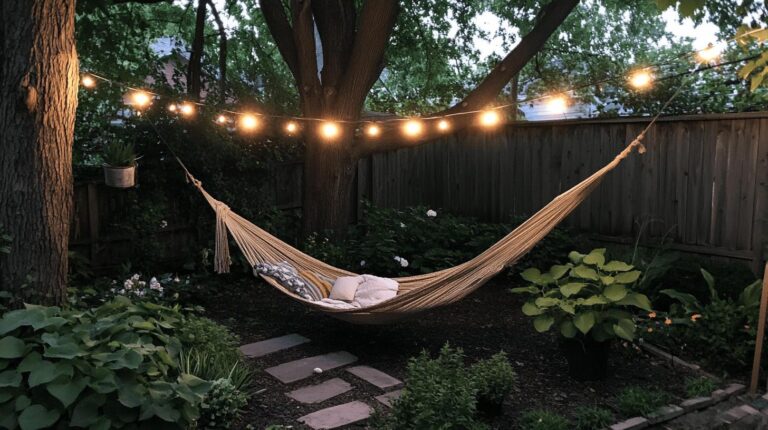
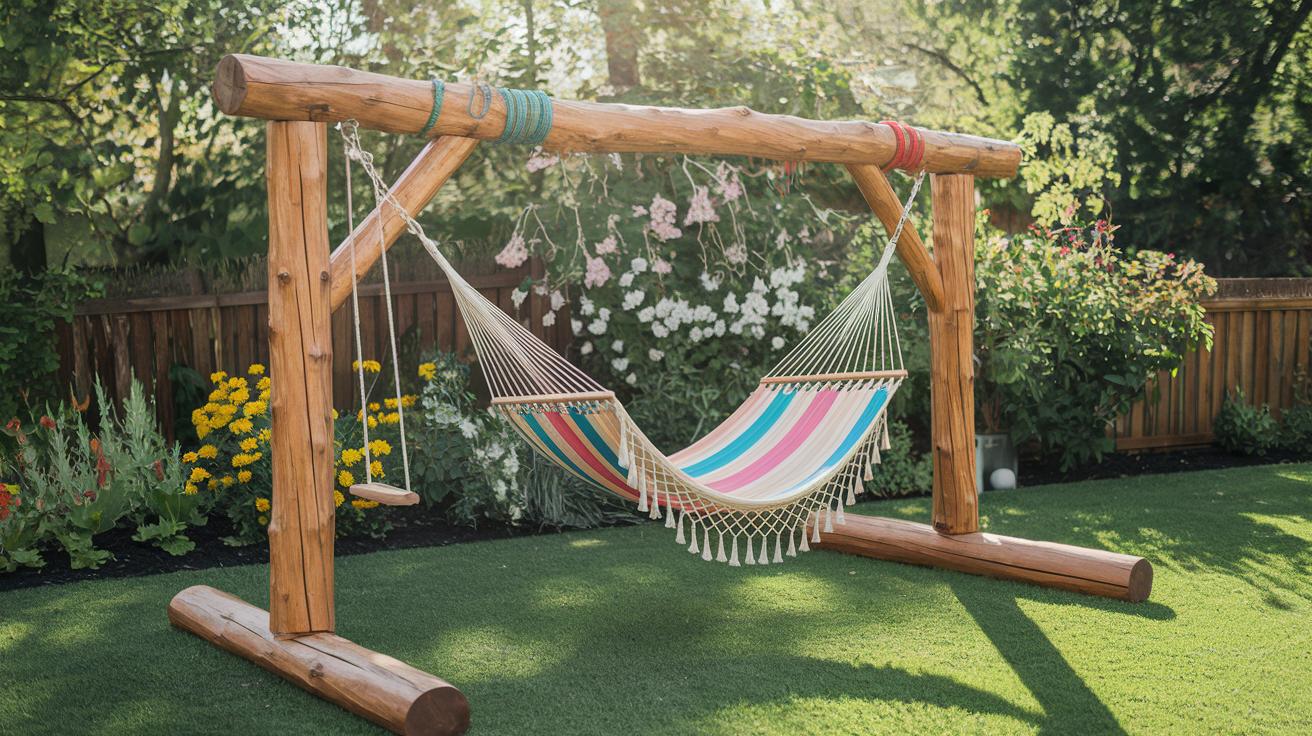
DIY Backyard Hammock Stand Plans For Garden Stunning
Who says you need a perfect tree to hang a hammock in your garden? I sure don’t.
You can ditch the guesswork and crazy price tag by building your own hammock stand. With just a few straight cuts in treated lumber (wood treated to resist rot), some bolts, and a bit of sanding to smooth rough spots, you’ll have a sturdy A-frame (triangular stand) ready to cradle your hammock. It feels like a gentle swing under the sky. Wow.
We’ll walk you through each step, from measuring every board to tightening the final lag bolt (heavy-duty screw). By the way, I once mismeasured and ended up with a wobbly side (oops!). So let’s keep it simple and follow the plan.
Your backyard is about to become the ultimate cozy retreat.
DIY Backyard Hammock Stand Step-by-Step Assembly Guide
Have you ever smelled fresh-cut wood in your yard? It’s like a mini forest right outside your window.
-
Grab four 4×4 pressure-treated boards for your legs. Pressure-treated wood (wood soaked in protective chemicals) fights rot. Measure and mark each board for 5 to 6 feet. Set your circular saw (a power tool with a spinning blade) to a 15° angle. Cut along the lines. This A-frame support (a structure shaped like the letter A) is the backbone of your hammock stand.
-
After cutting, the wood can feel a bit rough. Grab some 120-grit sandpaper (coarse paper that smooths rough wood). Sand every edge and flat surface until it feels smooth under your palm. Then switch to 220-grit sandpaper (fine paper for a final touch) and go over it once more to zap any last splinters. Feel that wood smooth out? And um, gloves help here too.
-
Lay two legs side by side with their tops about 18 inches apart. Slide a 2×4 cross brace (a board that connects the legs) between the peaks. Secure it with heavy-duty carriage bolts (bolts with rounded heads), washers, and nuts. These fasteners help your A-frame stay rock solid.
-
Repeat step 3 for the second A-frame. Stand both frames upright on level ground. Make sure they look like twins, same height and angle. That way, installing the top beam will be smooth sailing.
-
Set an 8-foot 4×4 horizontal beam across the tops of your A-frames. Mark pilot holes (small starter holes for screws) 2 inches from each end. Drill ½-inch holes all the way through the beam and into the A-frames. Fasten everything with 400-pound-rated lag bolts (heavy-duty screws) and add washers under the heads for extra grip.
-
Time for the base supports. At ground level, attach 3-foot 2×4 boards perpendicular to each A-frame leg. Let each board stick out about a foot past the leg. Drive in exterior-grade screws every 8 inches. This step keeps your stand from tipping on uneven garden soil.
-
Now the hanging hardware. Pre-drill ½-inch holes at each beam end deep enough so eye bolt loops sit flush with the wood. Screw in stainless-steel eye bolts until snug. Clip on snap hooks or carabiners and give each a firm tug to test its strength.
-
Almost there! Use a wrench to snug every bolt and screw. Give the whole frame a gentle shake. No wobble? You’re ready for a lazy afternoon swinging under the sky.
Materials & Tools for DIY Backyard Hammock Stand in the Garden
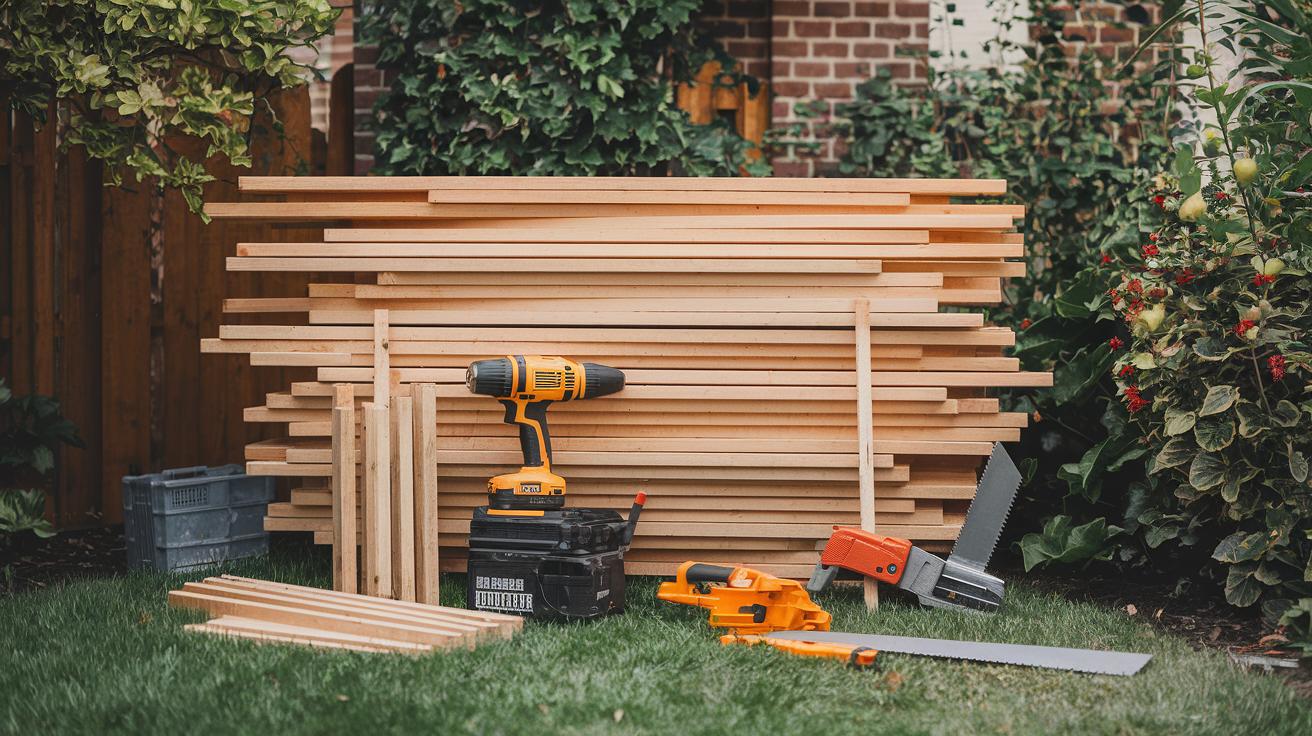
Ready to build your own cozy hammock spot? Here’s what you’ll need for about $80 to $150, or you might find some of this in your garage already.
Materials:
- 4×4 PT lumber (8 ft) (pressure-treated wood that resists rot) – 4 pieces
- 2×4 PT lumber (8 ft) (pressure-treated boards) – 4 pieces
- Lag bolts, ½" x 4" (thick screws to hold pieces tight) – 4 bolts
- Carriage bolts, ½" x 6" (bolts with rounded head) – 4 bolts
- Exterior-grade screws, 3" (screws that resist weather) – 16 screws
- Eye bolts, ½" (hooks for hanging) – 2 pieces
- Snap hooks or carabiners (metal clips for quick hang) – 2 sets
- Exterior wood stain or sealant (protective finish for wood) – 1 quart
- Sandpaper (120-grit for rough sanding, 220-grit for smooth finish) – a few sheets
Tools:
- Circular saw (for cutting boards)
- Cordless drill (battery drill) – start with a small pilot bit (tiny bit that prevents splitting)
- Measuring tape (to check lengths)
- Carpenter’s square (for perfect right angles)
- Wrench (to tighten bolts)
- Power sander or sanding block (sand first with 120-grit, then finish with 220-grit)
If you’d rather have cedar, swap in cedar planks instead of pressure-treated lumber. They smell like a forest hug on a warm afternoon, though they cost a bit more. Once you’ve got everything together, you’re all set to build a sturdy frame ready for sun, rain, and lazy hammock days.
DIY Backyard Hammock Stand Blueprint & Dimension Calculations
Ever dreamed of stretching out in your own hammock on a warm afternoon? Building your own stand is easier than you think. You’ll need just a few boards, some screws, and a friendly afternoon project vibe.
Quick Guide: Dimensions & Hardware
| Component | Measurement |
|---|---|
| A-frame legs | 5 ft 6 in height; 3 ft base spacing |
| Cross brace | 2×4 spanning 18 in at peak |
| Horizontal beam | 8 ft length; ½ in pilot holes 2 in from ends |
| Base supports | 3 ft length; 1 ft overhang each side |
Your A-frame legs are the backbone. Set them so they’re 3 feet apart on the ground and rising 5 feet 6 inches at the top. Then slide in that 2×4 cross brace where the legs meet, about 18 inches up, to keep it from tilting.
For the horizontal beam, pick a straight 8-foot board. Drill tiny pilot holes half an inch wide, two inches from each end. This makes it easy to screw in your hammock hooks without cracking the wood.
The base supports give you extra balance. They’re 3-foot boards that slip under the legs with a foot sticking out each side. This little overhang stops your stand from wobbling when you climb in.
Time to kick back and enjoy your handiwork.
Outdoor Finishing & Weatherproofing for DIY Garden Hammock Stand
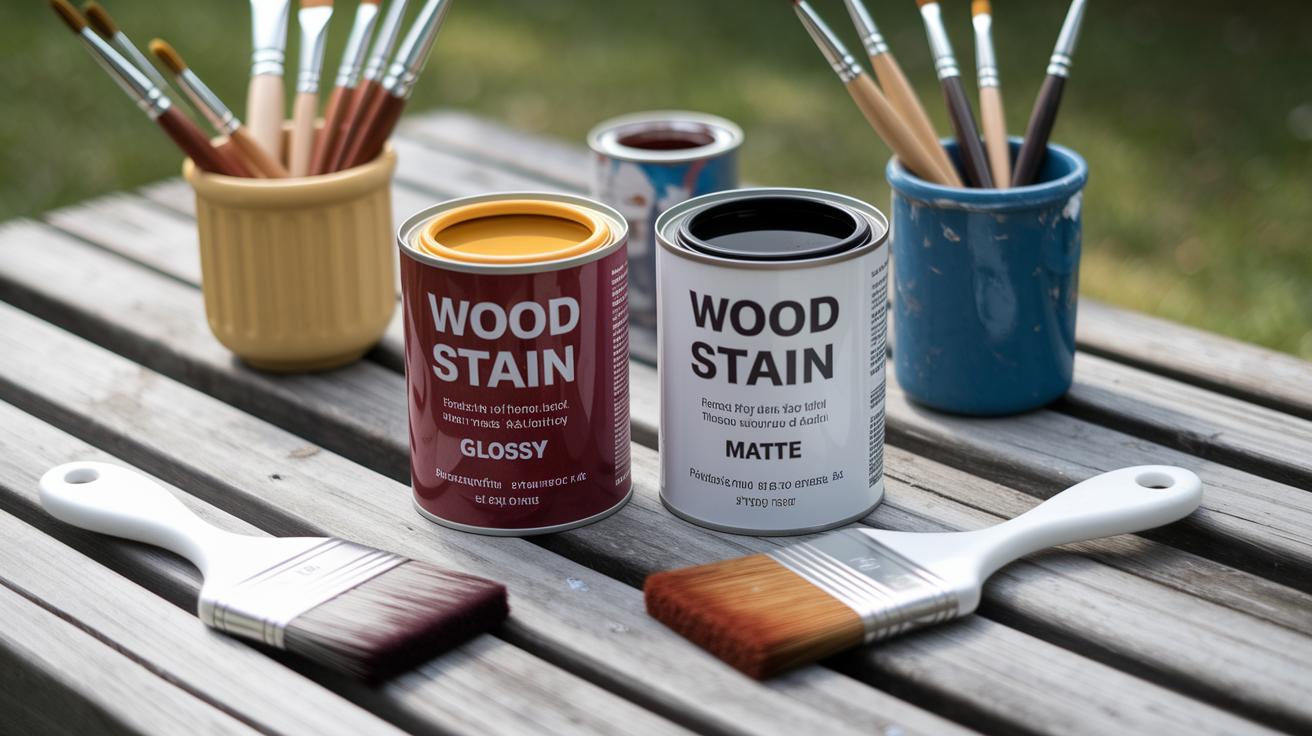
Let’s give your hammock stand some armor! Smooth a thick coat of exterior wood stain (colored finish that protects wood) or sealant (clear shield) onto every board. Make sure it’s labeled for outdoor weatherproof finishing so it fights moisture and mildew. Then wait a full 24 hours before you go back for coat two. That pause helps the stain sink in and darken, locking protection into the wood pores.
Oil-based stain (soaks deep) dries slowly but lasts long, while water-based stain washes off with soap and water and often has UV blockers (sun-damage fighters). Those UV blocks stop the sun from turning your stand gray and brittle. Pick the one that fits your schedule and cleanup style.
Every cut end grain (the little lines where wood fibers show) soaks up water fast. So dab on a grain sealer (liquid that seals those cut fibers) at each exposed edge. This thin barrier keeps rain from creeping into the boards and causing cracks during wet spells.
Don’t skip the metal bits. Give bolts, eye hooks, and carriage nuts a coat of corrosion-resistant paint (rust-fighting paint) or mist them with a rust-inhibitor spray (spray that blocks rust). Let the hardware treatments dry fully before you snap everything back together.
Once all your coatings are hard to the touch, give the stand a gentle shake. No peeling or flaking? You’re all set for years of lazy afternoons under the sky.
Stability, Location & Safety for Your DIY Backyard Hammock Stand
Pick a flat, level spot in your yard before you think about hanging that hammock. Lay out the A-frame bases and roll a 4-foot level gently across the 2×4 supports. Do you see the bubble off-center? Just slide the frames until it settles right in the middle. Feels good.
Got soft soil? Dig or drive in 12-inch ground sockets (sturdy metal tubes that hold your legs steady) and slide each leg inside. No fancy tools? Pour a one-inch layer of compacted gravel (small crushed stones) under each base so your stand won’t sink when it rains.
On a slope? Screw short 2×4 cross-supports (extra wood pieces) under the legs to widen the footprint by about a foot. You’ll get more grip and peace of mind. By the way, my cat loves sunning on those extra boards.
Good drainage means fewer muddy puddles under your stand. Pick a spot that tilts gently away or rake gravel into shallow trenches around each leg. Then water will run off instead of sitting against the wood and metal hardware.
Here’s a quick safety checklist every few weeks:
- Tighten all lag bolts and carriage nuts with a wrench until snug (hand-tight plus one quarter turn).
- Look for rust or rough spots on eye bolts and snap hooks; swap in new hardware if metal feels gritty.
- Check the ground sockets or gravel beds for any shifts; dig and re-compact if legs start to lean.
- Make sure your hammock plus gear never weighs more than 400 pounds total.
My neighbor skipped the gravel step once and ended up with a leaning frame after a spring downpour. A little prep now means no wobble or creaks later, just lazy swaying under the sun.
Design Variations & Customizations for DIY Backyard Hammock Stand
Got a tiny yard or need to tuck your stand away when guests pop over? Try folding it like a camping chair. Just add hinge plates (little metal parts that let the A-frame pivot) at the top joints. It snaps together and folds flat for easy moving or hiding in the shed.
Here are some easy ways to make it yours:
- Add hinge plates (metal parts that let each A-frame fold) at the peak so the whole frame lays flat
- Swap pressure-treated lumber (wood treated to resist rot) for cedar (a fragrant, weather-friendly wood) for a rustic touch
- Paint the frame in soft grays or bright pastels to match your garden vibe
- Fasten a bench across the base supports for extra seating or a spot to set a drink down
- Screw hooks into the top beam to hang a porch swing or string up lanterns
- Want more lounge ideas? Check out a patio daybed for another cozy seating option
I once painted mine fire-engine red – oops, bit bold, right? But it sure made a statement. With a few tweaks and a pop of color you’ll have a stand that feels like home and folds away when you need room. Ready to give it a try?
Final Words
You’ve cut the legs, fastened the crossbeam, and sanded every edge. You know where to grab materials and which tools do the trick.
You’ve marked your measurements, checked load specs, and sealed it against sun and rain. You’ve learned how to check for level ground and stay safe.
You sketched design tweaks for a foldable frame or color splash. That makes it truly yours.
Now it’s time to hang your chair and relax. Enjoy every sway with your DIY backyard hammock stand plans for garden.
FAQ
How do I cut and prepare the A-frame legs?
You should cut four 4×4 pressure-treated lumber legs at a 15° angle so each stands about 5 ft 6 in tall, then sand edges with 120-grit sandpaper to remove splinters.
What materials and tools do I need to build a hammock stand?
You need four 8 ft 4×4 and four 8 ft 2×4 pressure-treated lumber pieces, lag and carriage bolts, exterior screws, eye bolts, snap hooks, wood stain, sandpaper, a saw, drill, tape measure, square, wrench, and sander.
How do I attach the crossbeam and secure it?
You mount the 8 ft 4×4 beam atop each A-frame, pre-drill ½″ pilot holes, then fasten with lag bolts rated for 400 lbs and add eye bolts with snap hooks for hammock suspension.
What are the key dimensions for a stable hammock stand?
You space A-frame bases 3 ft apart, cut legs to 5 ft 6 in, use an 18 in 2×4 cross brace at the peak, and extend 3 ft base supports 1 ft beyond each leg’s footprint.
How do I weatherproof the hammock stand for outdoor use?
You apply two coats of exterior wood stain or sealant with UV inhibitors, wait 24 hours between coats, seal all end grain cuts, and brush metal hardware with a rust-inhibitor.
How do I keep the stand stable and safe?
You pick a flat spot, use a 4 ft level across base supports, add ground sockets or compact gravel under soft soil, tighten bolts monthly to spec, and stay below the 400 lbs limit.
What customization options can I add to my hammock stand?
You can install hinge plates for a fold-flat frame, swap in cedar for a rustic look, paint in muted grays or pastels, add a bench across the base, or hang lanterns from the beam.