How to Landscape a Sloped or Hilly Backyard
A sloped backyard isn’t a problem — it’s a design opportunity. Properly landscaped, the same slope that looks like a maintenance headache becomes a series of usable levels with retaining walls, terraced beds, a flat deck on top, and a rock garden on the steepest section. The challenge isn’t the slope itself; it’s choosing the right combination of techniques for your particular grade, budget, and aesthetic. This guide covers seven main approaches — terraces, decks, drainage, planting, rock gardens, low-maintenance budget tips, and entertainment zones — with practical cost ranges and skill levels for each.
Why Slopes Need Different Treatment
Slopes pose three problems standard landscaping doesn’t have to solve. Erosion: rain runs downhill, carrying soil with it, eventually exposing roots and undercutting any flat plantings. Drainage: water can pool against foundations or pool unevenly in low spots, creating muddy patches and dead zones. Usability: sloped ground is hard to walk on, impossible to set furniture on, and unwelcoming for most outdoor activities.
Every sloped-backyard landscaping technique addresses at least one of these. Terraces and retaining walls create flat usable space and stop erosion in one move. Drip irrigation, French drains, and erosion-control fabric handle the water-management side. Rock gardens turn the steepest sections (often 3:1 grade or steeper) into intentional features rather than unworkable problems.
The first decision is measuring your slope. The standard measurement is rise:run — how many feet of vertical change for each horizontal foot. A 1:4 slope (1 foot of vertical drop for every 4 feet horizontal) is mild enough for most planting techniques. A 1:2 slope is too steep for traditional lawn but ideal for terraces and rock gardens. Anything 1:1 or steeper genuinely needs retaining walls or engineered solutions.
Most backyard slopes fall between 1:6 and 1:3. That range is where the techniques below shine.
Building Terraces and Retaining Walls
Terracing — cutting the slope into a series of flat steps held back by retaining walls — is the single most useful technique for sloped backyards. Each terrace becomes a usable flat surface for planting, seating, or even small structures.
Materials and cost:
- Concrete blocks (interlocking systems): Most popular DIY option. $20–$50 per square foot of wall face. Click-together systems like Allan Block or Pavestone are forgiving for first-timers.
- Natural stone: Most attractive but most expensive. $40–$80 per square foot. Requires more skill to dry-stack.
- Timber (pressure-treated 6×6 landscape timbers): Cheapest, 10–15 year lifespan. $15–$30 per square foot. Less permanent than stone.
- Poured concrete: Most permanent and rigid. $50–$100 per square foot. Best for professional installation.
How to build a basic block retaining wall (up to 3 feet tall — taller walls usually need engineering permits):
- Mark the wall line with stakes and string. Dig a trench below the local frost line — usually 12–24 inches deep depending on climate.
- Add 4 inches of crushed gravel base in the trench. Tamp firm with a hand tamper or rented plate compactor.
- Lay the first course of blocks on the gravel base. Check level on each block — the first course is the foundation for everything above.
- Stack subsequent courses with the staggered (overlapping) joint pattern. Most modern block systems have integrated lips that automatically set the right setback.
- After every two courses, place geogrid reinforcement fabric extending back into the soil 6+ feet to anchor the wall against pressure.
- Install a perforated drainage pipe behind the wall at the base, then backfill with gravel (not soil) for the first 8–12 inches behind the wall. Soil-only backfill traps water and causes wall failure.
- Finish with topsoil on top of the gravel backfill, planting groundcover or shrubs to help hold soil.
For walls over 3 feet, get an engineer involved — local codes in most jurisdictions require it, and improperly built taller walls fail dramatically.
Bench-integrated retaining walls are a high-leverage feature. Add a wide flat cap to your retaining wall at 18-inch seat height with 16-inch depth, and the wall doubles as bench seating. Add steel brackets and a weatherproof timber or composite plank top, finished with all-weather cushions, and the same wall becomes a seating area along the terrace edge.
Drainage and Erosion Control
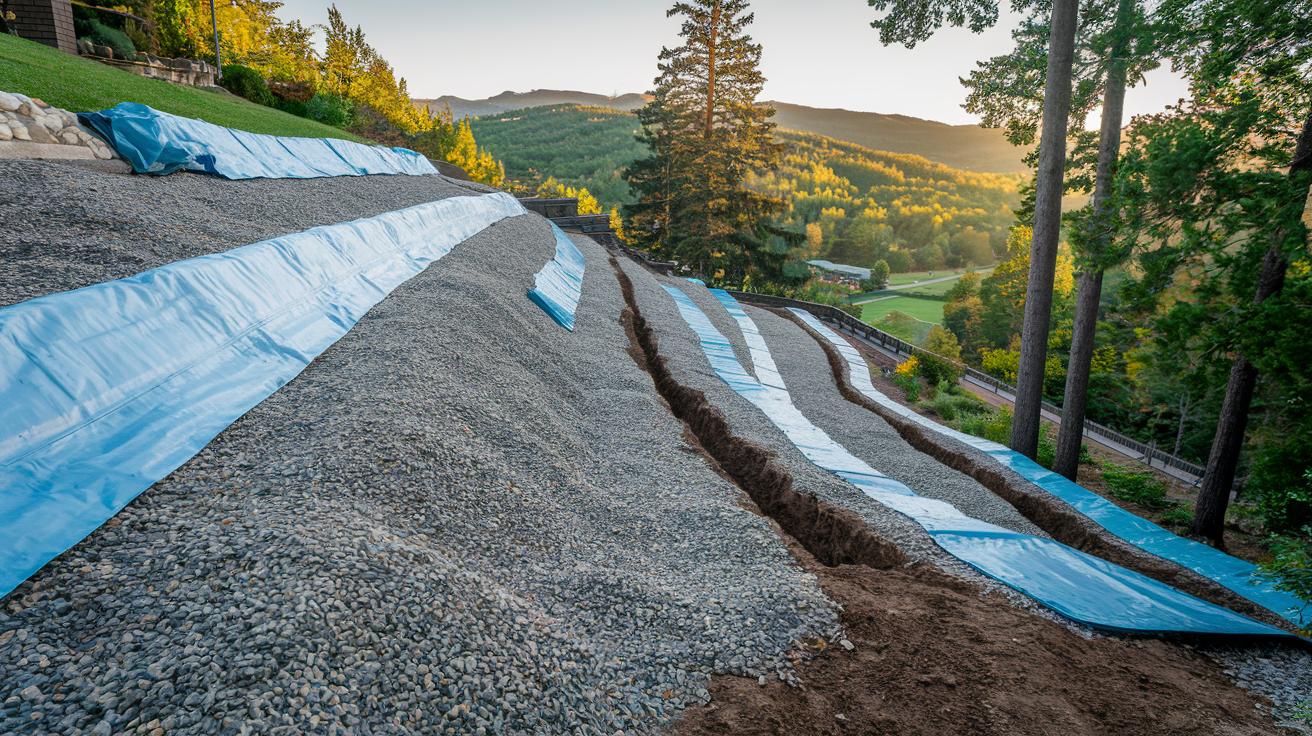
Even if you don’t terrace the slope, drainage and erosion control are non-negotiable. Without them, even modest 1:6 slopes lose soil to every heavy rain.
Three main techniques:
- French drain. A trench filled with gravel containing a perforated pipe at the bottom. Water enters through holes in the pipe and flows downhill to a daylight outlet, drain field, or storm drain. Best for redirecting subsurface water away from problem areas. Cost: $300–$800 for a typical 50-foot run.
- Erosion-control fabric (jute, coir, or polypropylene mesh). Rolled out over bare soil and pinned with landscape staples. Holds soil in place while plants establish. Biodegrades in 1–3 years (jute/coir) or stays permanent (polypropylene). Cost: $0.10–$0.50 per square foot.
- Geogrid. Stronger plastic mesh used under terraces to bind layers of soil. Different from erosion-control fabric — geogrid is structural, not just surface. Cost: $0.50–$1.50 per square foot.
Sloped-bed prep sequence if you’re planting on a 1:4 to 1:6 slope:
- Roll out erosion-control fabric over the planting area, pinned with U-shaped landscape staples every 2 feet.
- Cut X-shaped holes in the fabric where each plant goes.
- Plant directly through the fabric, settling soil firmly around roots.
- Mulch 2–3 inches deep over the entire fabric to hide it and slow evaporation.
- Water deeply at planting. Fabric stays in place under the mulch for 2–3 years, holding soil while plants establish.
By the time the fabric breaks down (jute and coir varieties), the plants you planted through it should have established root systems substantial enough to hold the slope on their own.
Decks, Stairs, and Hardscape on Slopes
A deck on a slope creates instant flat usable space. The big cost driver is post height — taller posts need deeper concrete footings and more material.
Deck specifics for sloped backyards:
- Use 6×6 pressure-treated posts as primary supports. Dig post holes below the frost line — 36″ or deeper in northern climates, 12″ in southern ones.
- Pour at least 12 inches of concrete footing per post. Set posts so they extend at least 6 inches above grade for ventilation.
- Connect to the house with a ledger board (lag-bolted to the rim joist) flashed with metal to prevent water intrusion.
- Frame the deck with treated 2×8 or 2×10 joists, spaced 16 inches on center.
- Decking boards on top — composite ($3–$5 per linear foot) or pressure-treated wood ($1–$3 per linear foot).
Cost for a sloped-backyard deck: $5,000–$15,000 for a typical 200–400 square foot deck depending on materials and post heights. DIY skill required: moderate. Permits required in most jurisdictions.
Stairs and pathways connect terrace levels and tie the slope together visually:
- Stone or concrete paver steps. Standard riser height 6 inches, tread depth 12+ inches. Build on a gravel base, edge with restraints to prevent shifting.
- Permeable pavers in pathways. Let rain soak through rather than running off. Especially valuable on slopes where surface runoff erosion is the main problem.
- Timber retaining steps. Pressure-treated 6×6 timbers laid across the slope with stakes anchoring them. Cheap and rustic; lasts 10–15 years.
Outdoor lighting on stairs is more than aesthetic — it’s a safety necessity on slopes after dark. Low-voltage step lights ($30–$60 per fixture, $300–$600 installed for a 6-step stairway) tuck into the riser face. Solar step lights ($15–$30 each) snap on without wiring but produce less light. Plan one fixture per 2–3 steps minimum.
Plants That Hold Soil on a Slope
The right plants on a slope do two jobs: hold soil with root systems and create visual interest. The wrong plants either fail to root deeply enough to anchor soil or grow so aggressively they become invasive.
Best slope plants by category:
- Spreading groundcovers — periwinkle (Vinca minor), creeping juniper, creeping thyme, ice plant, sedum. Form dense mats that physically hold soil. Most spread by runners or rooting stems. For more cultivars matched to specific conditions, see our roundup of ground cover plants for your backyard.
- Ornamental grasses — feather reed grass, blue fescue, little bluestem, prairie dropseed. Fibrous root systems bind soil. Tall grasses also slow downhill water flow.
- Drought-tolerant perennials — lavender, Russian sage, sedum (taller varieties), yarrow, coneflower. Best for sunny exposed slopes that drain fast.
- Native shrubs — dogwood, serviceberry, beautyberry, oakleaf hydrangea. Substantial root systems for slope anchoring. Choose species suited to your local climate.
- Small trees — Japanese maple, redbud, river birch. Long taproots stabilize slopes that drought-tolerant plants alone can’t handle. Use sparingly on smaller slopes.
For sunny dry slopes specifically, a xeriscape approach pairs well — drought-tolerant natives with drip irrigation rather than trying to keep traditional plants happy. See our guide on how to plan a xeriscape garden for your yard for the planting palette and watering strategy.
For shaded slopes (under trees, north-facing sides of houses), shade-tolerant plants are essential. Our butterfly garden plants for shade list covers low-growing options that hold soil while attracting pollinators.
One planting rule for slopes: plant in staggered diagonal rows rather than straight horizontal lines. Diagonal planting interrupts water flow more effectively, slowing erosion. Plant 6 inches closer together on slopes than you would on flat ground — closer spacing fills in faster, giving you root coverage sooner.
Rock Gardens and Water Features

Rock gardens turn the steepest section of a slope into a feature rather than a problem. Boulders anchor soil mechanically; gravel between rocks lets water filter through; planting pockets between boulders hold drought-tolerant plants that fit the look.
Building a slope rock garden:
- Sketch the layout. Larger boulders go at the bottom (visually grounding the composition) and as anchors for higher levels.
- Excavate planting pockets at intervals, scaled to the plants you’ll add.
- Spread 2–3 inches of drainage gravel as a base layer where boulders will sit.
- Place boulders. Aim for the look that 2/3 of each boulder is below grade — this makes them look anchored rather than placed.
- Fill between boulders with a gritty soil mix (1 part standard topsoil, 1 part coarse sand, 1 part small gravel) for the planting pockets.
- Plant alpine and rock-garden varieties — sedums, sempervivums, dwarf evergreens, creeping thyme, alpine asters.
- Topdress with a final layer of small decorative gravel around plants to retain moisture and visually unify the planting.
For boulders larger than what you can move with a wheelbarrow (anything over ~100 lbs), rent a small skid steer or mini-excavator for placement. Don’t try to roll large boulders on a slope by hand.
Water features on slopes work especially well because gravity does the work. A small recirculating waterfall built into the slope with a pump tucked at the base creates the sound of running water without major plumbing. Solar-powered options skip wiring entirely. Materials: $200–$600 for a kit; $1,000–$3,000 for a custom-built feature with stone work.
Low-Maintenance and Budget Options
If extensive terracing or hardscape isn’t in the budget, several lower-cost options still tame a slope:
- Artificial turf — $5–$15 per square foot installed. No mowing, no watering, no fertilizing. Works on slopes up to about 1:3. Stays green year-round. Sun exposure can shorten lifespan in extreme climates.
- Gravel ground cover — $1–$3 per square foot. Plant native shrubs and ornamental grasses through landscape fabric, then top with 2–3 inches of gravel. Almost no maintenance once established.
- Vertical-blade reel mower ($150–$300) — Standard rotary mowers struggle on slopes; reel mowers cut more safely sideways across grade. Works on slopes up to 1:4.
- Drip irrigation ($60–$120 for a basic kit) — Replaces ongoing hand-watering of slope plantings. Drip emitters at each plant keep water at the root zone instead of running downhill.
- Native plant restoration — Hard to beat for ongoing cost. Native species evolved for your conditions, need essentially no supplemental water or fertilizer once established. Year 1 costs more (mulch, fabric, plants) but year 2+ approaches zero.
For households where time matters more than upfront cost: artificial turf or gravel-and-natives are the lowest-maintenance solutions. For households where upfront budget matters more: native plant restoration costs more upfront in plants but pays back over 3–5 years.
Fire Pits and Entertainment Zones
A flat terrace dedicated to a fire pit and seating transforms a sloped yard from “back of the property” to “destination.” The build sequence:
- Pick a terrace at least 12×12 feet for a single fire pit with seating around it. Smaller works but feels cramped.
- Clear a 3-foot perimeter zone around the fire pit location for safety. No grass, no overhanging branches, no flammable furniture within that zone.
- Lay pavers or cast stone blocks for a sturdy pad — at least 8 feet across so embers don’t land on bare soil.
- Set the fire pit ring or bowl in the center. Pre-built rings cost $100–$400; custom stone-built pits cost $500–$2,000.
- Scatter a 6-inch ring of gravel or decomposed granite around the pit edge to catch embers and clearly define the safety zone.
- Position seating outside the safety zone — built-in stone benches, prefab Adirondack chairs, or stone seats integrated into the retaining wall.
- Add solar step lights or low-voltage path lights along the terrace edges. Important on slopes for finding the way back uphill after dark.
Code check: many municipalities require a permit for permanent fire pits or have specific setback rules from property lines, structures, and gas lines. Check before building.
Putting Your Sloped Backyard Plan Together
For a typical 1:4 sloped backyard with $5,000–$10,000 budget, a reasonable project plan looks like this:
Year 1 ($3,000–$5,000): Install the main retaining wall(s) and one or two terraces. Add drainage if water pooling is a current issue. Plant the most visible flat areas with established plants. Start fast-growing groundcovers on the cut-bank slopes.
Year 2 ($1,000–$2,500): Add the deck or paved patio on top of the highest terrace. Install stairs connecting terrace levels. Add lighting for evening usability.
Year 3 ($1,000–$2,500): Fire pit area and entertainment zone on the chosen terrace. Final planting layer including specimen shrubs and trees. Drip irrigation system extension if needed.
Splitting the project across years lets you see how each phase performs before committing to the next. The terraces and retaining walls done in year 1 also establish the geometry that everything else builds on.
For the overall planting strategy on the planted terraces, our walk-through of a DIY pollinator garden layout covers how to combine shrubs, perennials, and groundcovers into a coherent design that supports pollinators while doing the slope-stabilization work.
Common Questions About Sloped Backyards
What is the best landscaping approach for a sloped backyard?
The best approach combines terraces or retaining walls (for usable flat space and erosion control), drainage solutions like French drains, slope-stabilizing plants like spreading groundcovers and ornamental grasses, and one or two hardscape elements like a deck or fire pit on a flat terrace. The specific mix depends on your slope grade — 1:4 and gentler is easiest; 1:2 and steeper needs significant retaining walls.
How can I make my sloped backyard more usable?
Create flat zones using retaining walls or raised decking. Even one terrace transforms a slope from unusable to functional. Add level pathways with proper steps connecting different elevations. Place seating, dining, or play areas on the flat terraces. The key is generating multiple usable flat spaces rather than trying to fight the slope on its entire length.
How do I landscape a slope on a budget?
Use timber 6×6 landscape timbers for low retaining walls ($15–$30 per sq ft) instead of stone or concrete blocks. Pick native groundcovers that spread on their own rather than buying mature shrubs. Install gravel paths instead of paved walkways. Use erosion-control fabric ($0.10–$0.50 per sq ft) to stabilize plantings while they establish. DIY rather than hiring a contractor where skill level allows.
What does it cost to landscape a sloped backyard?
Costs vary by approach: rock gardens $500–$2,000; basic terraces $1,000–$4,000; multi-tier retaining walls $20–$50 per sq ft of wall face; sloped decks $5,000–$15,000; full landscape design with multiple terraces and hardscape often runs $10,000–$30,000. DIY can cut costs by 40–60% on hardscape elements.
What are low-maintenance landscaping ideas for a slope?
Artificial turf eliminates mowing and watering on slopes up to 1:3. Gravel ground cover with native shrubs needs no maintenance after establishment. Drip irrigation replaces hand-watering. Native plant restoration matches species to your climate so they thrive with minimal input. Combining 2–3 of these creates a slope that essentially manages itself.
What plants are best for holding soil on a slope?
Spreading groundcovers (periwinkle, creeping juniper, creeping thyme, ice plant), ornamental grasses (feather reed grass, little bluestem, prairie dropseed), drought-tolerant perennials (lavender, Russian sage, yarrow), native shrubs (dogwood, serviceberry, beautyberry), and small trees with deep root systems. Plant in staggered diagonal rows rather than straight horizontal lines for better erosion control.
Do I need a permit to build a retaining wall in my backyard?
Most jurisdictions require permits for retaining walls over 3–4 feet tall. Many also require engineering design for walls over that height because improperly built tall walls can fail catastrophically. Check your local building department before starting. Smaller walls under 3 feet usually don’t require permits but should still follow proper construction techniques.
How do I prevent erosion on a sloped yard?
Combine three strategies: install French drains to redirect water away from problem areas, lay erosion-control fabric or geogrid before planting, and plant deep-rooted spreading groundcovers across the slope. Mulch heavily after planting to slow surface runoff. Terraces with retaining walls solve erosion completely on steeper sections by removing the slope itself.