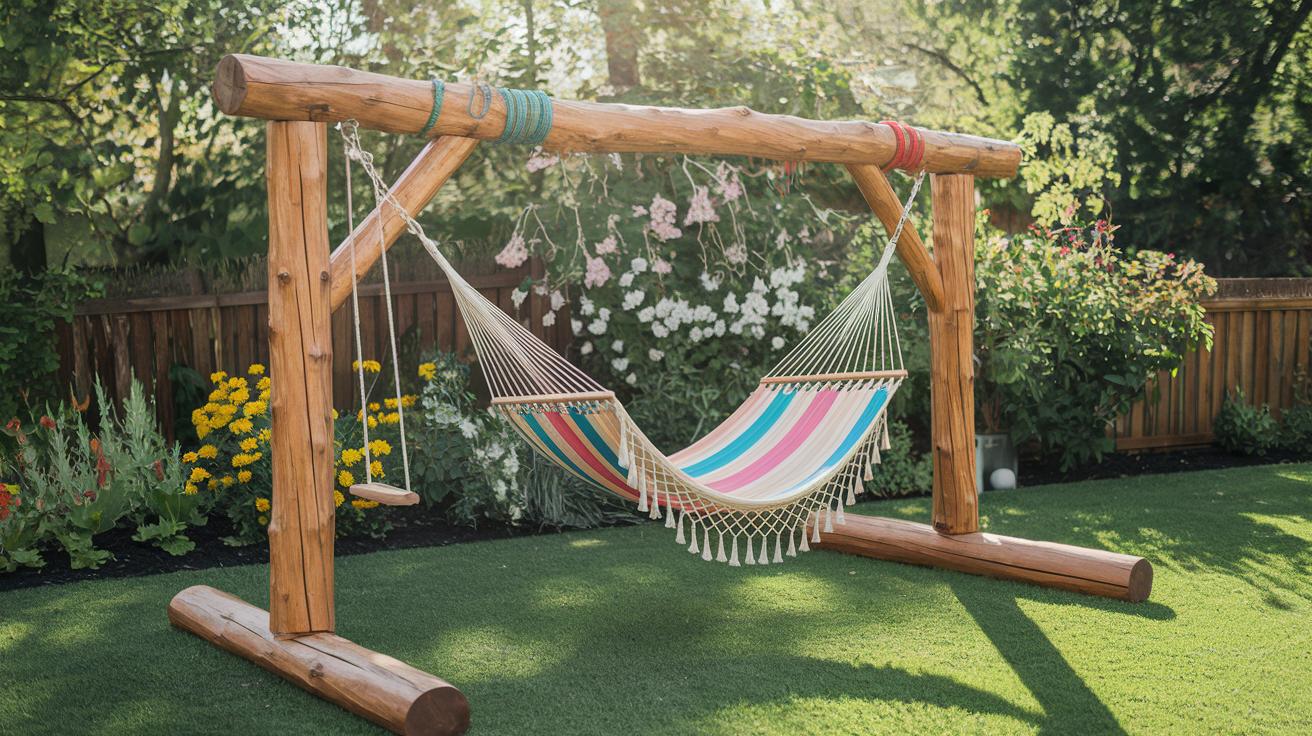
DIY Backyard Hammock Stand Plans and Build Guide
Buying a steel hammock stand runs $100 to $300 depending on size and quality. Building your own A-frame stand from pressure-treated lumber lands at $80 to $150 in materials and takes a Saturday — and the result is sturdier, lasts longer, and can be customized to a span and finish that store-bought stands don’t offer. The build uses standard lumber, a circular saw, a drill, and basic hand tools. No advanced carpentry required.
This guide walks through the full A-frame stand build: materials and tools, exact dimensions, step-by-step assembly, weatherproofing for outdoor longevity, stability and safety, and customization options. If you’d rather skip the build and look at all the ways to hang a hammock without trees (including buying a stand or sinking posts), see our broader guide on how to hang a backyard hammock without trees.
Materials and Tools
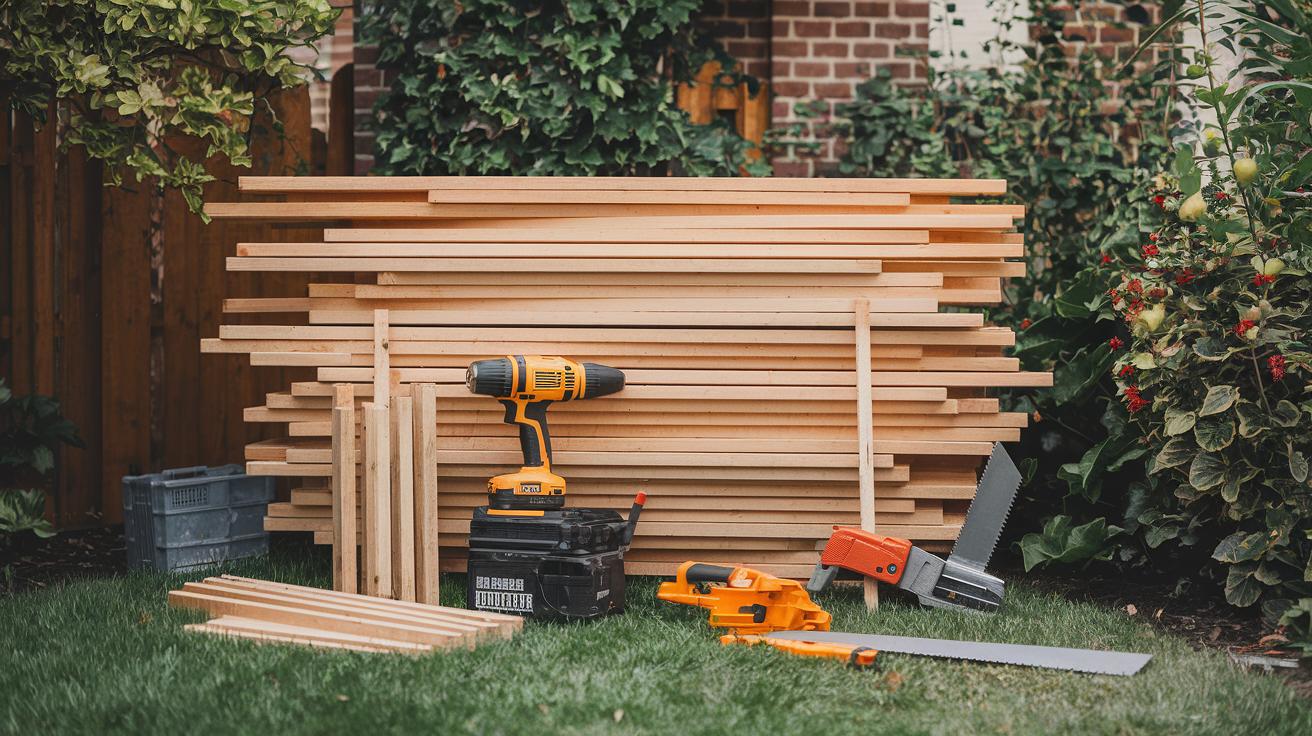
The full build runs $80 to $150 in materials depending on lumber prices in your area. You may already have most of the tools in the garage.
Materials:
- 4×4 pressure-treated lumber, 8 ft — 4 pieces (legs and top beam)
- 2×4 pressure-treated lumber, 8 ft — 4 pieces (cross braces, base supports)
- 1/2″ × 4″ lag bolts — 4 (top beam to A-frame joints)
- 1/2″ × 6″ carriage bolts with washers and nuts — 4 (A-frame joints)
- 3″ exterior-grade screws — 16 (base supports)
- 1/2″ stainless-steel eye bolts — 2 (hammock hang points)
- Steel snap hooks or locking carabiners rated 500+ pounds — 2
- Exterior wood stain or sealant — 1 quart
- Sandpaper, 120-grit and 220-grit — a few sheets each
Tools:
- Circular saw with a 15° angle adjustment
- Cordless drill with 1/2″ bit and a small pilot bit
- Measuring tape, 25 ft minimum
- Carpenter’s square
- Wrench or socket set for the bolt sizes
- Power sander or sanding block
- 4-foot level (for the final stability check)
Lumber upgrade option: swap pressure-treated for cedar planks if you prefer the appearance and the natural cedar smell. Cedar costs 30–60% more but doesn’t have the green tint pressure-treated lumber starts with, and it weathers to a silver-grey instead of fading unevenly. Either species will last 15+ years if sealed annually.
Blueprint Dimensions
The dimensions below are sized for a standard 12- to 13-foot hammock. Adjust the top beam length if your hammock is shorter or longer.
| Component | Dimension | Notes |
|---|---|---|
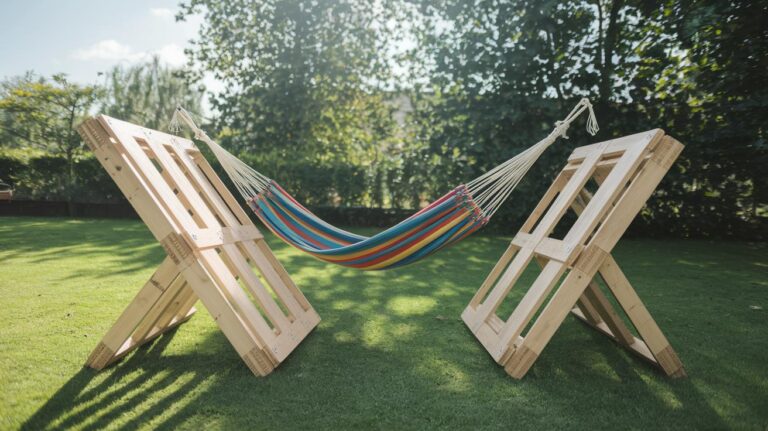
| A-frame legs (×4) | 5 ft 6 in tall | 4×4 lumber cut at 15° angle at top; 3 ft base spacing |
| Cross braces (×2) | 18 in | 2×4 lumber spanning between leg pairs at the peak |
| Top beam (×1) | 8 ft | 4×4 lumber; 1/2 in pilot holes 2 in from each end |
| Base supports (×4) | 3 ft | 2×4 lumber attached perpendicular to A-frame legs; 1 ft overhang each side |
The 1-foot overhang on the base supports is the detail most DIY tutorials skip. Without it, the stand sits unstable on uneven ground and can tip when someone enters or exits the hammock. With it, the footprint widens and the whole assembly stays planted.
Step-by-Step Assembly
Plan on 3 to 4 hours for the full build, plus drying time if you’re staining.
- Cut the legs. Mark four 4×4 boards at 5 ft 6 in. Set your circular saw to a 15° bevel and cut along the line at each end. The angled cuts are what let the legs meet flush at the peak.
- Sand everything. Run 120-grit sandpaper over every cut edge and flat surface, then finish with 220-grit. Splinters from pressure-treated lumber are no fun later. Wear gloves and a dust mask — the treatment chemicals shouldn’t be breathed in.
- Assemble the first A-frame. Stand two legs side by side, peaks together (the angled cuts should mate flush). Slide an 18-inch 2×4 cross brace between them about 6 inches below the peak. Drill through the legs and brace with a 1/2″ bit and secure with carriage bolts, washers, and nuts. Tighten by hand — final tightening comes after the whole stand is assembled.
- Assemble the second A-frame. Repeat step 3. Stand both frames upright on flat ground and confirm they look identical in height and angle.
- Mount the top beam. Lay the 8-foot 4×4 top beam across the peaks of both A-frames. Mark pilot holes 2 inches from each end. Drill 1/2-inch holes through the beam into the A-frame legs. Fasten with 1/2″ × 4″ lag bolts and washers.
- Add the base supports. At ground level, attach 3-foot 2×4 boards perpendicular to each A-frame leg, with about 1 foot of overhang on each side of the leg. Drive 3-inch exterior screws every 8 inches along the contact area.
- Install the hanging hardware. Pre-drill 1/2-inch holes at the top beam ends, deep enough that the eye bolt loops sit flush with the wood. Thread in the stainless steel eye bolts until tight. Clip on the snap hooks or locking carabiners.
- Tighten everything. Run a wrench over every bolt and screw. The stand should feel rock-solid when you push it from any side.
- Sit test. Hang your hammock, sit down slowly, then ease into a lie. Listen for creaks or bolt movement. Tighten anything that shifts.
Total build time: 3 to 4 hours for the first build, faster on subsequent ones once the cuts are dialed in.
Weatherproofing for Outdoor Longevity
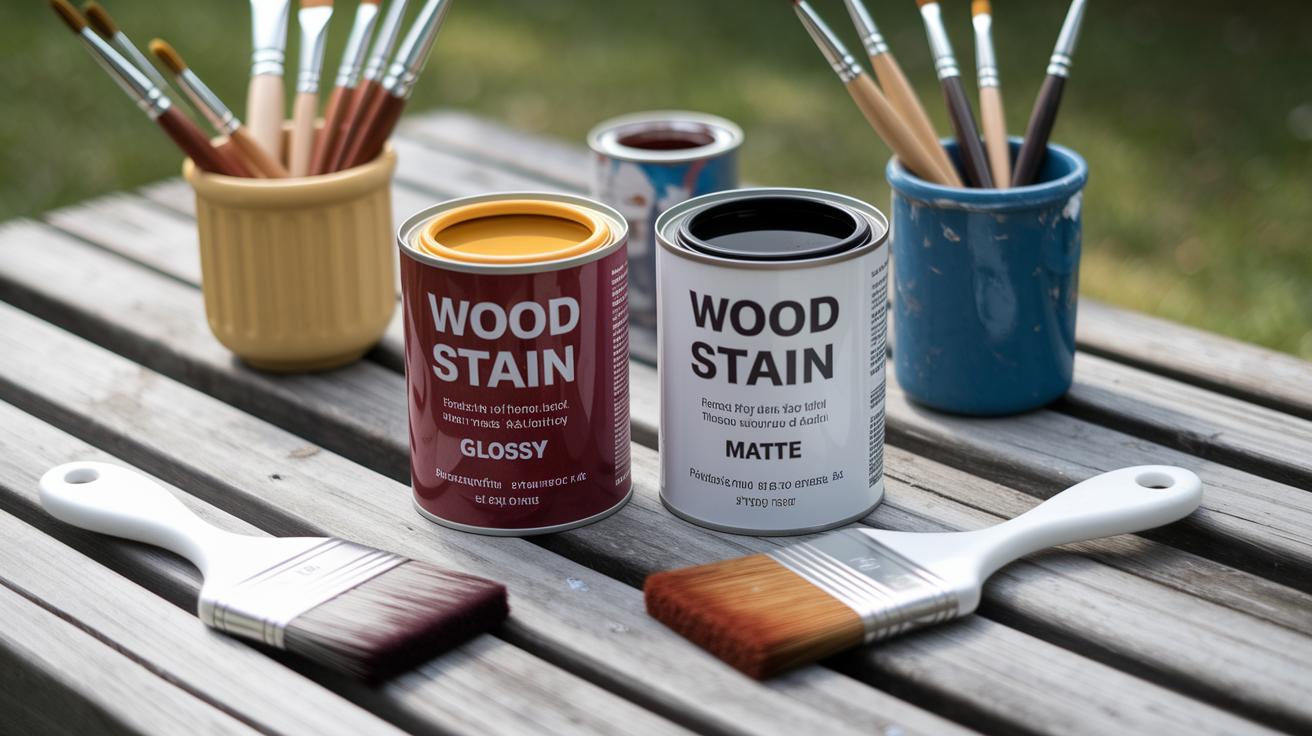
An unsealed pressure-treated stand will last 10 to 15 years outdoors. A well-sealed one doubles that. The hour you spend on finish work pays back for the life of the stand.
Stain or sealant. Apply two coats of exterior wood stain or clear sealant to every board, top and bottom. Wait 24 hours between coats so the first coat fully soaks in and darkens. Look for a product labeled for outdoor weatherproofing — both oil-based (slower-drying, deeper penetration) and water-based (easier cleanup, often UV-blocking) work well.
End-grain sealer. Cut ends of lumber soak up water faster than the rest of the board. Brush a grain sealer or extra coat of stain onto every cut end — the leg tops, the cross brace ends, the base support ends. This single detail extends stand life by years.
Metal hardware. Bolts and eye hooks rust at any exposed scratch. Brush a thin coat of corrosion-resistant paint over each bolt head, nut, and washer, or spray with a rust-inhibitor product. Stainless-steel hardware (the upgrade I’d recommend for eye bolts especially) skips this step.
Annual re-coat. Once a year, ideally in spring, brush on a fresh coat of stain over any spots that have weathered or faded. This 30-minute maintenance keeps the wood looking sharp and protected.
Stability, Location, and Safety Setup
The stand performs well on flat, firm ground. A few extras handle the realistic backyard conditions where flat-and-firm isn’t always available.
Level check. Set a 4-foot level across the base supports of the assembled stand. If the bubble isn’t centered, slide the whole stand until it sits level, or shim the low side with cedar shims or paver stones.
Soft soil: sandy, sodden, or recently graded soil lets the base supports sink under load. Two fixes — drive 12-inch metal ground sockets at each leg position and slide the stand into them, or compact a 1-inch layer of crushed gravel under each base support area.
Sloped ground: for slopes over 4 degrees, add longer base support boards (5 feet instead of 3) to widen the footprint, or build a small leveled wood platform underneath. Anything steeper than 8 degrees needs a real leveling project before the stand is safe.
Drainage: standing water around the legs accelerates rot. If your spot stays soggy after rain, rake gravel into shallow trenches around each leg to encourage runoff, or relocate the stand to a slightly higher spot.
Quarterly safety inspection:
- Tighten all lag bolts and carriage nuts to snug-plus-a-quarter-turn.
- Inspect eye bolts and snap hooks for rust, rough spots, or hairline cracks. Replace anything that looks compromised.
- Check ground sockets or gravel beds for shifting. Re-compact or re-tap as needed.
- Confirm the hammock weight rating, plus everyone using it plus any pets, stays under 400 pounds total.
For a deeper look at hardware load ratings and weight capacity specifically (eye bolts, straps, carabiners, what the numbers actually mean), see the canonical guide on hammock hardware load ratings.
Customization Options
Once you have the base build down, the design lends itself to easy modifications:
- Fold-flat for storage. Install hinge plates at the peak joints of the A-frames. The whole stand collapses to a flat package that fits behind a door or in a shed corner. Useful for renters or anyone who wants the yard clear in winter.
- Cedar upgrade. Swap the pressure-treated lumber for clear cedar. Costs 30–60% more, looks substantially better, and brings a faint cedar scent on warm afternoons.
- Painted finish. Skip the stain and use exterior latex paint in any color — muted gray, soft white, navy, even something bold. Paint covers pressure-treated lumber’s green tint and lets the stand match the rest of your outdoor decor.
- Built-in bench. Attach a 6-foot 2×8 across the base supports between the A-frames. Creates a low bench for sitting while you take your shoes off or set a drink down.
- Lantern hooks. Add small eye hooks along the top beam for string lights or hanging lanterns. Turns the stand into a focal point in the evening.
- Wider span for double hammocks. Increase the top beam to 9 or 10 feet and stretch the A-frame base spacing to 4 feet. The build cost goes up by about $25 for the extra lumber, and the resulting stand handles double-occupant hammocks comfortably.
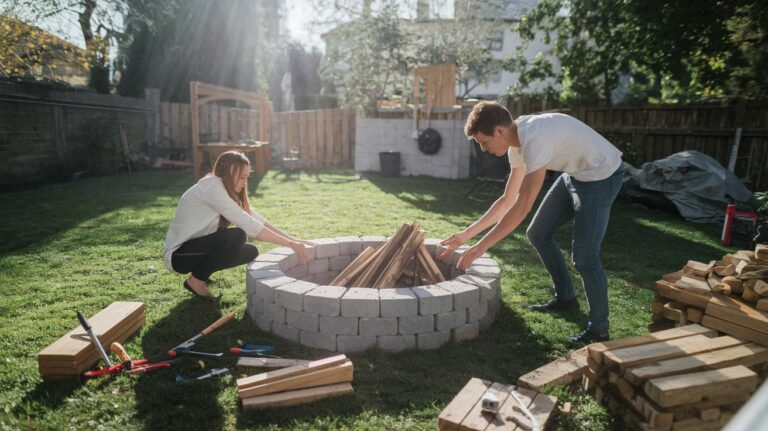
For more outdoor lounge ideas to pair with the hammock setup, see our guide on building or buying a patio daybed.
A weekend of work nets a hammock stand that costs half the price of a comparable store-bought steel one and outlasts it by years. Spend the extra hour on the weatherproofing step and the stand will pay back every summer afternoon for the next two decades.
DIY Hammock Stand FAQ
How much does it cost to build a DIY hammock stand?
Materials run $80 to $150 depending on local lumber prices and whether you upgrade from pressure-treated to cedar. Add $0 to $50 in tool costs if you don’t already have a circular saw, drill, and basic hand tools. Compare to $100 to $300 for a comparable store-bought steel stand.
How long does it take to build a hammock stand?
Plan on 3 to 4 hours for the actual build the first time through. Add 48 hours for the stain to cure between coats if you’re weatherproofing. A weekend project with most of the active work done Saturday morning.
What lumber works best for a backyard hammock stand?
Pressure-treated 4×4 and 2×4 lumber is the most common choice — affordable, widely available, and lasts 15+ years outdoors with annual sealant. Cedar is the premium upgrade: 30–60% more expensive, no green tint, weathers to silver-grey, mild cedar fragrance. Both species perform well structurally.
How much weight can a DIY hammock stand hold?
Built to the dimensions and hardware specs in this guide (4×4 lumber, 1/2-inch lag bolts, 500-pound-rated stainless steel eye bolts), the stand safely supports up to 400 pounds total — hammock weight plus people plus any pets. For higher capacity, scale up to 6×6 lumber and use bolts rated to 750 pounds or more.
How do I make sure the stand is stable on uneven ground?
Set a 4-foot level across the base supports and shim the low side with cedar shims or paver stones until level. For soft soil, drive 12-inch metal ground sockets at each leg position. For slopes over 4 degrees, build a small leveled wood platform underneath. The 1-foot overhang on the base supports also helps — it widens the footprint and prevents tipping.
Can I make the hammock stand foldable?
Yes — install hinge plates at the peak joints of the A-frames during assembly. The whole stand collapses to a flat package that fits behind a door or in a shed corner. Useful for renters or anyone who wants the stand stored during winter. Hinges add about $20 in materials.
How do I weatherproof the stand for outdoor use?
Apply two coats of exterior wood stain or clear sealant with 24 hours between coats, paying extra attention to seal all cut end grains. Brush a corrosion-resistant coating over bolts and metal hardware (or use stainless steel from the start). Re-coat once a year in spring to maintain protection. A well-sealed stand lasts 20+ years.