How To Install A Vertical Garden System Easily
Ever dreamed of a leafy wall but dread lugging heavy pots or climbing a tall ladder?
Hang on, because you can make it happen – no green thumb needed.
In this guide, you’ll learn how to attach a vertical garden frame (a sturdy rack that holds soil and plants on your wall), protect your paint, and set up a drip system (a simple tube network that delivers water drop by drop).
By the end, you’ll have living art full of fresh herbs, trailing blooms, or crisp lettuce in a space smaller than your front door.
Oops, I almost spilled some potting mix, but the best part is feeling the cool soil crumbling between your fingers.
Ready to turn that blank wall into a lush garden?
Let’s dig in.
Step-by-Step Vertical Garden System Installation Guide
Gather your supplies before you start:
- vertical garden frame or kit (pocket, panel, or hydroponic (growing plants in water without soil))
- waterproof backing or drip tray
- anchors and screws rated for your wall type (anchors are wall fasteners)
- drill with wood and masonry bits (masonry bits cut into brick or stone)
- level and measuring tape
- lightweight potting mix (soil mixture that drains well)
- seeds or seedlings that climb or trail
- irrigation tubing and emitters (drip devices)
- bucket or reservoir (for hydroponic setups)
- work gloves and protective eyewear
Have you got everything? Great. Let’s turn that blank wall into a living masterpiece.
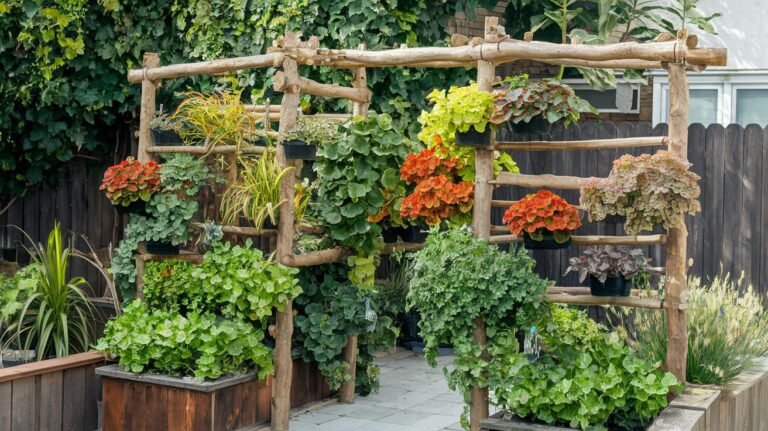
- First, choose your system. Pocket planters feel homey. Panels look modern. Hydroponic kits skip the soil.
- Hold the frame against the wall. Use a level and tape measure to mark bracket spots. Drill small pilot holes on your marks.
- Push anchors into each hole. Then drive in the screws until the frame feels rock solid.
- Slide the waterproof backing or drip tray behind the frame. This little shield stops moisture from sneaking into your wall.
- Clip on the pockets, panels, or hydroponic modules to the mounted frame. Follow your kit’s guide if you need extra help.
- Fill every pocket or cell with potting mix. Tuck in your seedlings or seeds and press the mix gently around them.
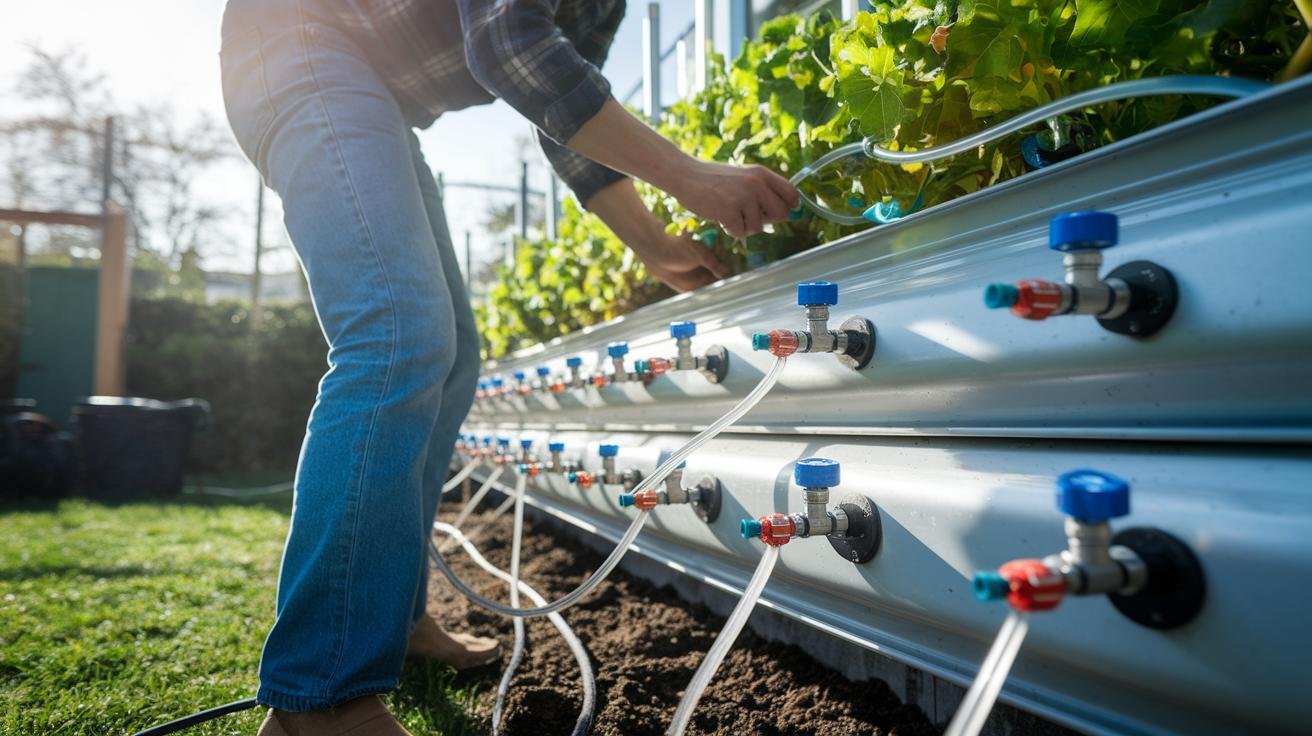
- Snap the irrigation tubing onto the emitters. Open the water valve slowly so you don’t trap air in the lines.
- Run a full water test. Watch for drips, tweak the flow, and make sure each pocket gets a good drink.
Planting now sets you up for a lush, green wall you’ll love. Enjoy the soft hum of water and the fresh burst of leaves all around you. Oops, almost forgot, stand back, take a deep breath, and smile at your new vertical garden!
Comparing Vertical Garden System Types
Picking the right vertical garden feels like choosing the perfect tool for your weekend project. You want something that fits your sunny balcony or backyard wall, works with your budget, and matches how much hands-on time you’re up for.
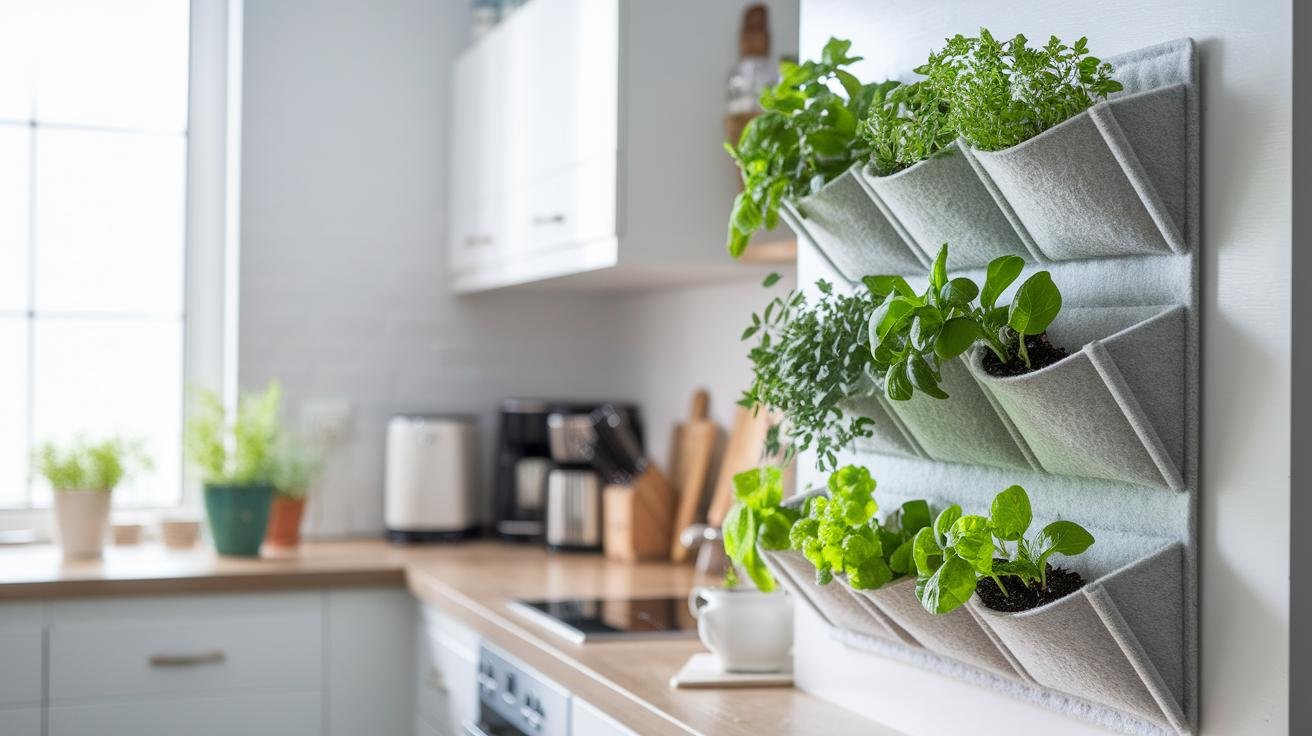
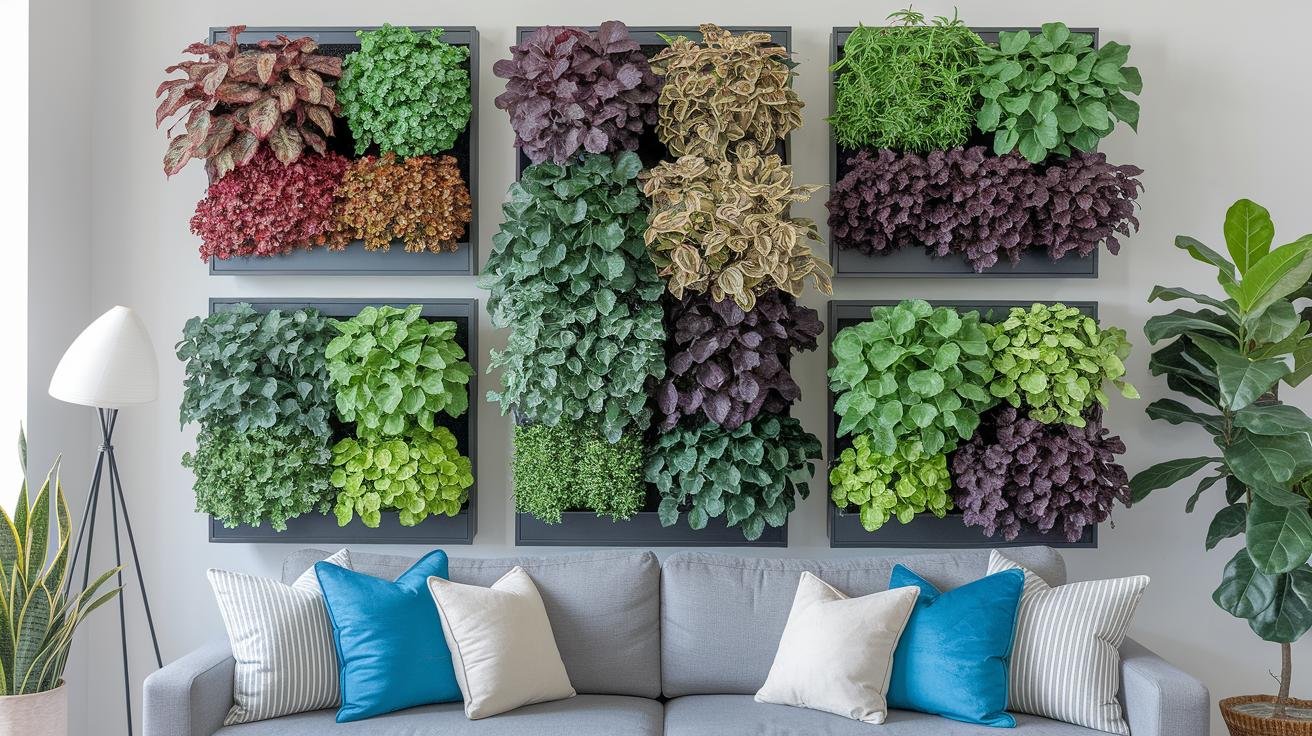
Pocket systems use tough fabric or felt (soft, plant-hugging material) to make little pouches that clip onto a board or wall. They’re light and perfect for tiny herbs or cute succulents.
Panel systems, also called modular planting panels (sturdy boards with plant-holding holes), give vines and leafy greens a firm backbone to climb. Just make sure you anchor them well so they don’t sag under heavier veggies.
Hydroponic vertical gardens skip soil completely. A stream of water loaded with nutrients flows through tubes, so your lettuce or herbs can grow fast. It does mean a pump, a water tank (called a reservoir), and a bit of plumbing know-how.
| System Type | Description | Typical Cost Range |
|---|---|---|
| Pocket Systems | Fabric or felt pouches (small, sturdy pockets) that hang on a frame – perfect for tiny herbs and trailing plants | $50–$150 |
| Panel Systems | Sturdy boards with holes for planting (think a grid of mini garden spots) – holds bigger veggies but needs strong mounting | $100–$300 |
| Hydroponic Gardens | Soil-free setup where water packed with nutrients moves through tubes (plants drink what they need) – grows fast but requires a pump and tank | Starting around $200 |
Pocket systems are a breeze to hang up, so you can have fresh basil on your patio in no time. Panel systems give you a sleek look and saddle up big veggies, as long as you secure them with solid anchors. And if you’re into tech, the hydroponic option makes plants shoot up quick – no dirt required. Pick what feels right for your space and skill level, and you’ll have a living, leafy wall that really stands out.
Choosing Plants and Growing Medium for Vertical Garden Systems
Picking plants that climb or trail makes your living wall look great. And you’ll need a growing medium (the mix that feeds your plants) that’s light but holds water. That combo is your secret to a happy vertical garden.
Plant Categories
Herbs like basil (a fragrant leaf herb) and mint (that fresh morning breeze smell) love pocket planters. Have you ever sniffed mint on a warm morning breeze? It’s like a mini-spa for your nose.
Succulents such as sedum sip just enough water to stay plump. They tuck into tiny slots like snug little guests.
Ferns, my favorite is Boston fern, sprout feathery green fronds and thrive in shade. They’re perfect for walls that don’t soak up full sun.
You can even grow small veggies. Give lettuce about 6 inches of space so its crisp leaves can spread. Cherry tomatoes need deeper pockets and a little pruning now and then so vines don’t droop.
Growing Medium Options
A good growing medium drains fast but still hugs your roots. I like mixing peat-free potting mix (decayed plant bits plus compost) with perlite (tiny white stones that hold air).
Coconut coir (the fibrous husk of coconut) also holds moisture without getting soggy.
Some kits include a ready-made mix you just tuck into the pockets. Oops, I spilled a bit of mix there, just goes to show how fluffy it is. Give it a squeeze. It should crumble in your hands, not clump like thick clay.
That lets water trickle through and air reach the roots. By the way, my neighbor’s cat loves sunning on the planter shelf. Back to filling your pockets, this simple test helps your plants breathe easy.
Setting Up Irrigation and Drainage in a Vertical Garden System
Getting plants just the right drink without drenching them is a sweet spot. Drip irrigation gives each planting pocket a slow drip (constant slow release) so water won’t pool and rot roots. And slipping a drip tray or drainage mat under your tower catches extra moisture and keeps root systems happy.
Drip Irrigation Setup
Here’s what you’ll need:
- Polyethylene tubing (flexible plastic pipe for water flow)
- Drip emitters (tiny nozzles that meter water)
- Flow-control valves (knobs to tweak flow speed)
- Tee fittings and end caps (to join lines and stop leaks)
- A pressure regulator (stops water from blowing out)
First, lay the tubing along the top of your vertical garden. Then clip one emitter into each pocket about 6 to 8 inches apart so every plant gets its own drip. Attach the line to a faucet or pump, add the regulator, and aim for about one gallon per hour from each emitter. Open the valve and watch the first cycle. Adjust the valve until every emitter drips evenly.
Next, slide a drip tray or drainage mat under your frame. It’ll catch any extra water and guide it away from walls so you don’t end up with damp patches. For an easy setup, try drip irrigation systems for vertical herb gardens.
Hydroponic Circulation Setup
Hydroponics is like giving plants a buffet of nutrients in water. Start with a reservoir (a bucket or tub to hold water). Pop a submersible pump inside and run tubing up to the top planting module. Clip or glue the tube into each inlet port, then run return lines back to the reservoir so water loops nonstop.
You’ll want about 10 gallons per hour of flow for every square foot of garden. Mix a water-soluble nutrient solution (liquid food for plants) at the label’s rate. Check the pH (acidity level) and dial it to around 6.0–6.5 so roots can grab nutrients best. Plug in the pump, watch the water feed your roots, then drain back to refill for the next round. Easy as that.
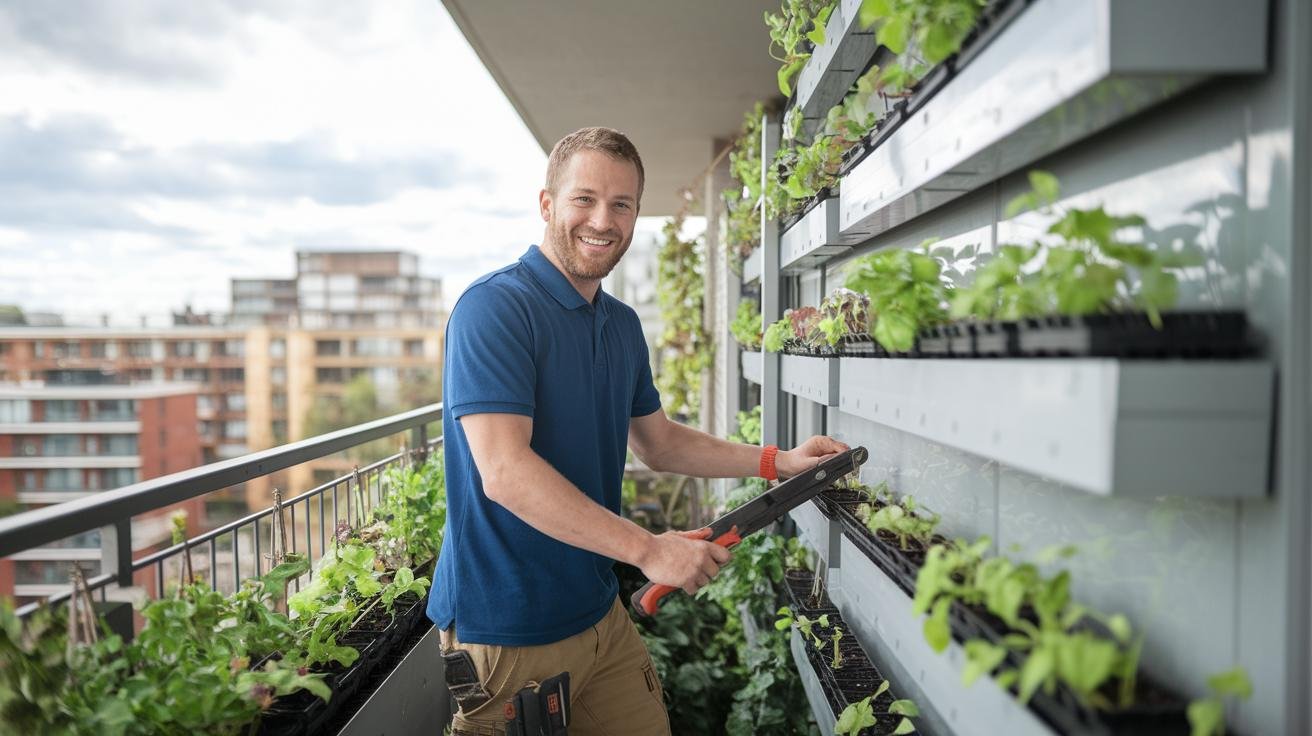
Mounting and Structural Support for Vertical Garden Systems
First, take a good look at your wall and feel its surface. Imagine it holding heavy, soaked soil (dirt full of water) and thirsty plants. You’ll want to find solid spots, not just empty drywall. Grab a stud finder (a small tool that finds wooden studs behind drywall) and mark those studs. Choosing the right frame now saves you headaches later.
Next, pick anchors and screws that match your wall type. For drywall, use toggle bolts or self drilling anchors (they cut their own hole). If you have brick walls, tap in masonry anchors with 2.5 inch screws. Concrete walls need sleeve anchors (they grip deep inside the hole) to lock in tight. Space each garden bracket 16 to 24 inches apart so the weight spreads out nice and even. By the way, my cat loves to nap right under my green wall. Remember to choose corrosion resistant hardware like stainless steel if you’re outdoors or in a damp spot. Press each bracket flush against the wall so it won’t wobble over time.
Now, slip a waterproof backing or drip tray (a tray that catches extra water) behind your frame before you tighten the screws. This layer protects your wall from moisture. Use a level before and after you tighten so the planting pockets sit straight and water runs off calmly. Give each bracket a gentle tug to test its hold. And just like that, your wall’s ready to host a parade of plants.
Cost Estimation and Budgeting for Vertical Garden Systems
First, gather the extras you’ll need:
- Mounting hardware.
- Potting mix (soil blended with compost to feed your plants).
- Seedlings (young plants ready to grow).
DIY can save you a bundle. I once scavenged old gutters and scrap wood to build a frame under the warm sun. My hands got dusty, but I ended up with a three-foot panel for under $15. Oops, my cat even claimed it as her new napping spot.
Watch your lead time (the wait between ordering and delivery) on custom panels or hydroponic parts. You don’t want spring planting to stall, right?
Maintenance and Troubleshooting for Vertical Garden Systems
First, peek into each pocket or panel. Push your finger an inch into the growing mix (soil blend that holds nutrients and drains well). If the warm earth feels dry, open the drip valve (water flow control) a bit. But if water is pooling at the bottom, slow the flow so roots don’t sit in a soggy patch. Oops, spilled a drop of water there – my bad.
Every two to four weeks, feed your wall with a balanced liquid fertilizer (plant food mix with nitrogen, phosphorus, and potassium). I like to run the drip system (tubing that drips water to each pocket) with fertilizer one morning, then flush plain water the next day. This gives plants a steady buffet without leftover salt crumbs.
Trim away extra growth so air can swirl around the leaves. Snip dead fronds or leggy vines with clean shears. It’s like giving your garden a fresh haircut – it looks neat, breathes easier, and makes room for new shoots.
Keep an eye out for tiny green aphids on tender shoots or powdery mildew (white fuzzy spots). Gently wipe leaves with soapy water or mist them with a baking soda spray (one teaspoon baking soda in a quart of water). Catching pests early means you won’t have to use harsh sprays later.
If a pocket stays bone dry or some plants lag behind, check for low spots in the tubing or shady corners that never see sun. Swap out struggling seedlings with fresh ones that suit your light levels. A quick pocket switch or tube tweak gets your living wall back on track.
Final Words
Mounting the frame and checking wall strength felt like a real win. Filling those modules with lightweight mix and tucking in basil or sedum made it even sweeter.
You covered everything: pocket vs panel vs hydroponic choices, irrigation lines, drainage trays, budget tables, and simple upkeep tips for a thriving green wall.
Now you know exactly how to install a vertical garden system from start to finish. Step back, feel that fresh breeze, and admire your new living wall, you did it!
FAQ
What materials and tools do I need for a vertical garden installation?
A vertical garden installation needs a sturdy frame, waterproof backing, drip tray, wall anchors, screws, planters or modules, growing medium, irrigation tubing, a pump for hydroponic setups, plus a drill and level.
How do I install a vertical garden system step-by-step?
Installing a vertical garden starts by testing wall strength, adding waterproof backing, mounting the frame with correct anchors, attaching planters, filling with growing medium, planting your selections, hooking up irrigation, and running a water test.
How do I choose the right vertical garden system type?
Choosing the right system type matches plants and budget: pocket systems fit small herbs on a low budget, panel systems support larger plants at midrange prices, and hydroponic setups boost growth but require a higher investment.
Which plants and growing mediums work best for vertical gardens?
The best plants include herbs like basil, succulents such as sedum, ferns, and small veggies. Use lightweight, well-draining mixes like coconut coir or specialty pocket substrates to keep roots healthy.
How can I set up irrigation and drainage for my vertical garden?
Setting up irrigation and drainage means running drip tubing and emitters along each planter and placing a drip tray at the bottom. Hydroponic setups add a reservoir, pump, tubing, and a filtered nutrient solution.
What hardware do I need to mount a vertical garden securely?
Mounting a vertical garden securely calls for anchors and screws matched to drywall, brick, or concrete, corrosion-resistant brackets for outdoor use, and a waterproof backing or tray to protect indoor walls from moisture.
How much does a vertical garden system cost?
Vertical garden costs run $50–$150 for pocket kits, $100–$300 for panel systems, and around $200 for basic hydroponic setups. Plant, soil, and custom orders may add extra cost and lead time.
What maintenance does a vertical garden require?
Vertical garden care involves checking moisture levels, tweaking drip timing, feeding plants every 2–4 weeks with liquid fertilizer, trimming overgrowth for airflow, and inspecting regularly for aphids or mildew.
How do I troubleshoot common issues in a vertical garden?
Troubleshooting common issues starts with checking for dry spots or pooling water, then adjusting irrigation flow, moving plants to better light, swapping out weak plants, and treating pests promptly.