How To Test Soil pH At Home Effortlessly
Ever sprinkle fertilizer on your plants and end up with sad, yellow leaves?
It’s a bummer. But don’t sweat it. There’s a sneaky reason.
It might be your soil’s pH (how sour or sweet the ground feels). If it’s off, your plants can’t grab the nutrients they crave.
Good news: you don’t need a high-tech lab. You can test with a kitchen tool or a simple garden kit.
And really, just half an hour is all it takes. You’ll learn if your soil needs lime (a powder that makes soil less sour) or sulfur (a powder that makes soil more sour).
In this guide you’ll get easy, step-by-step instructions to test soil pH at home without any stress. Ready to dig in?
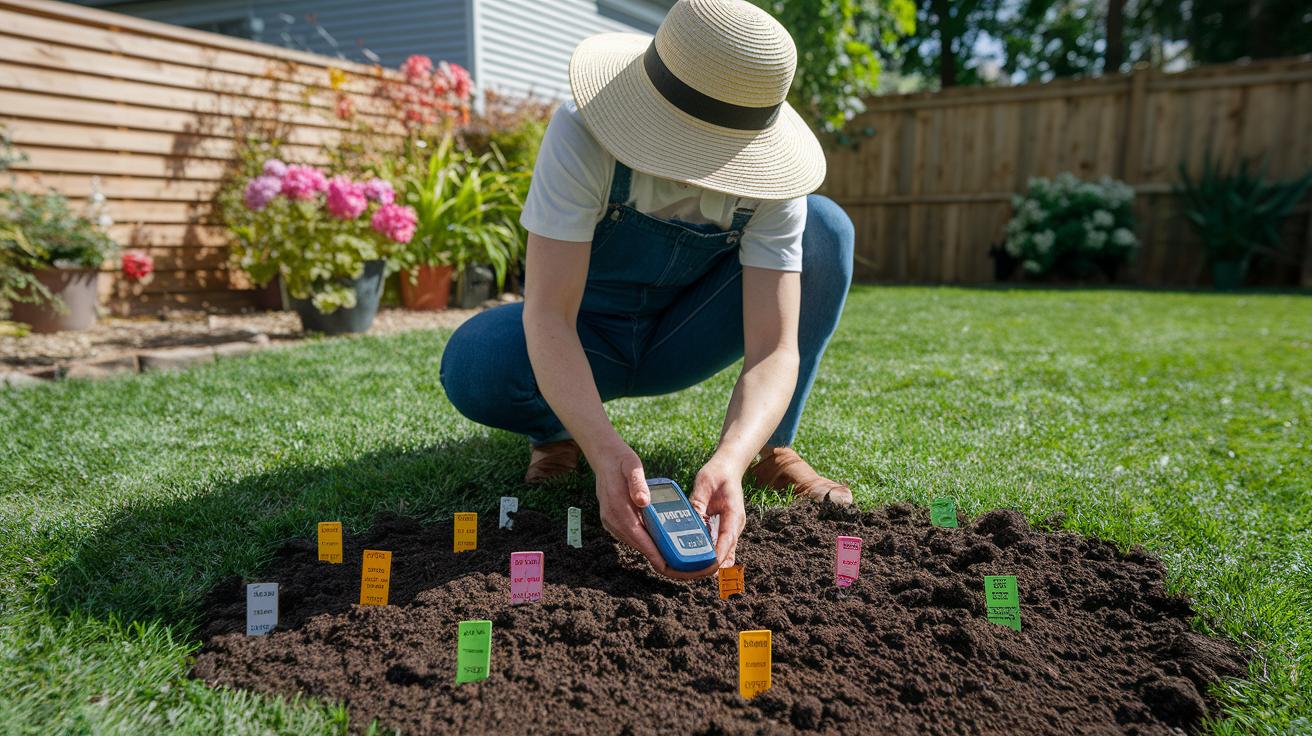
Step-by-Step Soil pH Test at Home
Want to know if your soil is sour or sweet? Testing soil pH (a measure of how acidic or alkaline your soil is) is easier than you’d think. You just need a simple garden kit or items from your kitchen and about 30 minutes.
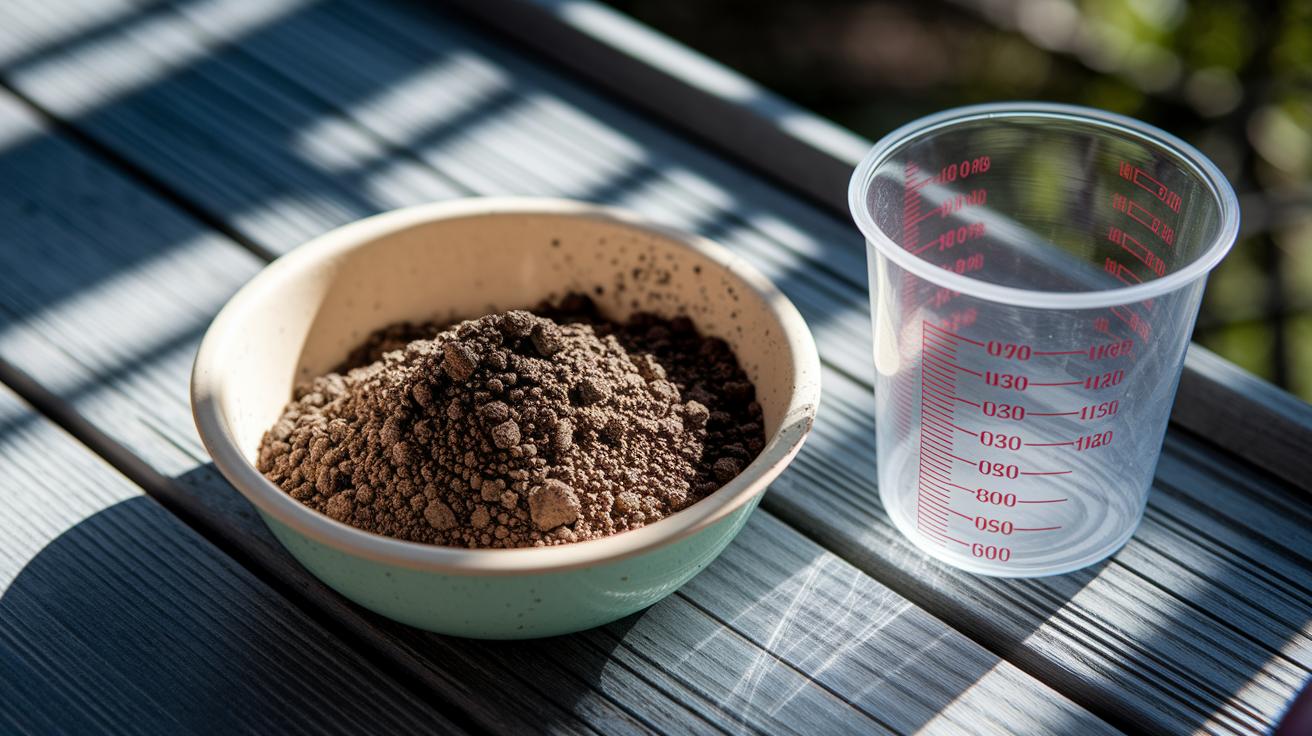
- Scoop about 1 cup of soil from a few spots, digging down 2 to 8 inches. That gives you a good snapshot of raised beds or pots.
- Pick out roots, rocks, or sticks by hand or with a clean sieve so nothing throws off your reading.
- Pour equal parts soil and room-temperature water into a clean container. Think of it like making a thin mud mix.
- Stir for about 30 seconds with a spoon or spatula. Break up any clumps until it looks smooth.
- Let the mix sit, uncovered, for 15 minutes. The heavy bits sink, and a clear liquid rises on top.
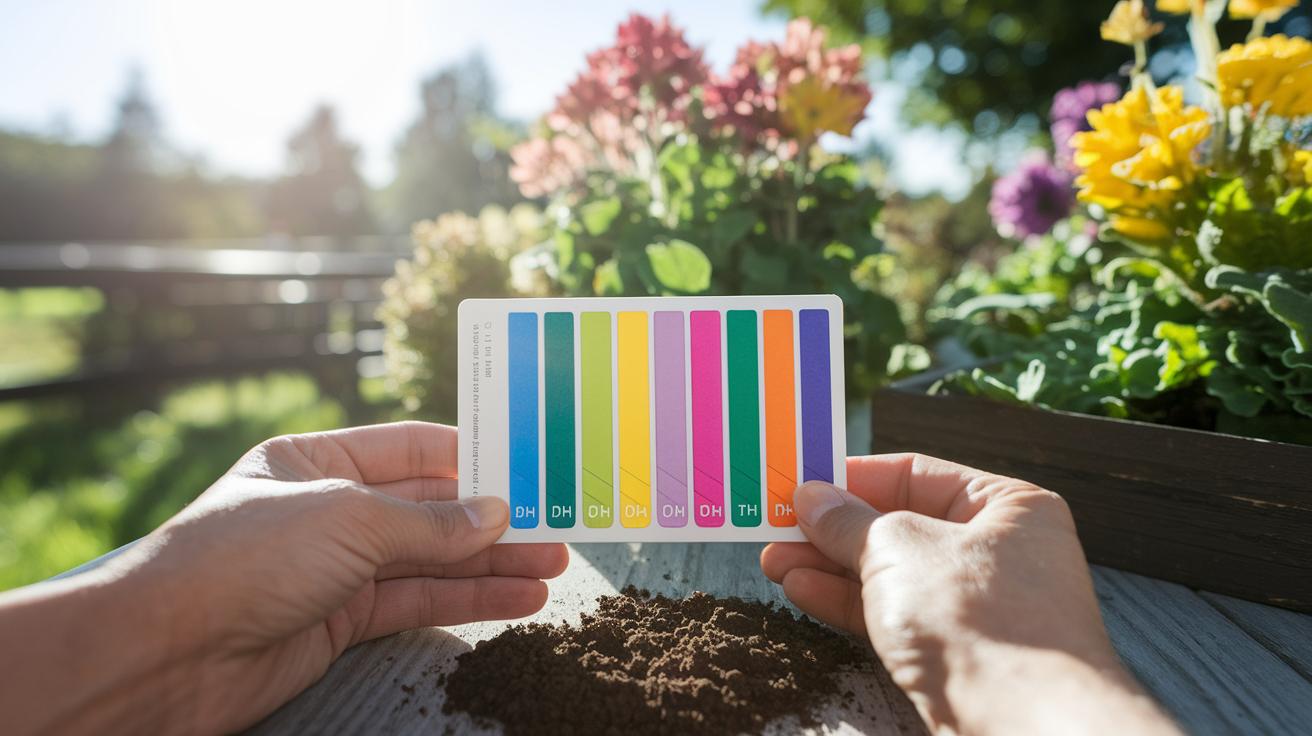
- Test that clear liquid:
- pH strips (about $5 to $10) give you a quick color match.
- A digital meter probe shows a precise number right away.
- Homemade test: add ½ cup vinegar, if it fizzes, pH is above 7. Or stir in 1 teaspoon baking soda, fizz means pH is below 7.
Keep a simple log of each zone’s results. Regular checks help you decide if you need lime (to raise pH) or sulfur (to lower pH). Have fun watching your garden grow!
Soil Sample Preparation for Home pH Testing
Grab a clean trowel (the little shovel you dig with) and a sturdy bucket. I once used my old paint pail. Works great, right? You’ll collect 3 to 5 smaller piles of soil (subsamples are small pieces of soil) from each garden zone or raised bed. Go about 2 to 8 inches deep, that’s where most roots and nutrients like to hide.
- Pick out roots, stones, or old mulch by hand or with a small sieve (a tool with holes to catch big bits).
- Spread the soil on a tray and let it air dry for about 24 hours. This dry sample is perfect for checking pH later.
- Label each tray or container with the zone name so you don’t mix up your results.
Moisture can shift your pH (a measure of soil acidity or alkalinity) reading by almost one full point, crazy right? So you’ll test two mixes:
- A wet slurry (fresh soil and water at a 1 to 1 ratio)
- The dry sample mixed with water
That way you see if dampness is skewing your numbers.
Now blend all the subsamples from one zone into a single mix. Stir it well, like fluffing a pillow so every bit feels the same. That combined sample gives you an average pH reading. Fewer surprises later when you adjust your soil’s acidity or alkalinity.
Check pH with your home kit and jot down each zone’s number. Then get ready to feed your garden the right nutrients. Happy digging!
DIY Household Methods for Testing Soil pH at Home
You don’t need a pricey kit to check your soil pH (a scale from 0 to 14 that shows acidity or alkalinity). Just grab some kitchen staples and let’s play scientist in your own backyard. Jot down what you see and you’ll know if it’s time for a proper pH strip or meter.
-
Vinegar test
Grab a clear glass and add 2 teaspoons of dry soil (earth for plants) plus ½ cup plain white vinegar. If it fizzes like soda bubbles, your dirt is alkaline (pH above 7). No fizz means your soil is neutral or acidic (pH 7 or below). -
Baking soda test
Mix 2 teaspoons of soil with a splash of water to make a paste, then stir in 1 teaspoon baking soda. Oops, it might get messy, just the fun of backyard experiments. If it bubbles up, your soil is acidic (pH below 7). No bubbles? You’re looking at neutral or alkaline ground. -
Red cabbage color check
Chop about a cup of red cabbage and boil it in water for 5 minutes. Strain out the leaves and keep the purple cabbage water. Stir equal parts of that liquid and a soil slurry (soil plus water). If it shifts from purple to green or yellow, your dirt is acidic. Staying purple means it’s neutral or alkaline. -
Turmeric trick
Stir 1 teaspoon turmeric powder into 1 cup warm water. Let the sediment settle, then pour off the clear yellow liquid into a soil–water mix. Acidic soil turns orange-red, while neutral or alkaline stays yellow. -
Beet juice shade test
Grate a fresh beet and squeeze out about 1 tablespoon of juice. Add it to a soil slurry. If your mix glows pink or red, that’s acidic soil. If it drifts toward yellow-green, expect a higher pH.
These simple kitchen tests won’t give you exact numbers, but they’ll flag spots that need a closer look. Keep notes on fizz strength and color shifts so you’ll know where to pull out a proper pH strip or meter later.
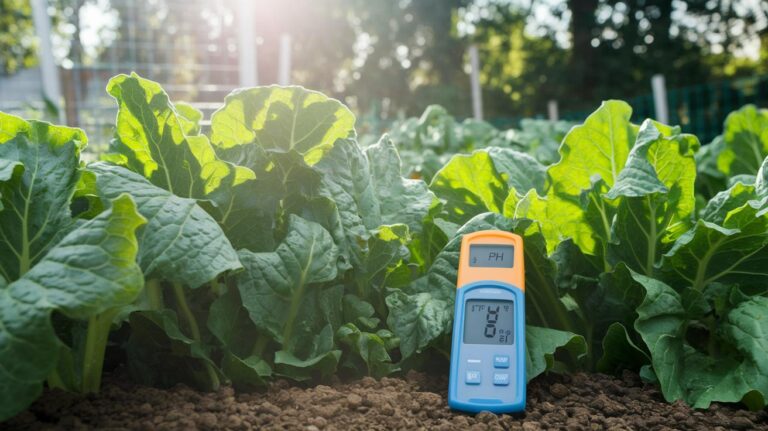
Using Digital Soil pH Meters at Home: Calibration & Care
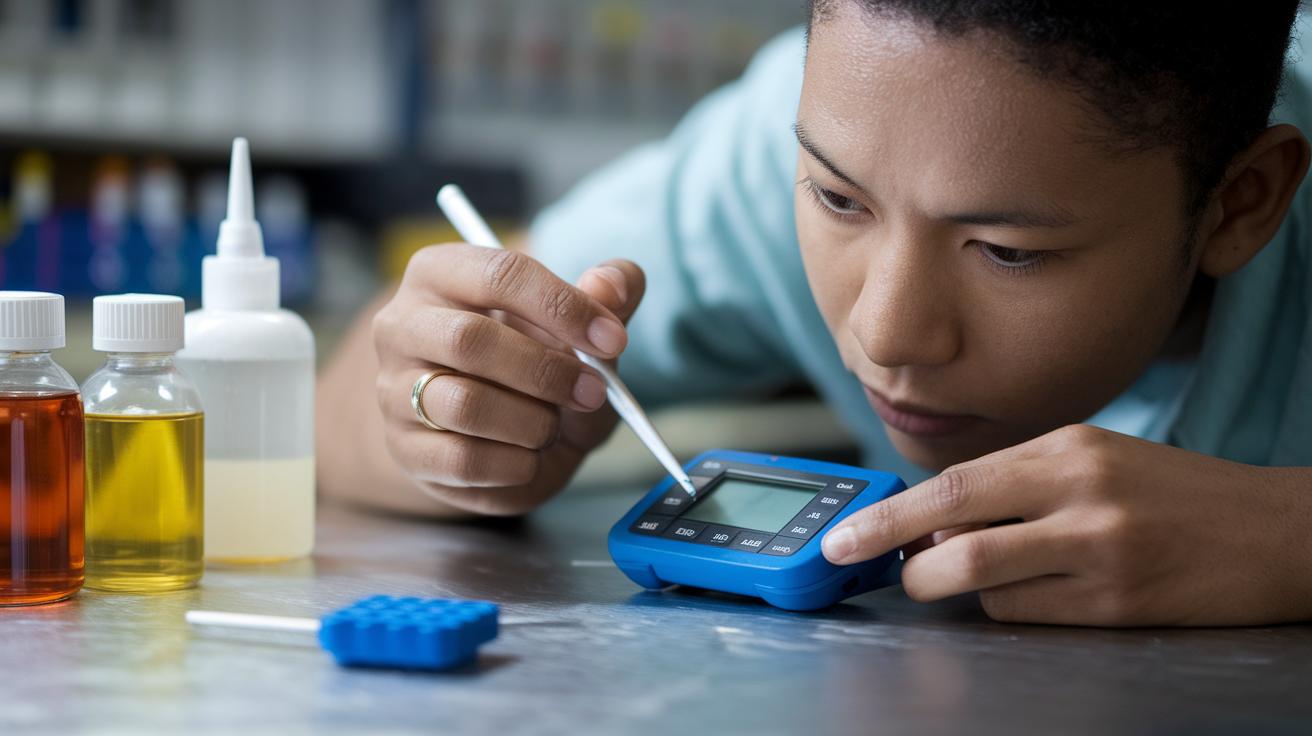
Have you ever wondered if your garden soil is too sour or too sweet for your plants? A digital soil pH meter (tool that measures how acidic or alkaline soil is) can answer that in seconds. You don’t need to break the bank. You’ll find budget-friendly models for about $15 to $50 with clear screens and replaceable batteries.
Here’s how I get mine ready each time:
- Rinse the probe tip in distilled water (pure water without minerals).
- Pop it into a pH 7 buffer solution (a liquid that should read neutral).
- Twist the little knob until the meter reads 7.0 exactly.
- If your meter has multi-point calibration, repeat with pH 4 (acidic) and pH 10 (alkaline) buffers.
- Let the probe air-dry, just rest it upright on a clean cloth.
| Buffer Solution | Expected pH | Usage Tip |
|---|---|---|
| Acidic Buffer | 4.0 | Check low range and adjust slope |
| Neutral Buffer | 7.0 | Main calibration point before each use |
| Alkaline Buffer | 10.0 | Verify high-range accuracy |
Calibration done right feels like giving your meter new life. By the way, my dog once tried to chew on the probe, oops, lesson learned about keeping tools off the ground.
Probe care is simple. Once a month, soak the tip for one minute in distilled water and gently wipe off any tiny salt crystals (those can mess up readings). Then pat it dry with a soft cloth.
Batteries matter too. After about 100 tests, swap them out. A weak battery can make your numbers wander or the screen go blank. I always tuck a spare set into my garden tote.
Troubleshooting tips:
- Salt buildup? Rinse the probe if readings jump around.
- Dim screen? Change batteries.
- Dirty probe? A gentle scrub with a soft cloth avoids scratches.
- Weird high readings? Try a dry soil sample to compare.
A well-loved meter gives quick, steady pH readings. And that helps you pick the right plants, tweak your soil, and watch your garden thrive.
Interpreting & Adjusting Soil pH for Your Home Garden
Your soil pH test is like a taste check for your dirt. Readings between 4 and 6 mean your soil is moderately acidic (tangy, almost like lemon). A 7 is neutral (plain water). And 8 to 10 feels alkaline (a gentle soapiness). Most veggies, from crisp lettuce to fresh green beans, will be happiest at pH 6.0 to 7.0. Have you ever sniffed your garden soil after a spring shower? It smells earthy and alive.
Blueberries do a happy dance in soil that’s a bit sour. They like around 4.5 to 5.5. Hydrangeas flash pink or blue petals when you tweak acidity up or down. If your test reads below 6.0, your veggies might pout. To raise pH, sprinkle 5 pounds of agricultural lime (ground limestone that raises soil pH) per 100 square feet in fall. This gives the lime time to break down over winter. You’ll find lime fertilizer at feed stores lime fertilizer.
Mix that lime into the top six inches of soil (like stirring flour into cake batter) so it reacts evenly. Then rain will help push it deeper. Your spring seedlings will thank you with faster nutrient uptake.
If your reading drifts above 7.0, your soil tastes chalky to plants. Stir in 1 pound of elemental sulfur (a soil amendment that lowers pH) per 50 square feet into the top six inches. Sulfur works slowly. It can take about three months to nudge pH down. So plan to apply it in early spring or late summer.
Clay soils can swing to both extremes because they hold onto acids and bases. Top-dress with a one to two inch layer of mature compost (decayed organic matter that enriches soil and has pH around 6.5 to 7.5). Gently fork it in. Compost helps buffer sharp pH shifts in clay so seedlings settle in without shock. By the way, sometimes I just sniff my compost pile. It smells like sweet earth.
Adjusting soil acidity now gives you strong roots and a big harvest.
Troubleshooting Home Soil pH Testing Issues
Got clay soil (fine, sticky soil that holds water)? It can hang on to moisture and salts, pulling your pH (soil acidity level) readings down by about 0.2 to 0.5 units. Air-dry a handful in a sunny spot for 24 hours before testing so those extra salts don’t throw you off.
Cold soil (under 50 °F) can skew a digital meter (probe that measures pH) by around ±0.2. Think of it like a sleepy neighbor, bring it indoors or let it sunbathe on the windowsill for an hour so it wakes up. Oops I meant until it reaches room temperature.
Ever notice things dip after a downpour? Heavy rain often drops soil pH by 0.2 to 0.3. Try testing right before a storm, then again a day later to see how much it shifts. It’s like nature’s own little experiment.
Your soil’s pH also drifts with the seasons, chilly winter beds feel different from hot summer pots. Track those changes by retesting monthly or every few months (quarterly) in each area. Go ahead, circle winter, spring, summer, and fall on your calendar. You won’t regret it.
And hey, dirty probes muddy your results too. Rinse the tip in distilled water and give it a soft wipe before and after each reading. Easy fix, right?
One more thing: calibrate your meter at the same temperature you’ll test so your buffer solution (standard mix for calibration) checks and backyard samples line up without wild swings. Catching pH shifts early means you can tweak your soil amendments (additions like lime or sulfur to balance pH) with confidence, and give your garden steady soil to grow.
Final Words
In the action, we walked through six easy steps to check garden acidity: gathering soil, mixing, stirring, waiting, then testing with strips, digital meters, or home items. You learned how to prep a good sample, try DIY tricks with vinegar or cabbage, care for electronic probes, read pH numbers, and make fixes with lime or sulfur.
Getting a healthy backyard doesn’t have to be hard. You’ve seen just how simple it is and even tackled common hiccups. Now you’re ready to give it a go and really know how to test soil pH at home with confidence. Happy digging!
FAQ
What’s the basic six-step process for home soil pH testing?
The six-step process starts by collecting one cup of garden soil and clearing debris. Mix equal parts soil and water, stir for 30 seconds, let it sit for 15 minutes, then test with strips, a meter, or vinegar.
How should I prepare soil samples for accurate pH readings?
Gather subsamples from 2–8 inches deep across the garden, remove rocks and roots, air-dry them for about 24 hours, then blend the subsamples for an overall average reading.
Which household items can I use for a DIY pH test?
Use vinegar (bubbling means pH above 7) and baking soda (fizz shows pH below 7). You can also boil red cabbage and mix the juice with soil, or use turmeric or beetroot juice for color shifts.
How do I calibrate and care for a digital soil pH meter?
Soak the probe in a pH 7 buffer and adjust the reader to 7.00. Rinse the probe in distilled water, clean it monthly, and replace batteries after about 100 tests.
How do I interpret pH results and adjust my garden’s soil?
Most vegetables prefer 6.0–7.0 pH. To raise pH, add 5 lb of agricultural lime per 100 sq ft in fall. To lower pH, mix 1 lb of sulfur per 50 sq ft into the top six inches of soil.
What common issues affect home soil pH tests and how can I fix them?
Salt buildup in clay can push readings lower, cold samples can err by about 0.2 units, and heavy rain can drop pH slightly. Let soil dry, test at room temperature, and retest monthly.