How to Build a Backyard Obstacle Course
A backyard obstacle course turns a flat lawn into something kids will use every afternoon for a whole summer. The build doesn’t have to be expensive or permanent — a workable course goes together in a weekend with materials from the garage and a hardware store. This guide walks through planning, materials and budget, construction sequence, obstacle options, age-appropriate difficulty tiers, theme variations, and the safety and maintenance that keep it running.
Plan Before You Build
Most failed backyard courses start with someone building one obstacle, then another, then realizing the layout doesn’t flow. Spending 30 minutes with graph paper before any cuts get made saves weekends of rework later.
Map your yard. Walk the available area and note slope, root systems, low spots that hold water after rain, and any existing play structures the course should connect to. Mark where the sun hits midday — a balance beam in full afternoon sun gets uncomfortably hot in steel-rod construction.
Set the course goal. Three common goals point to different designs: a play course (low intensity, varied obstacles, kids 5–12), a ninja-style course (more intense, climbing and balance challenges, kids 10+), or a multi-age course (modular sections that toddlers and teens both use). Decide which before sketching.
Sketch with graph paper or a drawing app. Use a scale of 1 inch = 4 feet. Mark each obstacle’s footprint, the transition path between them, and a clear start and finish. Course flow matters as much as obstacle choice — a course that loops back near where it started gets used more than a linear one.
Confirm clearances. Each obstacle needs at least 3 feet of clear space around it for safe approach and dismount. High obstacles (climbing walls, monkey bars) need 6 feet of soft surface on the fall side. Don’t position high obstacles near fences, walls, or paved walkways.
Check permits and rules. Most freestanding play structures under 6 feet tall and not anchored in concrete don’t trigger permit requirements. Anything taller, anything anchored, or anything visible from the street might. A 5-minute call to the local building department clears this up before you start.
Materials and Budget Tiers
A workable obstacle course can run anywhere from $50 (garage scraps and rope) to $5,000+ (built-in masonry footings and pro-grade equipment). Three tiers cover most family builds:
| Tier | Budget | Approach | Lifespan |
|---|---|---|---|
| Scavenged | $50–$200 | Tires, pallets, pool noodles, cardboard tunnels, rope, old lumber | 1–2 seasons |
| Hardware-store DIY | $200–$800 | New 2x4s and 6×6 posts, eye bolts, climbing rope, foam pool noodles, paracord | 3–5 years with annual maintenance |
| Pro-grade modular | $800–$5,000+ | Manufactured obstacle kits — balance beams, climbing walls, ninja warrior peg boards | 5–10+ years |
Scavenged tier shopping list. Old tires (free from any tire shop, just ask), wooden pallets (free from most lumber yards), pool noodles ($1–2 each at end-of-summer sales), heavy-duty rope (under $20 for 50 feet), cardboard moving boxes for tunnels, and any spare lumber. Skip treated wood from unknown sources — older treated lumber can leach chemicals kids will contact.
Hardware-store tier shopping list. Pressure-treated 4×4 posts for vertical anchors (4–8 of them depending on course size), 2×4 lumber for crossbars and frames, exterior-rated screws, 1-inch black pipe for monkey bar rungs, climbing rope (1-inch diameter), eye bolts and carabiners, and rubber mulch or playground chips for fall zones. Total roughly $400–$600 for a 6-obstacle course covering 200–400 square feet.
Pro-grade kit considerations. Manufactured obstacle kits ship pre-cut with hardware and instructions. The premium options include weatherproof finishes and stainless hardware. Compare weight capacities against expected user weight (heaviest climber plus 50 pounds for active load).
Construction Step by Step
The construction sequence depends on which obstacles you’ve picked, but the broad order is the same:
- Clear and level. Strip any sod where posts will sink. Pull rocks and roots from impact zones. Tamp the area flat with a rake.
- Set anchored posts first. Any obstacle that anchors in concrete (climbing wall, monkey bars, swing) needs footings cured before you build around it. Dig 2–3 foot holes, set posts plumb, fill with concrete, wait 48 hours.
- Build freestanding obstacles next. Balance beams, hurdles, tire walks, tunnels. These don’t need cure time — assemble and place.
- Lay surfacing under high obstacles. Rubber mulch at 6 inches deep is the safest common surfacing. Engineered wood fiber at 9–12 inches works at lower cost. Pea gravel handles drainage but is less forgiving on falls.
- Run rope and chain accessories last. Climbing ropes, hanging rings, and net climbs go in after the main structures are stable. Tie all knots with double overhand security — single overhand knots slip under load.
- Test before opening. Walk every obstacle yourself before the first kid uses it. Push laterally on every post — any rocking means more anchoring is needed. Bounce-test any balance beam or jumping element. Verify ropes hold under your weight plus a strong tug.
For most family builds, the whole sequence runs a weekend with a 2-adult crew. Solo builders should budget 2–3 weekends for a 6-obstacle course.
Obstacle Options That Actually Work
Mix obstacle types so the course tests different skills — balance, grip strength, agility, problem-solving. A course that’s only one skill (just climbing, just balance) gets boring fast.
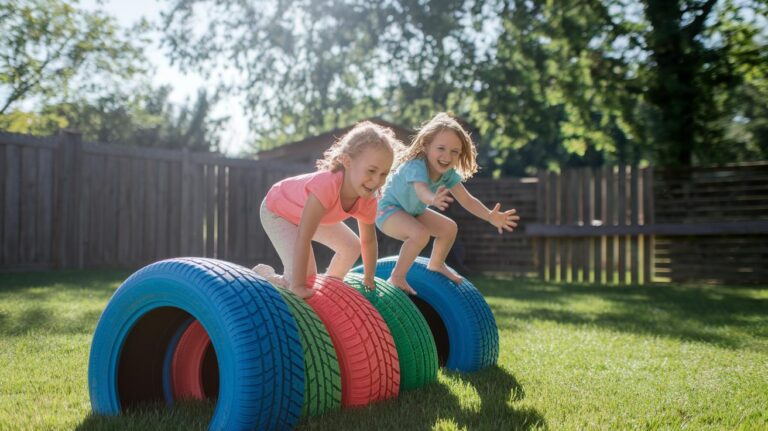
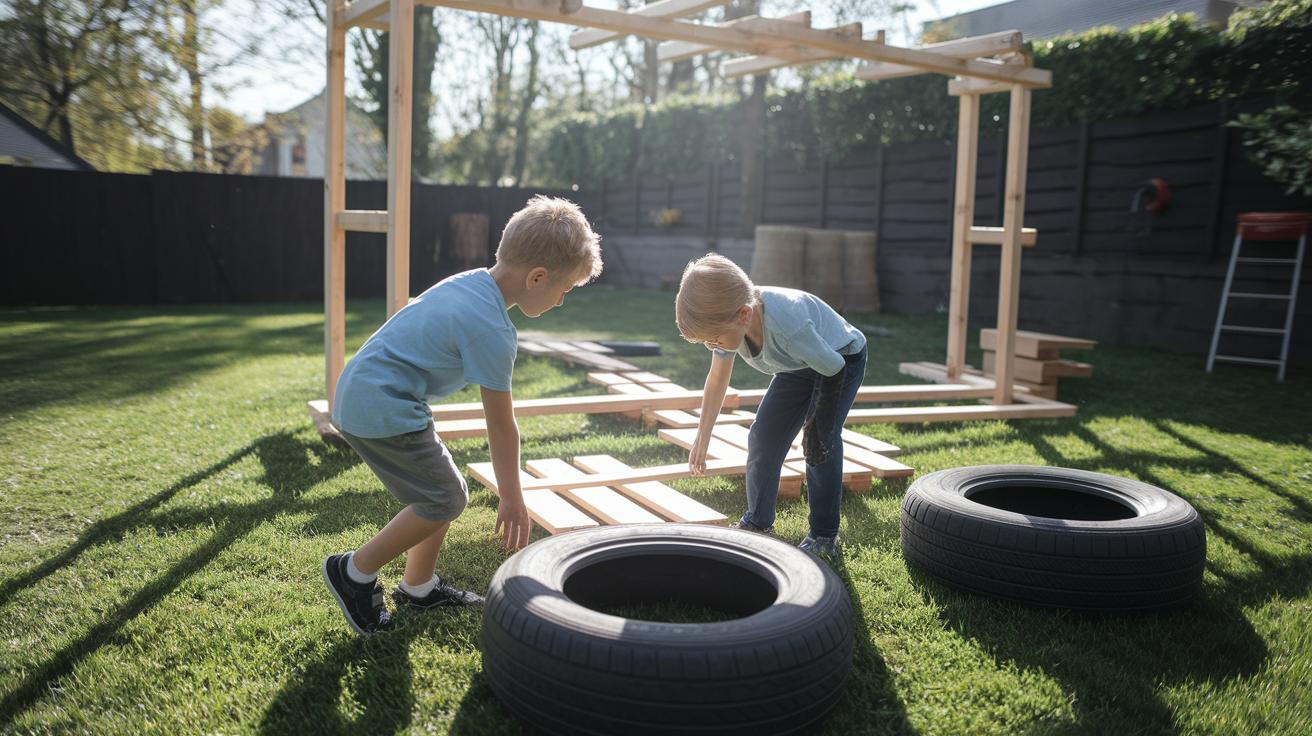
Balance challenges. A 2×4 or 4×4 balance beam set 6 inches off the ground on cinder blocks. A row of tires laid flat for high-stepping. A rope walk between two stakes. A series of small stumps or logs to step across.
Grip and upper-body. Monkey bars at appropriate height for the user (covered in detail in the monkey bars buyer’s guide). Hanging rings or trapeze attached to a sturdy crossbar. A climbing rope on an angled support. A peg board for older kids and teens.
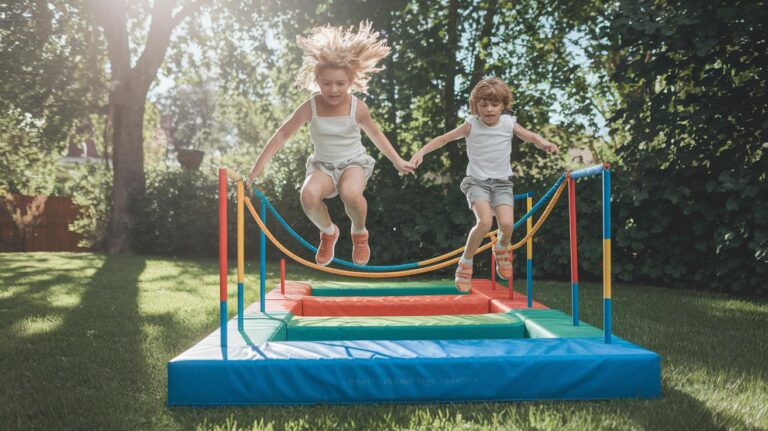
Agility and jumping. PVC pipe hurdles at varying heights. A jump-the-pool-noodle row. Tire jumps where the kid hops in and out of stacked tires. A long-jump line marked on the lawn or surfacing.
Crawling and tunneling. Cardboard boxes taped together end-to-end. A fabric tunnel pole-supported between stakes. A “low crawl” under a horizontal rope strung between two posts at 12 inches off the ground.
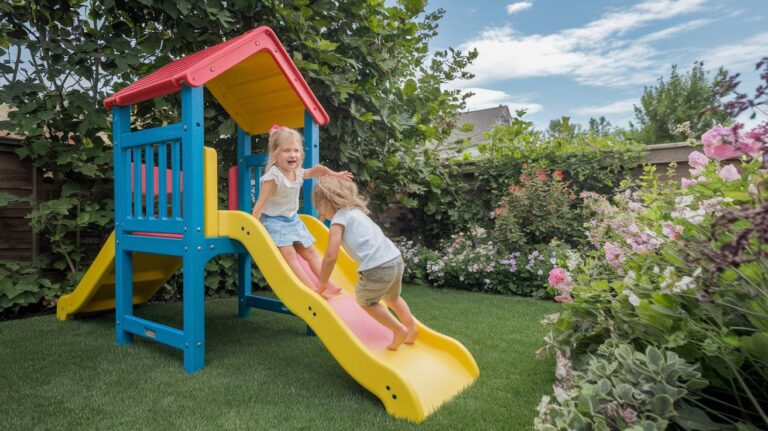
Climbing. A small climbing wall with attached holds (kits run $100–$300). A cargo net stretched between two anchored posts at an angle. A simple slide to descend from a climbing structure.
Problem-solving. A “memory station” where the kid has to find a hidden item before continuing. A station where they have to assemble something — stack cups, build a small tower of blocks — before moving on.
A solid 6-obstacle course pulls one or two from each category. Course flow should let kids reset breath between high-intensity stations.
Age Tiers and Theme Variations
Age range determines difficulty more than any other factor. A course built for a 5-year-old bores a 10-year-old, and vice versa.
Toddler tier (ages 3–5): Ground-level only — no climbs or hanging obstacles. Wide balance beams (6 inches+), short hurdles (under 6 inches), soft tunnels, simple sequence challenges. Total course length under 30 feet so attention holds.
Elementary tier (ages 6–9): Mix of ground-level and low-elevation obstacles. Standard monkey bars at 5 feet, balance beams 12 inches off the ground, 12-inch hurdles, climbing ropes up to 6 feet. Course length 50–100 feet.
Tween and teen tier (ages 10+): Full-height obstacles, ninja-warrior-style challenges, peg boards, salmon ladders for older teens with strength training. Course length 100+ feet with multiple loops.
Multi-age tier: Modular sections that adjust. A monkey bar set with adjustable rung spacing handles both ages. A balance beam with removable pegs lets the same structure offer easy and hard versions.
Theme variations. A theme keeps a course feeling fresh without rebuilding the whole thing. Common themes that work well:
- Ninja warrior. Focus on grip and balance. Monkey bars, peg board, balance beam, rope swing, salmon ladder.
- Military boot camp. Low crawl, cargo net climb, tire walk, sandbag carry, run loop.
- Jungle adventure. Rope swings between platforms, tire walk styled as “lily pads,” climbing wall painted as a rock face, fabric tunnel as a “cave.”
- Sensory course (for younger kids). Stations with different textures underfoot — grass, gravel, foam, sand. Less about racing, more about exploration.
For yards too small for the multi-obstacle layouts described here, the small-backyard obstacle course guide covers compact 100–200 square-foot designs that pack the same skill variety into a tighter footprint. For multi-feature alternatives that combine bars, swings, and climbing in one structure, the jungle gyms for backyard guide covers manufactured options.
Safety, Maintenance, and Expansion
A course built well and maintained casually stays safe. A course built well and never inspected becomes a hazard after a couple of seasons.
Pre-use safety check. First time each season (and after any major storm), do a full walk-through:
- Tighten every bolt on anchored structures.
- Inspect every rope and chain for fraying or rust. Replace anything more than 3 years old regardless of condition.
- Check wood for splinters, cracks, or rot — especially at ground contact points.
- Push laterally on every vertical post. Any rocking means refurbish or replace the footing.
- Top up surfacing material in fall zones to maintain the required depth.
Adult supervision. Kids under 8 need direct supervision on any obstacle over 3 feet. Older kids can use the course with check-in supervision, but never with no adult on the property.
Course rules worth posting. Closed shoes required. No two kids on the same balance beam at once. Wait for the prior climber to clear an obstacle before starting. No course use in rain or with wet ropes.
Expansion over time. A modular course is easier to grow than a built-in one. Plan post locations so additional obstacles can attach later. Anchored posts at corners give you bolt points for a future climbing wall, swing, or rope course. As kids age up, swap easier obstacles for harder ones rather than rebuilding the whole course.
FAQ
What are some outdoor obstacle course ideas for adults?
Adult-scaled courses focus on grip strength, balance, and cardio. Workable obstacles: peg boards, salmon ladders, longer monkey bars at 7+ feet, rope climbs, sandbag carries, and tire flips. Build to 250-pound capacity minimum and use stainless hardware throughout. A 50-foot course covers a serious 30-minute workout.
What are some indoor obstacle course ideas?
Indoor courses run smaller and lower than outdoor versions because ceilings cap vertical obstacles. Workable indoor elements: low balance beams on furniture-grade lumber, fabric tunnels, pool noodle hurdles, taped lines on the floor for jump sequences, and cushion-stack climbing for younger kids. Skip any hanging or high-impact obstacle indoors.
What are some DIY obstacle course ideas for kids of different ages?
For ages 3–5, ground-level only — wide balance beams, soft tunnels, short hurdles, sequence stations. For ages 6–9, add low monkey bars, 12-inch obstacles, climbing ropes up to 6 feet. For ages 10+, full-height obstacles and ninja-style challenges. A multi-age course uses adjustable elements like swap-out rungs and pegs.
How do I make an obstacle course in my yard?
Sketch the layout first with graph paper at 1 inch = 4 feet. Pick 5–7 obstacles that mix balance, grip, agility, and crawling. Anchor any vertical post in concrete footings cured 48 hours before adding load. Surface fall zones under high obstacles with rubber mulch 6 inches deep. Test every obstacle yourself before kids use it.
How much does it cost to build an obstacle course?
$50–$200 for a scavenged-material course (tires, pallets, rope, pool noodles). $200–$800 for a hardware-store DIY course with new lumber and proper hardware. $800–$5,000+ for a pro-grade modular kit with manufactured obstacles and stainless hardware. Mid-tier is the sweet spot for most families.
How do I make a tunnel for an obstacle course?
Two approaches work. For temporary use, tape moving boxes end-to-end with the bottoms cut out — kids crawl through, the tunnel folds flat for storage. For longer-term use, drive two stakes 4 feet apart and stretch fabric (a tarp or canvas) over a pair of curved PVC arches between them. A play-tent tunnel from a toy store works too for younger kids.
What makes a good obstacle course?
Variety of skills (don’t make everything a climb), age-appropriate difficulty, clear flow from start to finish, safe surfacing under high elements, and obstacles spaced 3+ feet apart for safe transitions. The best home courses also let kids reset and try again easily, so failure feels like part of the game rather than an ending.
How long does it take to build a backyard obstacle course?
A scavenged-material course goes up in an afternoon. A hardware-store DIY course with concrete-anchored posts runs a full weekend for a 2-adult crew (most of which is post-hole digging and concrete cure time). A pro-grade modular kit goes together in 4–8 hours depending on size. Plan a separate day for surfacing the fall zones.