How to Build a Small Backyard Obstacle Course
A backyard 14 feet on each side — roughly 200 square feet — is enough for a real obstacle course. You won’t fit a Spartan Race in that footprint, but you can fit a balance beam, two or three tire hops, a rope climb, a PVC weave, and a low jump platform with clear approaches and landings. The trick is laying out the obstacles like puzzle pieces, picking materials that survive weather and use, and anchoring everything so nothing tips when a kid hits it at full speed.
This guide walks through the planning, the obstacle picks that fit a small footprint, the budget materials that hold up over a season, the safety basics for installation, how to make the course modular so it can grow with the kids, and the seasonal care that keeps it ready year after year.
Planning the Layout in 100 to 200 Square Feet
Start with a tape measure and graph paper. Measure the usable area and sketch it to scale — one square per foot is a good ratio. Mark fence lines, low branches, the AC unit, the dog’s path, anything that’s permanent and not moving.
Aim for 100 to 200 square feet of obstacle space. Less than 100 and it feels cramped; more than 200 and you start running out of yard for everything else. Inside that footprint, pick a flow pattern:
- Linear shot: a straight line of 5 to 7 obstacles, end to end. Easy to follow, easy for kids to race head-to-head if you have two lanes.
- Loop: obstacles arranged in a circle or rectangle that brings you back to the start. Better for solo training or timed laps.
- Zigzag: obstacles laid out in a Z or W pattern across the footprint. Fits the most challenges into the smallest area, but the turns slow the run down.
Space obstacles 3 to 4 feet apart. Closer than that and a kid running fast can clip the next obstacle before they’ve recovered from the last. Wider and you waste real estate.
Leave a 3-foot buffer around the entire course. The buffer doubles as a safety zone for falls and as room to swap or rearrange pieces later. Mark the buffer with a different color flag or a strip of mulch so you remember not to crowd it with patio chairs or planters.
Before any building starts, walk the planned route at running speed yourself. The places where you instinctively slow down or shift your weight are the spots that need rethinking — usually because the spacing is off or a turn is too tight.
Six Obstacles That Fit a Small Footprint
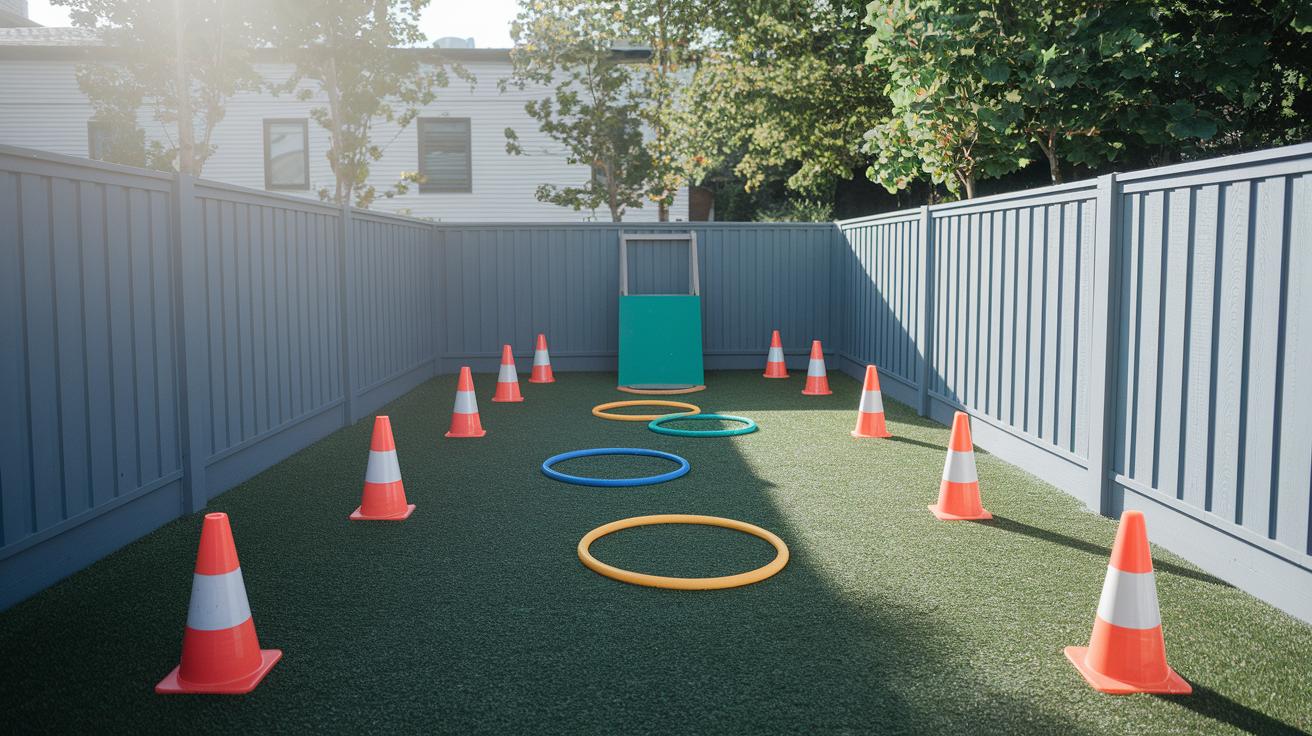
These six obstacles each take 25 square feet or less and cover the main movement skills — balance, agility, jumping, climbing, lateral quickness, foot speed. Pick four or five for a starter course; add the rest as the kids progress.
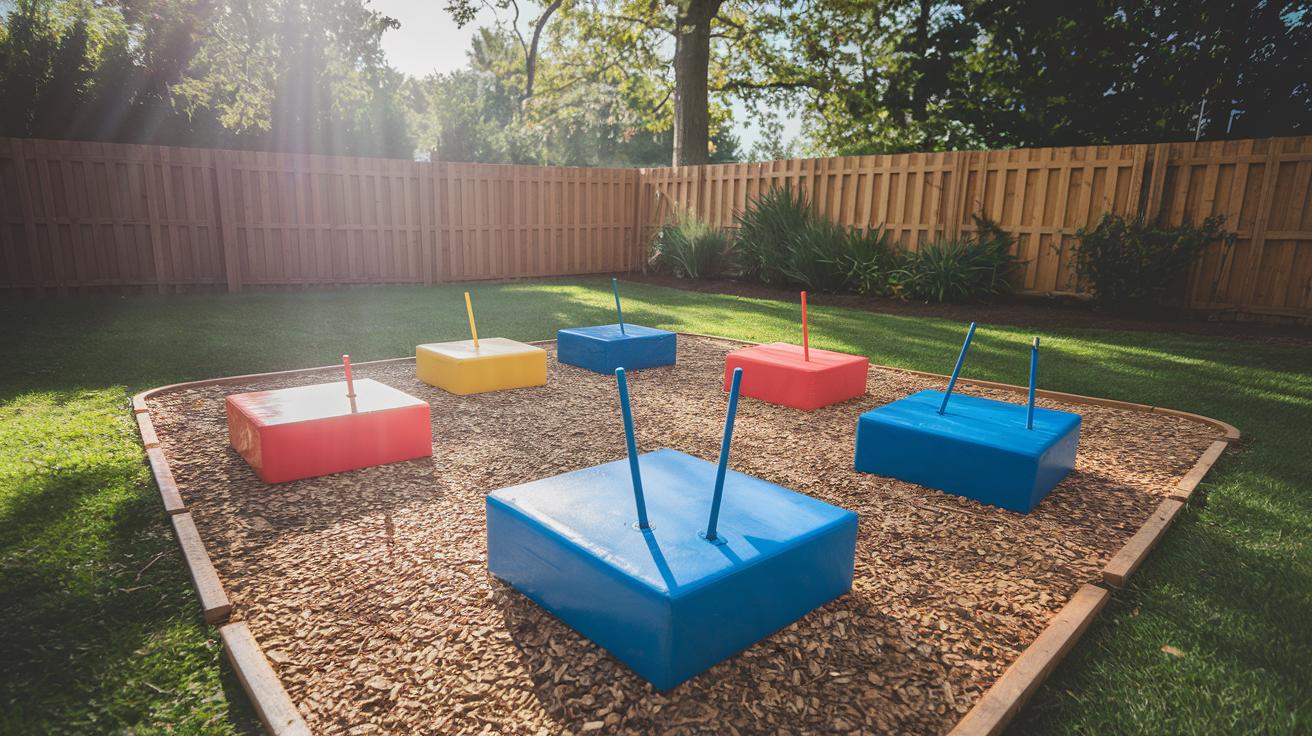
Balance beam (6 feet by 1 foot). A 2×6 plank set 4 to 8 inches off the ground on two cinder blocks or short posts. Heel-to-toe walking trains balance and core control. Add a hop-off-and-hop-back-on step at the midpoint to bump the difficulty.
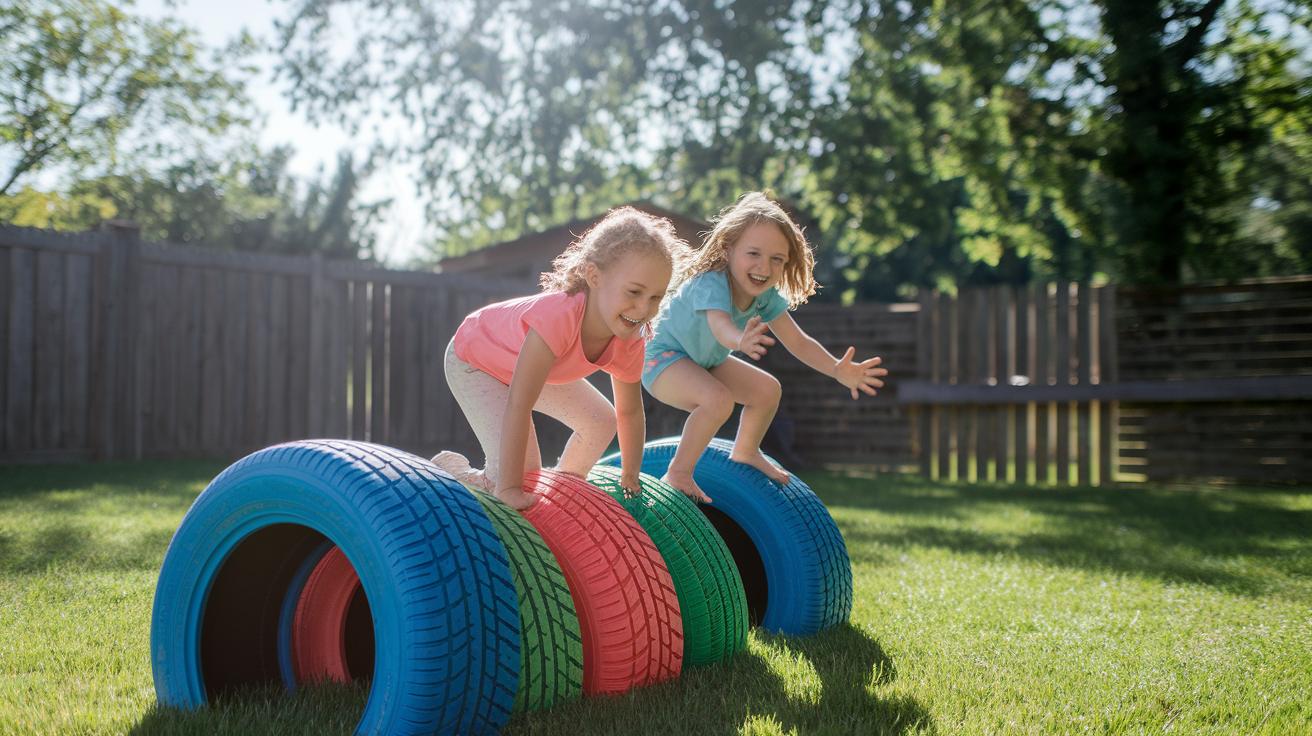
Tire hops (8 feet by 3 feet). Three old tires laid flat, spaced 3 to 4 feet center-to-center. Step in and out, or hop one-footed in alternating patterns. Free tires are usually at any tire shop — call before you drive over.
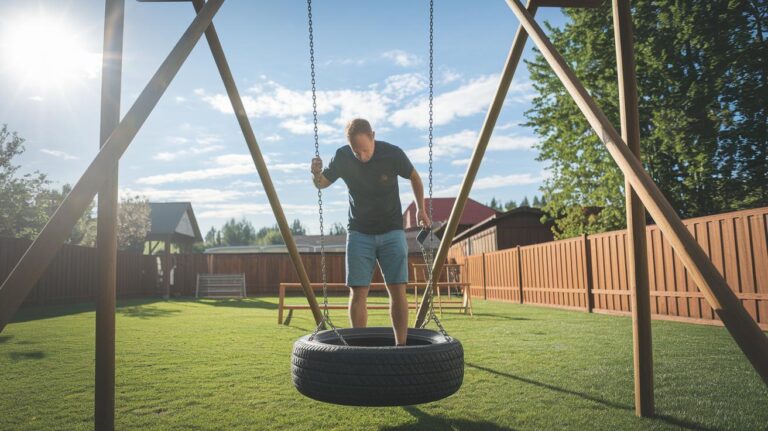
Rope ladder climb (3 feet by 5 feet vertical). A rope ladder hung from a sturdy tree branch, swing-set crossbar, or a freestanding A-frame. Trains upper body strength and grip. Use marine-grade or climbing-rated rope — clothesline rope frays fast under repeated use.
PVC weave poles (6 feet by 2 feet). Four 4-foot PVC poles set in ground sleeves, 18 inches apart. Run a slalom pattern through them. Sleeves let you pull the poles out for mowing or rearranging.
Jump cubes (3 cubes, each 2 feet by 2 feet). Wood cubes spaced 2 to 3 feet apart. Jump from box to box for explosive leg power. Stack two cubes when the kids outgrow the easy version.
Agility ladder (10 feet by 1.5 feet). A flat rope ladder laid on grass for footwork drills. Cheapest piece in the course — under $15 — and the one kids ask to run most often.
For inspiration on full-yard layouts that combine play space with obstacles, see our guide to family-friendly backyard design.
Budget-Friendly Materials That Last
A full course built from new lumber, premium ropes, and rubber mulch runs $300 to $500. Built from reclaimed and recycled materials, the same course lands at $50 to $150 — sometimes less if your neighbors are clearing out a garage.
Where to source each piece:
- Wood pallets: free from warehouse loading docks (ask at the loading dock, not the front office), hardware stores, and Buy Nothing groups. Choose pallets stamped “HT” for heat-treated, not “MB” (methyl bromide), which is a chemical treatment you don’t want kids climbing on.
- Tires: free from tire shops, who pay disposal fees and are happy to hand you whatever you can carry. Avoid steel-belted tires for ground-level obstacles — exposed wires can rust.
- PVC pipe: $3 to $8 per 10-foot length at any hardware store. Buy UV-resistant (it’ll say so on the label) so it doesn’t crack in summer sun.
- Rope: $0.50 to $2 per foot for marine or climbing-grade rope. Cheaper rope frays within a season — not worth the savings.
- Rubber mulch: $10 to $20 per bag, covers about 6 square feet at 2 inches deep. Reclaimed-tire mulch is cheaper than new and works the same. For more on durable outdoor gear and how to spec it, see our guide on choosing durable outdoor equipment.
Two upgrade picks worth the extra dollars: pressure-treated or cedar lumber for any wood that touches the ground (regular pine rots within two seasons), and weatherproof exterior paint with grip additive for any surface kids will step on (plain paint gets slick when wet).
Safe Installation and Anchoring
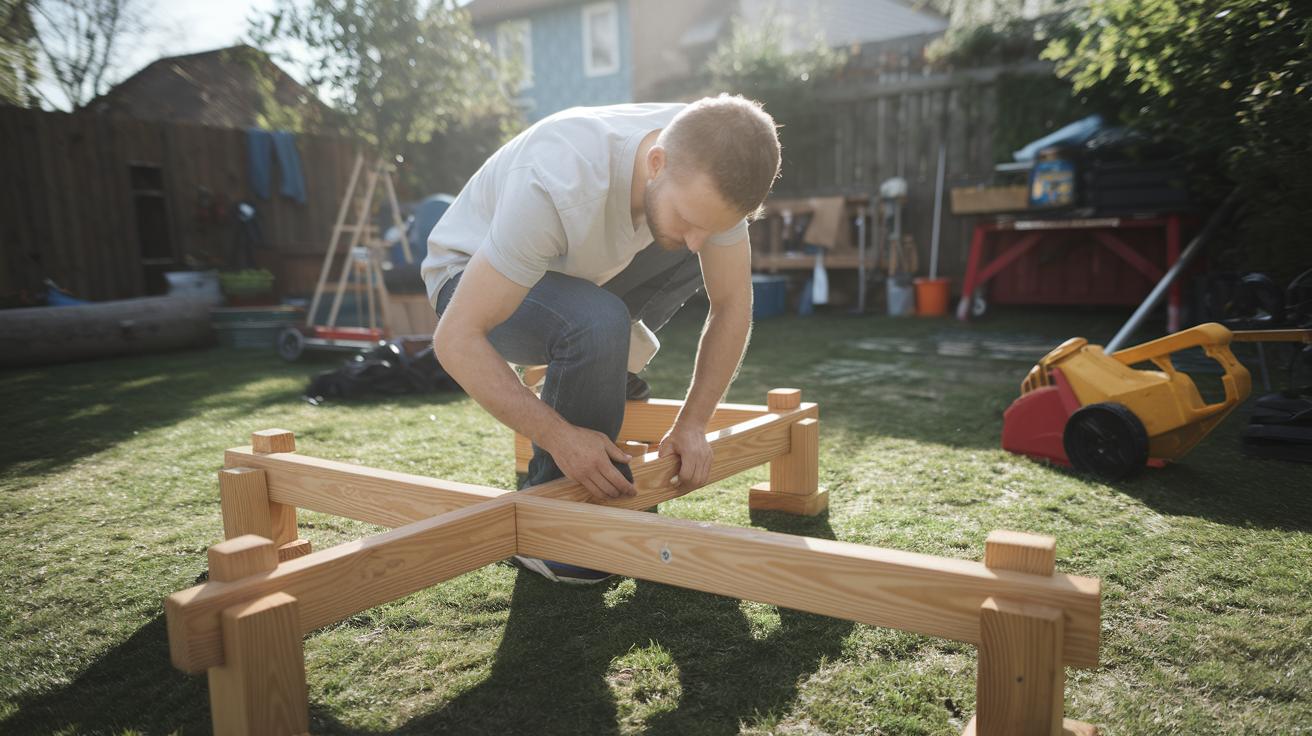
Two things separate a safe course from one that lands a kid in urgent care: every sharp edge sanded smooth, and every frame anchored hard enough that it doesn’t move when shoved.
Sand and smooth first. Run sandpaper (60 grit, then 120 grit) along every wood edge until your palm slides across without catching. File any metal corners. Check that all bolts are countersunk so heads don’t snag clothing.
Anchor every freestanding obstacle. The two main options:
- Ground anchors: auger-style metal anchors that screw into firm soil. The 18-inch ones rated for 1,000 pounds work for most balance beams, PVC weaves, and agility ladders. About $10 each at hardware stores.
- Concrete footings: for permanent obstacles like a freestanding rope ladder frame, dig a 12-inch hole, drop in a sonotube form, set the post, and fill with quick-set concrete. Lets the obstacle take real weight without shifting.
Pad the landing zones. Anywhere a kid might fall — under climbing obstacles, around jump cubes, at the end of a balance beam — lay 2 inches of rubber mulch or interlocking foam squares across a 4-by-4-foot patch. Wood mulch is the budget option but compacts hard within a season and needs refreshing.
Antislip everything they step on. Painted wood gets slick when wet. Coat every walking surface with antislip exterior paint or stick antislip strips along the top. Test by spraying with a hose and walking across in your shoes.
Hardware quality matters. Carabiners and eye bolts both come in load ratings stamped on the metal. Use hardware rated for at least 2 to 3 times the expected load — for a child on a rope swing, that means hardware rated for 500+ pounds. Cheap unrated hardware is the most common course failure.
Once everything’s installed, do the shake test: grab each obstacle and shake hard. If anything moves more than a quarter inch, re-anchor before letting anyone use it.
Age-appropriate scaling
The same course can serve a 5-year-old and a 12-year-old with a few quick adjustments. For younger kids, drop the balance beam to 4 inches off the ground, shrink the rope ladder to a step-stool height, and use mini cones instead of jump cubes. For older kids and teens, raise the beam to 12 inches, hang the rope ladder higher, and stack the jump cubes for hurdles.
One often-missed safety detail: helmet use on the rope climb and balance beam for kids under 8 is reasonable, especially while they’re still building the strength to catch themselves cleanly. Cheap skate or bike helmets work fine; they don’t have to be specialized climbing helmets. Most parents skip helmets and most kids are fine — but the one fall that lands badly is the one you wish you’d helmeted for.
Also worth noting: never leave a child unsupervised on the climbing or jumping obstacles, especially in the first few months while everyone is still learning the course. The safe height for unsupervised play is the height a kid could fall from and land okay on their own.
Modular Pieces for Versatility
A static course gets boring within a month. Modular design lets you rearrange the layout in 10 minutes when the kids ask for “something different.”
The pieces that buy you the most flexibility:
- Bolt-on platform extensions: jump cubes built with predrilled holes on every face. Bolt two together for a taller cube, side-by-side for a wider platform, or unbolt to store flat.
- Slot-in step blocks: 4×4 posts with metal brackets at varying heights. Slide a plank into different bracket heights to make a low beam, mid beam, or high beam without rebuilding.
- Foldable hurdles: PVC bars on hinged feet that fold flat when not in use. Adjust the bar height with a quick clip.
- Detachable agility ladder: a rope ladder you can roll up and hang on a hook between uses. Frees up 10 square feet when stored.
- Color-coded difficulty markers: green for easy, yellow for moderate, red for hard. Velcro-fastened cards on each obstacle let you change the difficulty rating as kids progress.
For older kids and adults, the course doubles as a HIIT circuit. For younger kids, drop the height of every obstacle by half and add a clear lane around the edges for tricycles and scooters.
Seasonal Care That Keeps It Ready
Two checks per year keep the course safe and the wood from rotting out: a spring check after winter freeze-thaw, and a fall check before the wet season.
The semiannual inspection list:
- Tighten every bolt and screw. Wood expands and contracts with temperature; hardware loosens. A 10-minute pass with a socket wrench catches the slow-loosening before it matters.
- Check ropes for fraying. Run your hand along every rope. If fibers come off, replace the whole piece — once fraying starts, it accelerates fast under load.
- Reseal exposed wood. Apply a coat of weatherproof exterior stain or sealer to any wood that’s started to gray. Skipping this step is the single biggest reason DIY courses rot out after two seasons.
- Pull and reset ground anchors. Soil settles and shifts. Re-tap each anchor with a mallet to confirm it’s still solid.
- Refresh the mulch. Top up rubber mulch or foam pads where they’ve thinned out. Compacted mulch loses most of its cushioning value.
- Sand and recoat any worn antislip surfaces. If a surface feels slick when wet, it needs another coat.
For winter, the simplest play is to disassemble what’s removable and store it in the garage or shed: agility ladder, foldable hurdles, jump cubes, anything portable. Fixed frames (rope ladder posts, balance beam supports) can stay outside but should be covered with a tarp or moved under an overhang to keep snow load off them.
For a wider walkthrough of what to weatherproof and what to bring inside each fall, our guide to winterizing outdoor equipment covers the broader yard.
Build the course in stages — one obstacle a weekend if you’re starting from scratch — and treat the rebuild every spring as the chance to swap in something new. A small course that grows with the kids is the one that gets used.
Backyard Obstacle Course FAQ
How much space do you need for a backyard obstacle course?
Plan on 100 to 200 square feet (roughly 10 by 10 to 14 by 14 feet) for a 5 to 7 obstacle course. Space obstacles 3 to 4 feet apart and leave a 3-foot safety buffer around the perimeter for falls and traffic flow.
What obstacles fit in a small backyard?
Small-footprint obstacles include a 6-foot balance beam, a 3-tire run, a rope ladder hung from a tree branch, a 4-pole PVC weave, three jump cubes, and a flat agility ladder. Each takes 25 square feet or less.
How much does a DIY backyard obstacle course cost?
Built from reclaimed pallets, free tires, and basic hardware, a five-obstacle course runs $50 to $150. Built from new lumber, marine-grade rope, and rubber mulch, the same course costs $300 to $500.
How do you anchor backyard obstacles safely?
Use 18-inch auger-style ground anchors rated for at least 1,000 pounds for portable obstacles, or pour 12-inch concrete footings for permanent frames. Test by shaking each obstacle — if it moves more than a quarter inch, re-anchor.
What should you put under climbing obstacles?
Lay 2 inches of rubber mulch or interlocking foam squares across a 4-by-4-foot landing zone under any climbing obstacle. Wood mulch is cheaper but compacts hard within a season and loses cushioning.
How often should a backyard obstacle course be inspected?
Run a full inspection twice a year — in spring after winter freeze-thaw and in fall before the wet season. Tighten bolts, check ropes for fraying, reseal exposed wood, and reset ground anchors. Quick visual checks weekly during heavy use.