Best Materials For DIY Backyard Obstacle Course Guaranteed
Think you need bulky expensive gear for an epic backyard obstacle course? Think again. All it takes is weatherproof lumber (wood that resists rain and sun), sturdy PVC pipe (plastic tubing built for rough play), and strong ropes. Mix those with water and you’ll have a muddy playground that stands up to sun, rain, even the roughest sneakers.
I once turned old tires into a course and ended up with a surprise ant colony. Oops. Now I stick to materials that last and keep critters out.
In this post I’ll share my top budget-friendly durable picks for your DIY course. Ready to get started?
Essential Materials for a DIY Backyard Obstacle Course
Picture the fresh scent of sawdust drifting through the air as you build a backyard obstacle course that laughs in the face of sun, rain, and muddy sneakers. Here’s what you’ll need, easy to find, tough on weather, and gentle on your budget.
- Pressure-treated lumber (wood treated to resist decay and bugs): Expect about $15–$30 for an 8-foot board, depending on thickness and grade. You’ll feel the rough grain under your fingers.
- PVC pipe (lightweight plastic tubing): Around $1.50–$3 per 10-foot length. Snap them together with elbow and T-joint fittings, no big tools required.
- Natural manila rope (plant-fiber rope with a grippy surface): Roughly $0.50–$1 per foot. Perfect for swing ropes or climbing lines.
- Synthetic climbing rope (weatherproof braided rope): Lasts two to three times longer outdoors and shrugs off moisture, about $1–$2 per foot.
- Old tires: Often free or cheap from local shops. Give them a good scrub, then seal the inside rim to keep out water and critters. Oops, I once skipped that step and found ants!
- Non-slip deck coating (grippy surface treatment): A gallon covers about 200 sq ft and costs $20–$40. Keeps wood from feeling like an ice rink when it’s damp.
- Outdoor wood sealant (clear coat that blocks UV rays and rain): About $10–$20 per quart. Plan to re-seal every year or two so your course stays solid.
- Galvanized or stainless steel screws (rust-resistant fasteners): Around $0.10–$0.20 each. They’ll hold tight, even when everything’s wet.
- Spare parts (replacement handles, connectors, small boards): Usually under $10 a piece. Great for quick fixes when a knot pulls loose.
Pro tip: Buying lumber, rope, or sealant in bulk can shave off 10–20% from your total. Ready to gear up? Check out budget-friendly backyard obstacle course equipment.
Durable Wood and Timber Solutions for Backyard Obstacle Course Materials
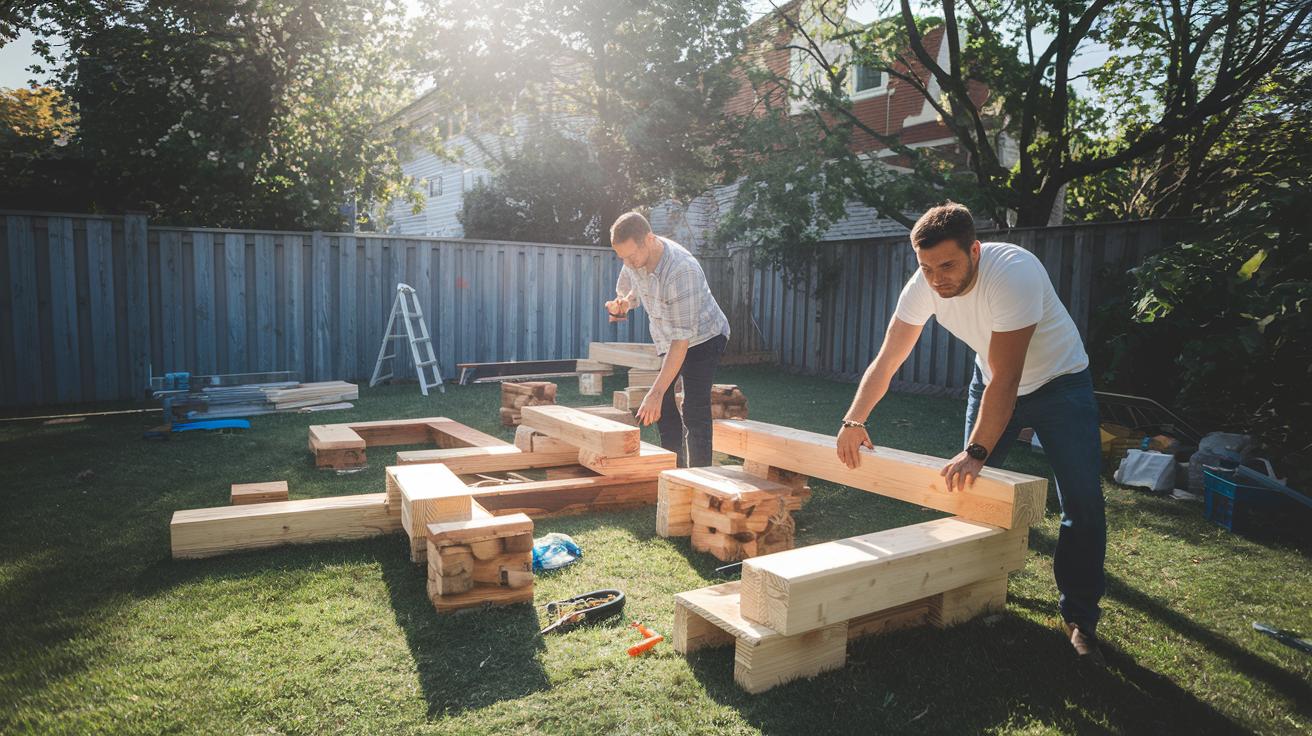
Pressure-treated lumber can last over 10 years outside. At about $15 to $30 for an 8-foot board (lumber: wood cut into boards), it’s a solid deal. Ever run your fingers over its rough grain? It’s a sign it’s soaked with preservatives (chemicals that guard against rot and bugs). But new boards can smell kinda sharp. So let them air out before you cut or sand them.
Cedar boards resist decay without extra chemicals. They bring a warm, reddish glow to your course and feel smooth against bare palms. That forest-y scent, you know? It’s kinda dreamy. They cost about 20 to 30 percent more than treated lumber, but I think it’s worth it.
Marine-grade decking planks shrug off moisture, UV rays, and salty air. Perfect if your yard gets splashy sprinkler days. They last over 20 years, though at $35 to $50 per plank, they’re a bigger spend. Their smooth surface gives your balance beams a steady footing.
To keep any wood looking great, grab an outdoor wood sealant (a clear coat that blocks rain and sun) for $10 to $20 a quart. Brush or roll on a coat every 12 to 18 months. That bit of elbow grease stops splinters, shields against sun damage, and locks in moisture defense. All these woods are all-weather lumber for the obstacles you build. Just pick what fits your style and budget.
PVC and Plastic Components for Your DIY Backyard Course
PVC pipe (a lightweight plastic tube) is like big building blocks for your backyard obstacle course. Each 10-foot length usually runs $1.50 to $3. It’s light, won’t rot or attract bugs, and snaps into whatever shape you like.
Connect those pipes with elbow and T-joint fittings (pipe connectors). They cost about 50 cents to a dollar each. You just slide them on, give a gentle tap with a rubber mallet, and voilà, a sturdy corner or three-way split.
When you need shorter pieces, grab some PVC cutters (pipe-cutting tool) and slice away. Then smooth any rough ends with a bit of sandpaper. Oops, I spilled a few shavings there, no biggie.
Want a tunnel? Flip a few pipe arches upside down and drape a corrugated plastic sheet (ridged plastic panel) over them. You can bend it into domes or lay it flat for a low crawl. Drill tiny holes along the ridges, then tie it down with zip ties or rope. Fancy a little secret passage for your kids?
For flat platforms, recycled plastic boards (slats made from old plastic) are a dream. They sit rock-solid in rain or snow and never warp or rot. Just lay them across your pipe supports, screw them in lightly, and watch kids balance safely, no slipping on soggy wood. They need almost no care, just a quick rinse now and then.
Rope, Netting, and Climbing Elements for Backyard Obstacles
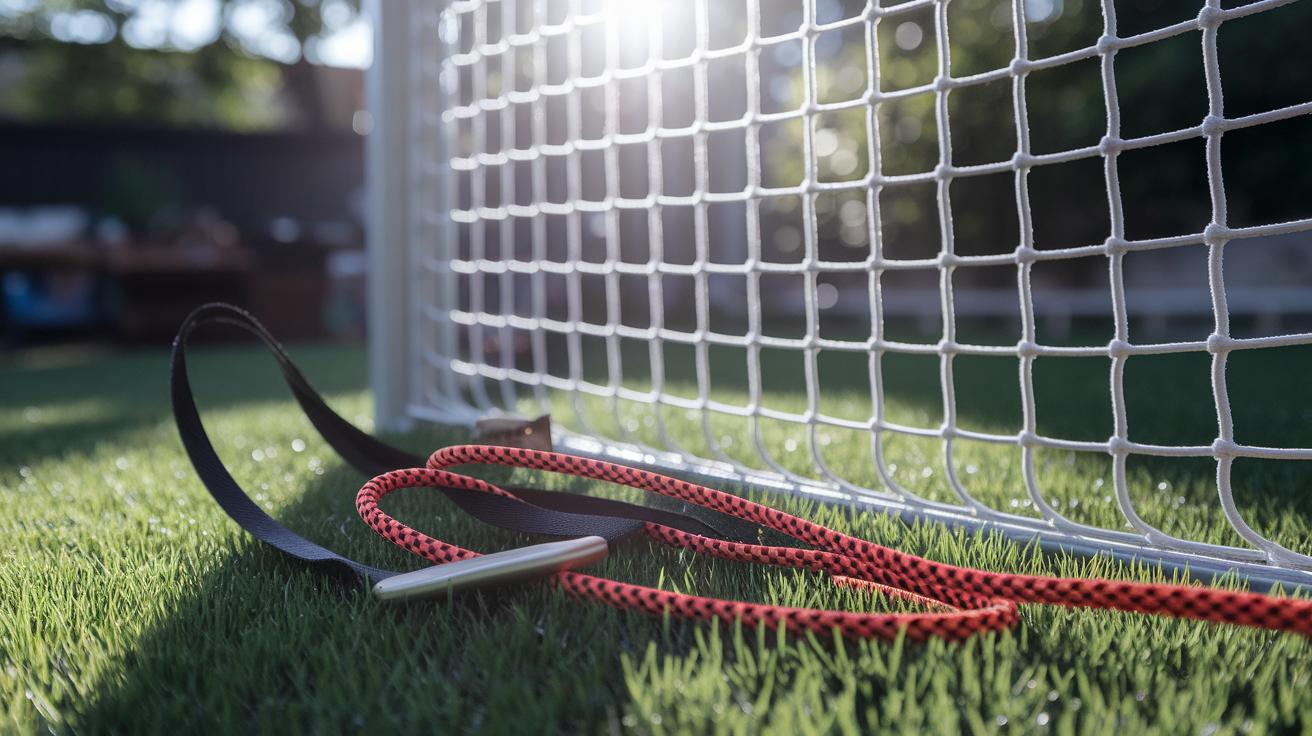
Natural manila rope (rope made from plant fibers) feels rough and solid in your hand. It costs about fifty cents to one dollar per foot. You’ll sense those stiff fibers gripping when you haul yourself up or down. It’s a classic choice that fits almost any backyard setup.
Synthetic braided climbing cord (rope with a woven plastic outer layer) lasts two to three times longer outdoors. Its smooth sheath sheds water and dirt so it stays strong season after season.
Heavy-duty mesh netting panels (netting made of thick nylon threads) add a fun twist to your course. They cost thirty to sixty dollars each and use UV-resistant fibers (threads that resist sun damage) for five years or more. Hang one from a wooden beam or a timber frame and tighten it with webbing straps (flat woven straps used in climbing). Doesn’t it look like a mini adventure?
For extra strength, nylon webbing (flat woven straps that hold five hundred pounds or more) wraps easily around posts or turns into a rope ladder. It feels sturdy under your hand and keeps everyone safe.
Picking the right climbing holds (plastic grips you bolt to a wall) adds both safety and variety. Look for holds rated for three hundred to five hundred pounds and fasten each with stainless steel bolts.
Drill a small pilot hole (a tiny starter hole) first. Then tighten the bolt so the hold stays put. Space them twelve to twenty-four inches apart. Whether kids or grown-ups, everyone finds a step that fits.
Ready to put it all together? Here are a few tips:
- Use screw-in eye bolts (bolts with a built-in loop) on solid posts to anchor your ropes and netting.
- Thread the rope through the loop. Finish with a figure-eight knot (a simple knot that won’t slip).
- Give it a tug test every few months to spot loose strands or slack knots before they become a problem.
Happy climbing in your backyard!
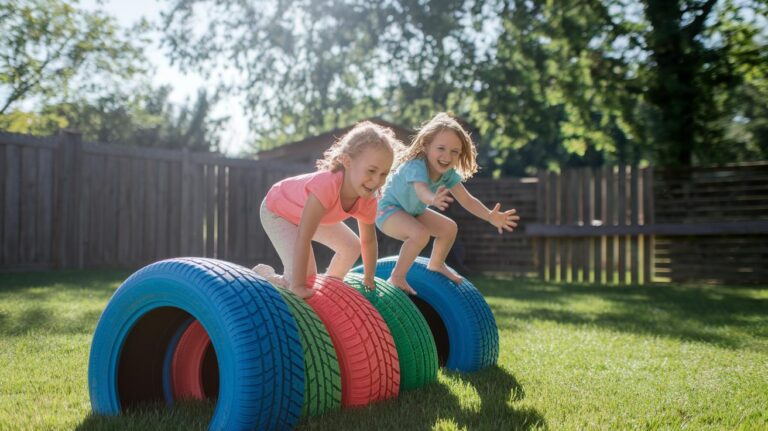
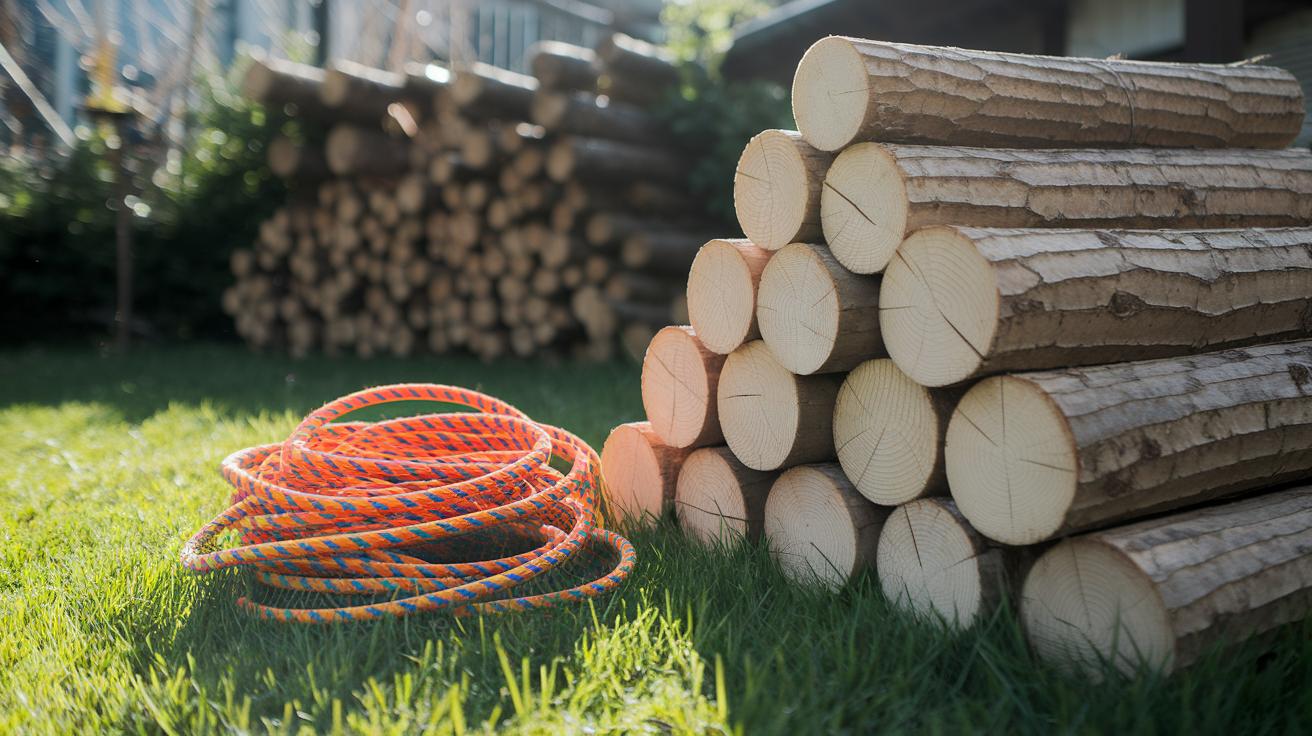
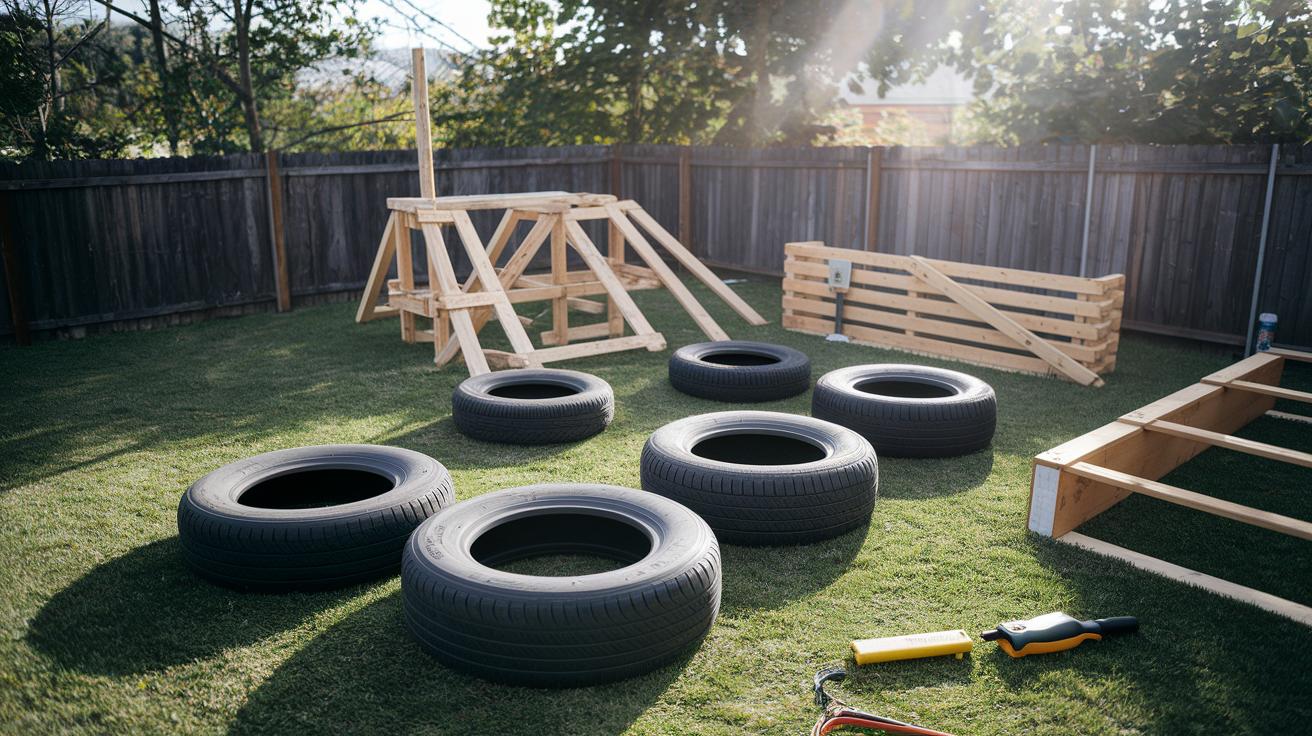
Tire Runs and Log Walk Features for DIY Backyard Challenges
Have you ever grabbed old tires from your local garage or reuse center? They’re usually free. Give each one a good scrub with soapy water (this removes oil and dirt). Oops, I once missed a spot.
After washing, seal the inside rim with a weatherproof sealant (this stops water from pooling and keeps mosquitoes away). Nestle them in a zigzag, half buried in the ground so kids can hop from one to the next. I love hearing their laughter bounce around the yard.
You can find log slices at a local sawmill for about $5 to $15 each. The fresh-cut wood smells like the forest floor.
Press each slice into the soil so the top sits a few inches above ground. Sand the edges smooth (your bare feet will thank you). Then brush on an outdoor wood sealant (about $10 a quart) to guard against rain and sun.
Want something more solid under your feet? Pick up pressure-treated beams (wood treated to resist rot and bugs) for about $15 to $30 per 8-foot board. Lay each beam on little pads of gravel or concrete pavers so they’re level.
Every two years I brush on a coat of sealant. You’ll feel the beam’s firm support and see the wood grain shining in the sun. By the way, my cat naps on ours. Just saying.
Safety Surfacing and Cushioning for Backyard Obstacle Course Materials
Kids zooming around obstacle courses might face a tumble – that’s part of the fun. But a soft landing spot keeps them safe and happy. Here’s how to pad every landing.
- Rubber mat tiles (1 sq ft each, $10–$20). Snap them together like puzzle pieces under swings or climbing ropes. They feel like stepping on a plush doormat. Quick to lay and extra comfy where kids drop.
- Foam padding blocks (soft foam cubes, $5–$10). Tuck them around sharp corners or step edges. One day I popped them on a wooden beam. My nephew bounced off laughing – no tears.
- Shock-absorbing underlay (a soft layer that soaks up shock, 1–2 inches thick). Roll it out, then top with mats or artificial turf (fake grass). A hard stomp turns into a marshmallow bounce.
- Rubber edging strips ($2–$4 per foot). Press them along mat edges. They hold corners flat and seal gaps. Trip hazards? Gone. By the way, my dog gave them a sniff and cozied up for a nap.
Soft landings mean big smiles.
Mix and match these cushions to map out safe zones across your backyard course. Then sit back and watch the fun – worry-free.
Hardware, Fasteners, and Sealants for Durable Backyard Structures
Have you ever put up a post only to watch it wobble in the breeze? Let’s fix that.
Screw-in stake supports (steel rods with big threads) cost about $2 to $5 each. You twist them into the warm earth like a giant screw until they feel rock solid. No more dancing poles when the wind blows.
But for a forever foundation, you’ll need poured concrete footings. Each one uses around $10 to $20 of cement. Dig a hole, mix the cement with water until it’s creamy, then pour it in and set your post bracket before it hardens. It’s a bit messy – oops, you might spill some – so grab a rag and a trowel.
Anchor bracket systems start at about $3 each. You bolt them right to your wood beam and into the footing. They lock your beam in place so it won’t budge, even during a summer storm.
Now let’s pick fasteners that shrug off rain and sprinkler sprays:
- Screw eye fasteners ($0.10–$0.20 each): little steel loops perfect for hanging ropes, netting, or swings.
- Stainless steel screws ($0.10–$0.20 each): drive them into wood or plastic boards. No rust streaks later.
- Hook-and-loop strips (reusable tape): wrap padding or tarps around beams in seconds – super handy.
- Waterproof adhesive ($5–$10 per tube): a glue-like seal for trim or edging when you can’t drill.
Seal every exposed surface to keep out the weather. Grab an outdoor sealant (clear, water-blocking coat) at about $10–$20 per quart. Roll it over raw wood ends, screw holes, and cut edges every year or two. For metal parts and brackets, brush on a corrosion-resistant finish (rust-stopping paint) at about $15 per gallon. One coat shields steel from flaking and keeps those bolts turning smoothly. Wow.
So here’s the deal: check stake depth, tighten bolts, and watch for worn sealant every season. A quick touch-up now and then keeps your backyard structures standing strong for years of garden adventures.
Sourcing, Cost Breakdown, and Maintenance Tips for DIY Backyard Course Materials
Have fun shopping. Local hardware stores and lumber yards often give you 10 to 20% off if you grab ten or more pressure-treated boards (wood treated under pressure to resist rot) or boxes of fasteners (screws and nails that hold things together). You might even find PVC scraps (leftover plastic pipe), sealant (waterproof glue), off-cut lumber chunks, old logs, or tires at discount retail outlets, recycling centers, or community reuse hubs. It feels good to give that extra bit of wood a second life.
I always buy a few extra screws, brackets, and sealant during sales. That way I dodge those last-minute runs to the store when I realize I’m missing one tiny bolt. Trust me, you’ll thank yourself later.
Maintenance Tools Kit (about $50):
- Electric drill with wood and metal bits
- Hand saw for trimming rough or splintered wood
- Measuring tape you can read without squinting
Every three to six months, run through this quick check:
- Tighten loose or replace rusted screws
- Retie or swap out frayed rope sections
- Sand away splinters or swap out wood boards that are rotting or cracked
Before a big rain or those blazing hot days, stash these supplies nearby:
- Waterproof sealant ($10 per quart)
- Non-slip paint patches ($15 each)
- Waterproof adhesive strips ($10 per roll)
Planting now sets you up for summer fun. So gather your gear, grab a cold drink, and let’s make that backyard course last for seasons to come.
Final Words
In the action, you’ve got a clear view of treated boards, PVC frames, sturdy ropes, tire runs, cushioned mats, and solid fasteners to hold it all.
You saw prices, from $15–$30 lumber boards, $1.50 PVC sections, to under $1 rope, and bulk and upcycled options at local reuse centers.
Armed with basic cost guides, maintenance checkups and weather-proof sealants, you can confidently choose the best materials for DIY backyard obstacle course.
Here’s to hours of backyard fun and easy upkeep.
FAQ
What are the essential materials for a DIY backyard obstacle course?
Rot-resistant lumber or cedar boards, PVC pipes with connectors, sturdy rope or netting, upcycled tires or logs, shock-absorbing surfacing, plus rust-resistant hardware and sealants.
How much does pressure-treated lumber cost and how long does it last outdoors?
Pressure-treated boards cost about $15–$30 per 8-foot piece and resist rot and insects for over 10 years when sealed and maintained every 12–18 months.
What plastic parts are ideal for building a weatherproof obstacle course framework?
PVC pipes run $1.50–$3 per 10-foot section, joined with elbow and T-joints at $0.50–$1 each, and corrugated plastic panels create crawl tunnels and decking that won’t rot.
Which rope types and netting should I choose for safe climbing features?
Natural manila rope grips well at $0.50–$1 per foot, though synthetic braided cord lasts 2–3× longer. Add heavy-duty net panels ($30–$60 each) and secure holds rated for 300–500 lb.
How can I use tires and logs for balance challenges in my backyard course?
Clean and seal free tractor tires to prevent standing water, then stack them for runs. Use local sawmill logs ($5–$15 each) or pressure-treated beams coated with outdoor sealant for raised log walks.
What surfacing options help cushion falls and reduce injury risk?
Rubber mat tiles cost $10–$20 per sq ft. Foam padding blocks run $5–$10 each. Shock-absorbing underlay adds 1–2 inches of cushion, and edging strips at $2–$4 per ft prevent trips.
Which hardware and sealants ensure durable, weatherproof obstacles?
Stainless steel screws and screw eyes ($0.10–$0.20 each) resist rust. Ground stakes cost $2–$5. Use outdoor sealant ($10–$20 per quart) and waterproof adhesive tubes ($5–$10 each).
How do I budget and source materials affordably for a backyard obstacle course?
Buying lumber and hardware in bulk cuts prices by 10–20%. Check local reuse centers for free tires and logs. Plan for $300–$500 total build costs and a $50 basic tool kit.